Applies to Matrix key projects
Items are added to the Features and Entities trees in one of two ways. Either via:
- The context pop-up menu, when the Features or Entities panel is right clicked.
- Or by main menu Tools…Add Features|Add Entities. The menu option depends on which panel (Features or Entities) has focus.
Adding items using the context pop-up menu
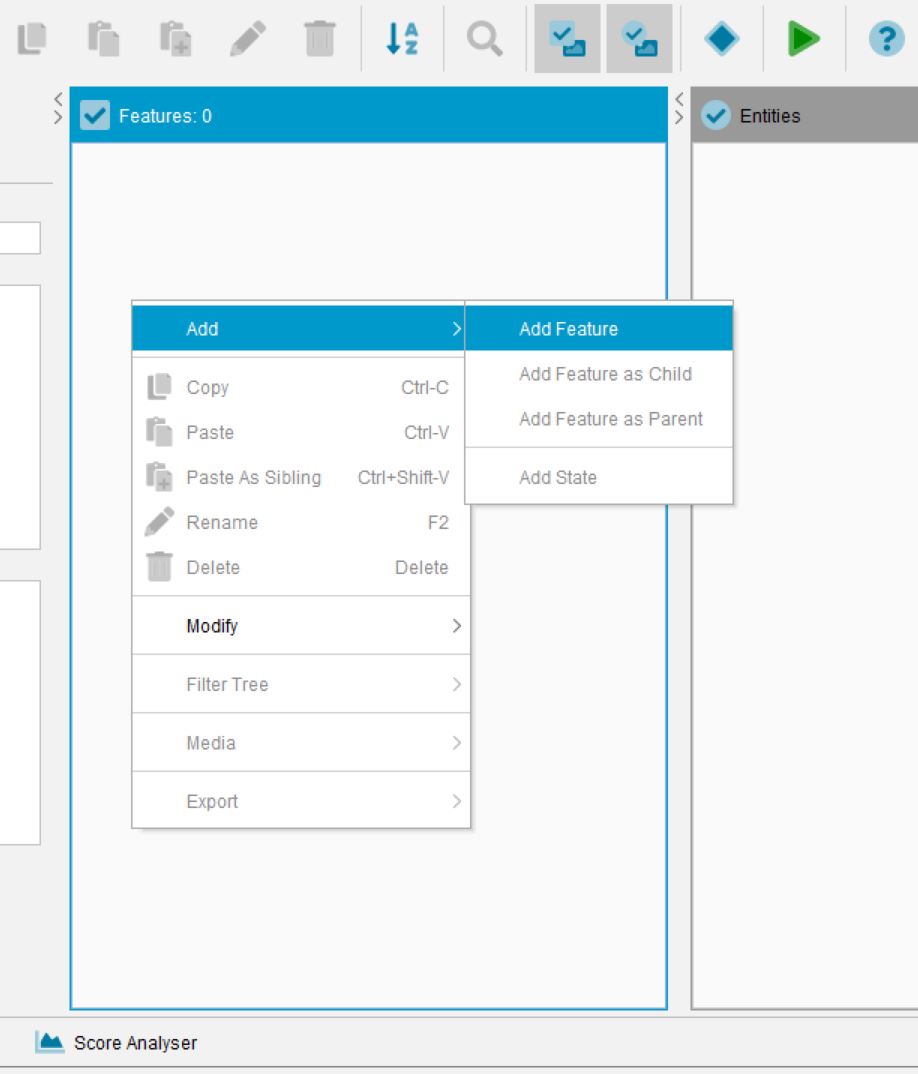
Right click in the Features or Entities panel to open the context pop-up menu. If you click with an empty area of the panel then the context menu will only offer Add options for adding a new Feature or Entity. If however, you have an existing Feature or Entity then right clicking on one of these will add additional options to the context menu such as adding a new Feature or Entity as a Sibling or Parent.
Features – Add Options
Add Feature – will add a new Feature to the root of the Feature tree. The position of the new Feature will be below the currently selected Feature (if one exists).
Add Feature as Child – This option will only be available if at least one Feature already exists in the Features Panel. The newly created Feature will be added to the currently selected Feature, if the Feature does not have any states. In other words the selected Feature can become a Grouping Feature. The Lucid Builder will enforce tree building rules to prevent any issues with the mismatching options. See the note below for further details on this.
Add Feature as Parent – This option will add a new Feature as a parent of the currently selected Feature.
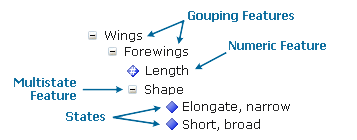
Add State – The Add State option is only available to non-grouping Features and non-numeric Features. Adding one or more States to a Feature turns the Feature into a Multi-State Feature. A Feature State is indicated by a blue diamond icon (![]() ) to the left of its label.
) to the left of its label.
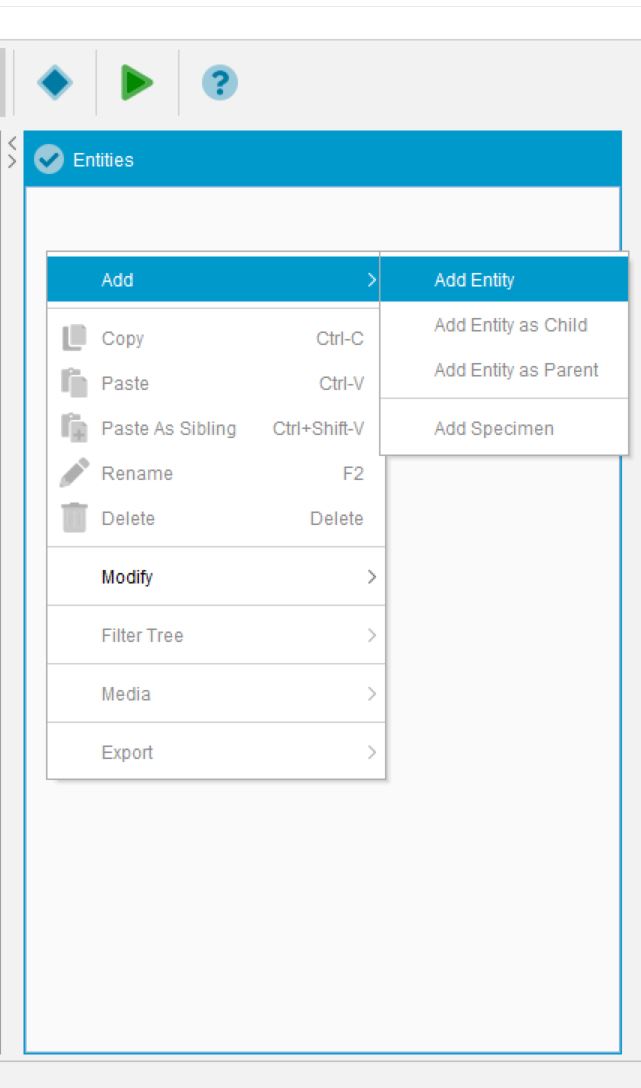
Entities – Add Options
Add Entity – will add a new Entity to the root of the Entities tree. The position of the new Entity will be below the currently selected Entity (if one exists).
Add Entity as Child – This option will only be available if at least one Entity already exists in the Entities Panel. The newly created Entity will be added to the currently selected Entity, if the Entity does not have any specimens. In other words the selected Entity can become a Grouping Entity. The Lucid Builder will enforce tree building rules to prevent any issues with the mismatching options. See the note below for further details on this.
Add Entity as Parent – This option will add a new Entity as a parent of the currently selected Entity.
Add Specimen – Adds a Specimen Entity as a child of the selected Entity. Specimen Entities can only be added where the parent entity isn’t a Grouping Entity. That is they can only be ‘leaves’ of the Entity tree. See here for more information on Specimen Entities.
Adding items using main menu Tools…Import Features | Entities
The ‘Add Features’ or ‘Add Entities’ option (depending on which tree panel is selected) allows you to quickly add multiple items (or even just one item).
Import Features
The ‘Import Features’ dialog allows you to quickly add multiple Features and States to the Feature tree. Each line within the text area represents a Feature or State. You can represent the Feature tree by using tabs. For example, a Feature entered without a preceding tab would be added as a root element within the Feature tree. While an item added with a preceding tab would be added as state, unless it has child items (represented by an additional tab). Below shows an example Feature set ready for adding:

Import mode: Append to tree
The text block of Features and/or States to be imported will be processed and then added to the end of the existing Feature tree. If an element already exists with the same label then the newly imported element will be renamed by appending a count number to keep the same level elements labels unique.
Import Mode: Merge with tree
Rather than just appending the text block of Features and/or States to the end of the existing Feature tree as with the ‘Append to tree’ option, the merge option will look for matching structure and element labels and merge any new elements into the existing tree structure. If no matching structure or elements are found then the text block items will be appended to the end of the tree.
Import Entities
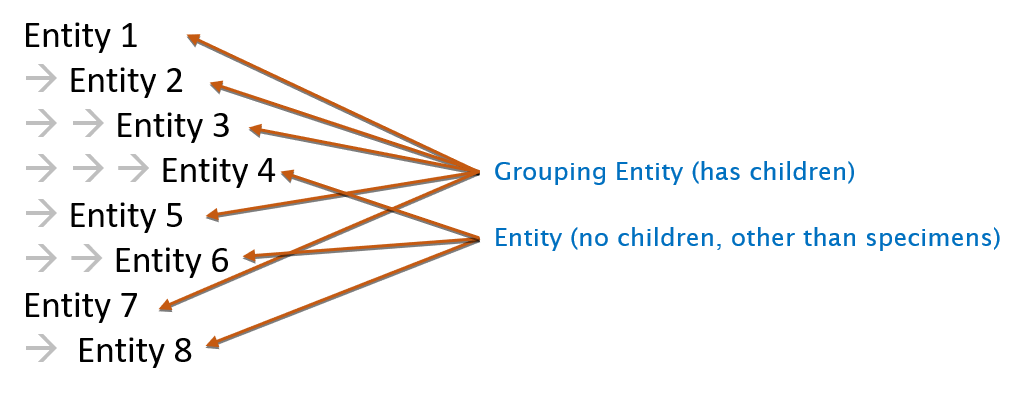
The ‘Import Entities‘ dialog allows you to quickly add multiple Entities to the Entities tree. For the ‘Add Entities’ option to be available in the Tools menu the ‘Entities Panel’ must have focus. Each line within the text area of the dialog represents an Entity. You can represent a tree structure of Entities by using tabs.
Import mode: Append to tree
The text block of Entities to be imported will be processed and then added to the end of the existing Entity tree. If an element already exists with the same label then the newly imported element will be renamed by appending a count number to keep the same level elements labels unique.
Import Mode: Merge with tree
Rather than just appending the text block of Entities to the end of the existing Entities tree as with the ‘Append to tree’ option, the merge option will look for matching structure and element labels and merge any new elements into the existing tree structure. If no matching structure or elements are found then the text block items will be appended to the end of the tree.