Categories
Fact Sheet Fusion v2

Media Manager Advanced Options

Media Manager

Advanced Media Options

Fact Sheet Fusion has several options for advanced users when dealing with media. Please read the help on any of these options prior to using as in most instances there is no undo action available.

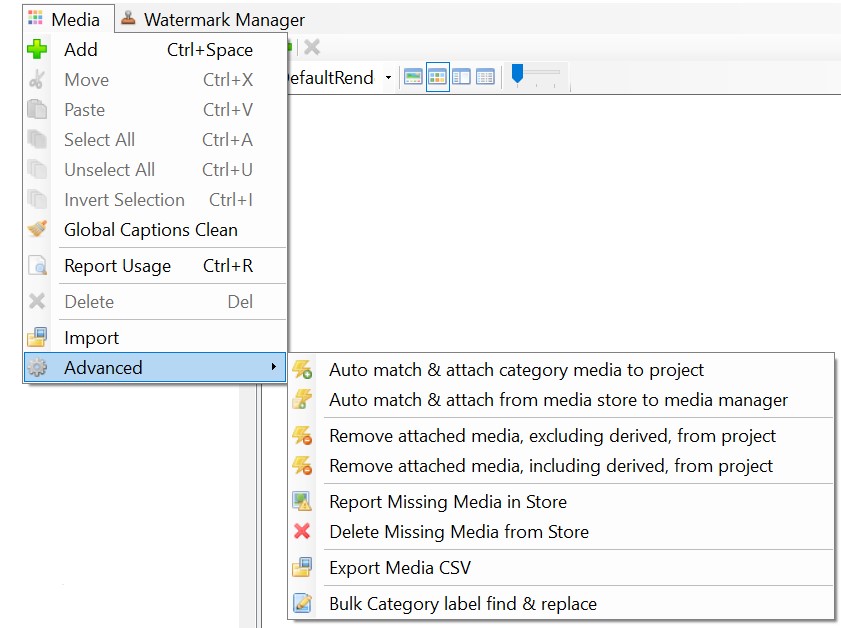
Auto match and attach category media option

This option will automatically attach any media found in the media manager entity categories to the corresponding project entities. This is useful for example after performing a large media import and saves having to attach each entities media items ‘by hand’.

Auto match and attach confirmation dialog

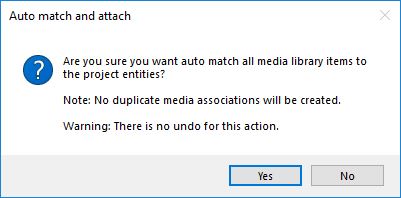
Confirmation warning prior to proceeding with the auto attach function.

Auto match and attach from media store to media manager

This option will search the currently opened Fusion database category sub folders found in the ‘Media’ folder location for any media files that have not yet been attached. Any unattached media found is then automatically added to the media manager under the corresponding category. No duplicate attachments will occur. This option does not attach the found images to the project entities. For this option use the ‘Auto match and attach category media’ option as described above.

Auto match and attach to a from the media store confirmation dialog

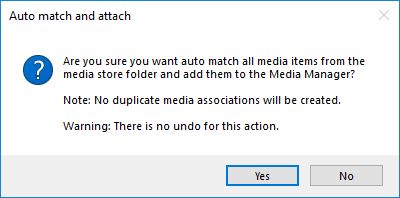
Confirmation warning prior to proceeding with the auto attach media manager function.

Remove attached media, excluding derived, from the project

This option removes the entity media attachments for the project, excluding derived media attachments. This doesn’t delete media. It only removes the image links that have been associated with an entity in the current project. Derived images aren’t removed as this custom information associated with the image would be lost since it is stored on the basis of the link between the entity and the media item.

Remove attached media, including derived, from the project

This option removes the entity media attachments for the project, including derived media attachments. This doesn’t delete media. It only removes the image links that have been associated with an entity in the current project. Derived images are also removed. This will result in the loss of any custom associated information or setting options for that entity image.

Report Missing Media from Store


Missing Media Report

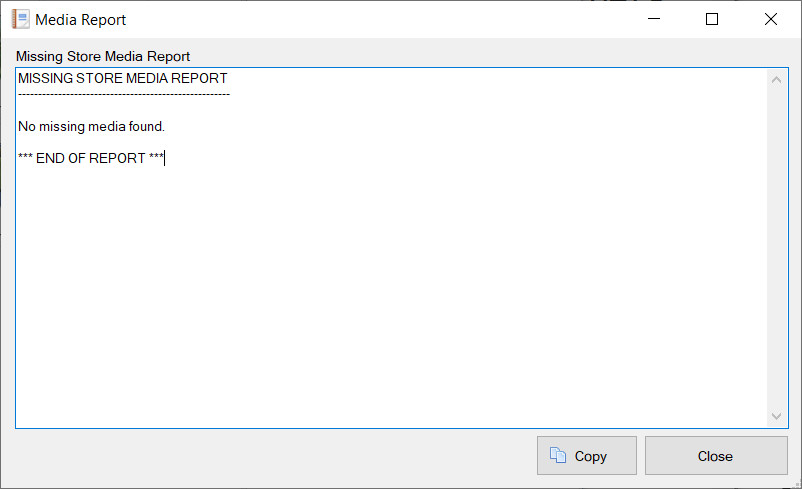
All media stored within the media manager will be checked for missing files where moving, renaming or deleting may have taken place outside the scope of Fact Sheet Fusion, breaking the link between the Fact Sheet Fusion database and the file system. E.g. Via the operating system file manager.

Broken media within the Media Manager will not show a thumbnail, but rather a small media icon.

Note

It is highly recommended that you do not move, edit or delete media files found in the FSF database Media folder using the Windows file manager.

Delete Missing Media from Store

Manual changes to the Fusion databases Media folder content is strongly discouraged, however some advanced users like to manually delete unwanted media from the media store. When this happens it does so outside the scope of Fact Sheet Fusion. When the media manager is loaded these deleted files will be shown as broken media. This option can be used to clean out these now defunct records from the media manager.
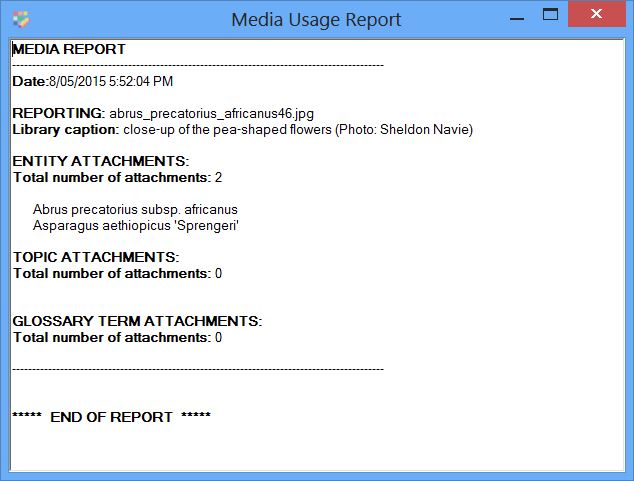
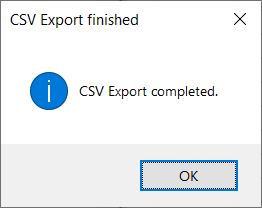
Export Media CSV

References to all media items will be exported to a CSV file. The format (columns of data) mirror that of the CSV media import file format.

After selecting to export a file browser dialog will allow you to choose a folder and filename in which to save the CSV. Once completed you will see a completion dialog.


CSV Export finished dialog

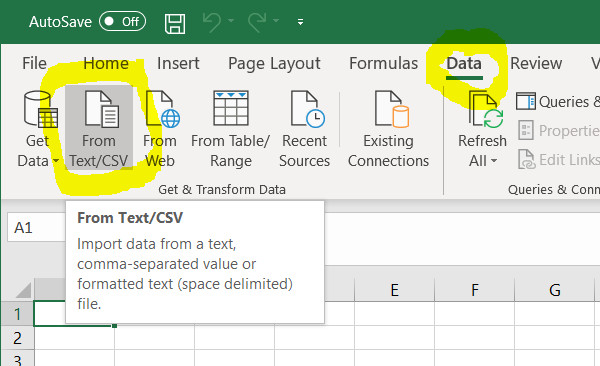
Opening the CSV in Excel

If you wish to open the CSV file in Excel, use the Data menu ‘From Text/CSV’ option, rather than trying to open it via the File…Open menu. As shown in the screen shot below.

Loading CSV into Excel

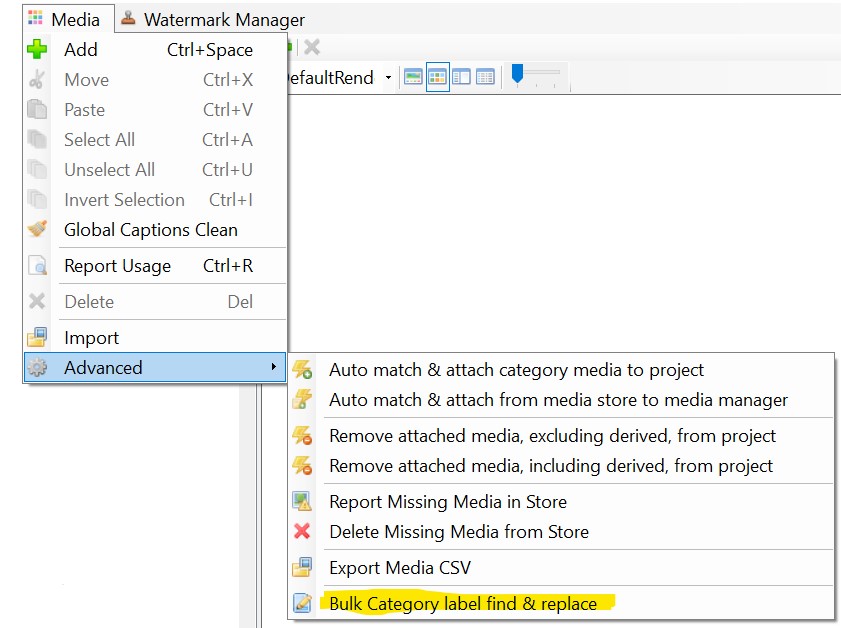
Bulk Category label find & replace

Media Manager Advanced option Bulk Category label find and replace

This advanced option allows you to find and replace text within media category labels.
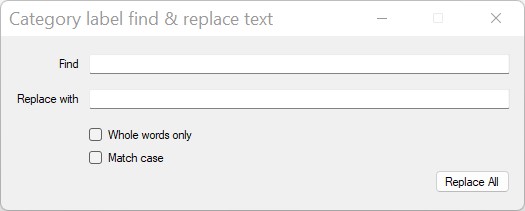
Bulk Category label find and replace dialog

Find

Enter the text you wish to find within the Category labels.

Note: If the find criteria is found in multiple places within the Category label each will be replaced with the replace criteria. 

Replace

Enter the text you want to replace the find text with.

Note: The replace text can be left empty. When left empty the any text matching the find text within the label will be deleted.

Whole words only

If selected, the search for the find text within the Category label must have spacing. In other words the find text must not be part of another word.

For example, if we were to find on ‘and’ with the Whole words only option selected. The following would be the result in these examples.

And this label                     <— Would be found

Anderson is his name      <— Would not be found

This label ends in and      <— Would be found

This label ends in ‘and’      <— Would be not found

Match case

If selected, for a match to be found within the Category label the same letter case must match the find text letter case. Using the above example, with this option selected searching on ‘and’:

And this label                     <— Would not be found

Anderson is his name      <— Would not be found

This label ends in and      <— Would be found

Replace All

This will perform the find and replace on the media Category list using the options entered within the dialog.

After successfully updating any matching labels the Category list will be automatically refreshed.

While performing the find and replace operation each label change is checked to ensure it won’t cause a duplicate Category label. Where this is the case, a list of matching Category labels skipped will be listed for review.

Categories
Fact Sheet Fusion v2

Media Usage Reports

Media Manager

The media usage report shows all usage of selected media throughout all projects. This is particular useful if you want to permanently delete a media item. Or to check associated derived captions.

To generate a report select one or more media items in the media manager. Then right click to view the media pop-up context menu or press Ctrl+R. A report will then be generated on the selected media and displayed in the Usage Report dialog.

Media Usage report
Media Usage report example
Categories
Fact Sheet Fusion v2

Media Properties

Media Manager

Media Properties

Media Properties panel

The Media Properties panel is located to the top right of the media list panel. It displays all of the properties that are associated with the currently selected media item. Different properties may be available depending on the media type. For example only images have watermarking properties available. Some media properties are informative (read) only, that is they can’t be modified. For example the media file size is informative only. Informative or read-only properties are identified by ghosted (light grey) labels, while editable properties are shown with regular text labels.

Properties are grouped within related categories. Each property group has a Group name (bold) which can be expanded and collapsed.

Editing a property depends on the property type. Some properties such as Custom Thumbnail size require two values to be entered for width and height, while others may be free form text. Each property has explanatory text associated with it that is displayed at the bottom of the property panel. This explanatory text is displayed when the property is selected.

Properties

General (Section)

Category – Shows the name of the Category the selected media is located in.

Filename – Shows the filename associated with the media item. You can, if needed, change the file associated with the media item by clicking on the file browse option on the right ([…]). This will replace the media file with the selected file while maintaining the media properties such as caption and copyright etc. This is useful ,for example, where your filename is extremely long and causes a problem when the exported path exceeds the maximum length. Or if you’ve modified the media store filename outside the scope of Fact Sheet Fusion, an action which is not recommended unless you are an advanced user.

Alternate Thumbnail – Allows you to select an image to represent the media item. Media types that don’t have a natural image association such sound files will automatically be assigned a default alternative thumbnail for that media group. These default thumbnails are located in the ‘Icon’ folder of the Fusion Database media store folder. Selecting this property will show a browse option that will let you select a custom thumbnail image file anywhere on your file system. The selected alternative image will automatically be copied across to your Fusion media store. Video media items will automatically have a frame captured and associated as the Alternate Thumbnail. These defaults can be changed by selecting a different image as describe above.

Note

You must have installed FFMPEG utility to enable video frame capture. You link the FFMPEG utility location to Fact Sheet Fusion via the Preferences dialog.

Media Type – Displays file type of the media item. E.g. Image, Video, PDF etc.

Caption Alternative Text – This text is automatically captured from the HTML Media caption associated with the media. It is a plain text version of this caption. This alternative text, without HTML formatting, can be useful when used in export templates that use JavaScript or require no HTML tags.

Custom Thumbnail Size – You can set a preferred thumbnail size for an individual media item. This can be used rather than the default export thumbnail size. The export dialog will allow you to override the Custom Thumbnail size. Normally consistent thumbnail sizes within fact sheets are desired, but this option allows you to fully customize each thumbnail, if needed.

Photographer – When selected this property will display a small text box to enter the media photographer’s details.

Copyright Statement – Similar to the Photographer property a small text box will be displayed allowing you to enter a copyright statement for the media item.

Comments – Author comments regarding the media item. These comments are private and not exported with the fact sheet. However, they are included as a part of the Media List file, if exported.

Review – You may mark a media item for review. By doing so, you can control via the export option whether this media is included in the fact sheet.

Image Watermark (Section)

Watermark Image – A drop down list of all watermark images that have been added to the project via the Watermark Image Manager. See the Watermark Image Manager for more information on this topic. 

Inherit Settings – The Watermark Image Manager can set global default settings for an individual watermark image. This can save applying the same watermark settings to every image the watermark is associated with. If you wish to override the global watermark settings for any selected watermark image then change the Inherit Settings to false. You can change back to the global settings for the selected watermark image anytime. Any custom watermark settings will be saved in case you wish to revert back to the individual custom settings.

Present Image Position – This setting is only available if a Watermark image has been selected and the Watermark Image Inherit settings are set to False.

Watermark position options dropdown

There are nine preset positions where the image watermark can be placed on the image as shown in the screen capture above. If a present position is selected this will take precedence over a manually set position (see Position Property below). 

Position – The position property allows you to set an X & Y pixel coordinate in relation to the  watermark image and the main image. The image watermark image will be positioned from its top left at the defined XY coordinates of the main image. Setting this property is often easier via the Image viewer as it will dynamically preview the watermark as the properties are changed. See the Image Viewer help topic for more information on this. The Position value will be overridden by the Preset Image Position, if selected.

Transparency Level – The transparency level of the watermark image determines how much of the underlying image shows through the watermark. The transparency level can be between 1 and 100. The lower the value the more transparent the watermark image will be. If the value is set too low the watermark image may be very difficult to see in the main image. Setting a value of 100 means no transparency will be added to the watermark image. 

Longest side – You can set the size of the watermark based on the longest side in pixels. This effectively is like defining the size of a square box that the watermark image must fit within while maintaining its aspect ratio. A watermark image will not be resized beyond its actual size if the longest size exceeds the watermark dimensions. Also if the longest side value exceeds the exported image size the watermark will be resized to fit within the image boundary.

Size to parent – You can define a percentage value for the watermark to the parent image. The Size to parent value must be between 1 and 100.

Text Watermark (Section)

Custom Watermark Text – Enter the text you wish to use as the watermark.

Font – Define the font type and size you prefer for the text watermark.

Preset Text Position
 – There are nine preset positions where the text watermark can be placed on the image. If a present position is selected this will take precedence over a manually set position (see Position Property below).

Position
 – The position property allows you to set an X & Y pixel coordinate in relation to the watermark text and the image. The text watermark will be positioned from its top left at the defined XY coordinates of the main image. Setting this property is often easier via the Image viewer as it will dynamically preview the watermark as the properties are changed. See the Image Viewer help topic for more information on this. The Position value will be overridden by the Preset Text Position if selected.

Text Watermark Color
 – Define the color of the text watermark.

Drop Shadow
 – Applies a drop shadow to the text watermark. The drop shadow can add more definition to the text making it clearer on the image it’s applied to.

Text watermark Transparency
 – The transparency level of the text watermark determines how much of the underlying image shows through the text watermark. The transparency level can be between 1 and 100. The lower the value the more transparent the text will be. If the value is set too low the text may be very difficult to see in the main image. Setting a value of 100 means no transparency will be added to the text watermark.

Auto Size
 – The auto size option automatically sizes the font based on the size of the image it’s being applied to and the position that has been selected.

Exclusions (Section)

Exclude – If set to true the media item will be excluded from Exports.

Media Caption

Add text associated with the image. The caption text is HTML based and has the mini HTML editor associated with it.

Global Caption Clean

See Global cleaning options.

Categories
Fact Sheet Fusion v2

Importing Media

Media Manager

Import Media buttonImporting Media

The media import option is accessible via the Media Manager menu (Media…Import).

Import existing media via a CSV file. It is assumed the CSV file will contain a header row, which will be ignored when importing. The CSV column format is as follows:

[Entity Name], [Media Path], [Caption], [Photographer], [Copyright], [Comments], [Watermark Text], [Watermark Filename], [Review], [Exclude], [Sort Order], [Delete]

For example, the following rows are valid:

Entity one, C:\images\entity_one\ent1.jpg,frontal view,Joe Smith,Copyright 2017,Check this image.,Photo by Joe Smith,,FALSE,FALSE,1,FALSE

“Entity two”, C:\images\entity two\entity 2.2.png,Top view,,Copyright 2013,,,TRUE,FALSE,2,FALSE

Entity three, C:\images\ent3\e3_bottom_view.jpg,”Bottom View”,,,,Find a replacement image,”[EntityName] – copyright [year].”,copyright.png,FALSE,FALSE,3,FALSE

As you can see from the examples, each column must be present, even if empty. The columns must be separated via a comma when viewed in a text editor. When viewed in Excel each element is shown as a column, the comma separator isn’t shown within Excel and is not needed as a part of the column data. The columns can optionally be wrapped in double quotes to avoid escaping commas contained in field. The [Media Path] field must be the absolute path to the media item. The content fields can contain HTML tags. Any tags will be automatically cleaned; any tags outside of the body tags will be removed.

The Delete field, if set to ‘TRUE’, will delete the image within the entity category, if found. If creating a CSV for the purpose of removing media then only the Entity Name, Media Path and Delete fields need hold values. The Media Path value can contain only the media item’s filename.

For example:

Entity name example, entity_one_20191.jpg,,,,,,,,,,TRUE

Any errors occurring during the import process will be logged to the default FSF log file. 

Tip

You can quickly access the log file via the Help…About menu.

Categories
Fact Sheet Fusion v2

Moving Media

Media Manager

Moving Media

You can move media from one category to another using the move command (Ctrl+X). To do this, select the desired media items within a category and then select the move option in the Media menu or via the context pop-up menu. Browse to the destination category and use the paste command via the menu, pop-up context menu or keyboard command (Ctrl+V).  Moving media within Categories will not affect media items that have already been linked to project elements such as Entities, Topics and Glossary items.

Categories
Fact Sheet Fusion v2

Supported Media

Supported media

Fact Sheet Fusion supports most media types. Media that is not considered Internet friendly such as Tiffs, Bitmaps etc will be automatically converted and optimized when exported.

Supported media include:

Images

Videos

Sound

Office Formats

Other

JPEGAVIMP3WordPDF
PNGMPEGWAVExcel 
GIFMP4M4PPowerPoint 
BITMAPMP2OGG  
TIFFMPVOGA  
 M2VFLAC  
 M4VAIFF  
 3PG3GP  
 WEBMWMA  
 MOV   
 QT   
Categories
Fact Sheet Fusion v2

Adding and Removing Media

Adding and removing media with the Media Manager

Before media can be added to a project you must first create a Media Category to hold it. There are several ways in which to add media to a Category.

1. Select the media category you wish to add media to then select ‘Add’ from the Media menu (shortcut key combination is Ctrl+space). Or you can right click in an empty area of the media panel and select ‘Add’ from the pop-up context menu, or click the add media button on the media panel toolbar.
Add and Delete buttons
You will then be presented with a media browser dialog.

Media browser dialog

When adding media you can select one or multiple items in the media browser dialog. To select multiple media items you can use either the Ctrl key or Shift key. The Ctrl key allows the individual selection of images, while the Shift key allows images to be selected in blocks.

Once you have selected your preferred media they will then be copied to your Fusion database media store folder and listed within the selected Media Category.

2. You can use drag and drop to add media from a Windows application, such as File Explorer to the selected Categories media panel. A copy of this media will be automatically copied across to the fusion database media store and listed in the selected Media Category.

3. Use copy and paste to add media from internal or external sources of media to the media panel. You can use the in-built Windows clipboard for adding media items to a Category. When copying media from an external source such as Windows File Explorer use the Copy command (Ctrl+C), then select the desired category and paste the media to it using the menu, context menu or keyboard command (Ctrl+V). For moving media internal to the Media Manager see the Moving Media topic.

For information about attaching media to Topics, Entities and Glossary Terms please see the Media help topic.

Categories
Fact Sheet Fusion v2

Media Views

Media Manager View Options

Media List

Media view options toolbar

To the right of the Media Categories list is the media list. Media items found in the selected category will be listed here. There are a number of options available to view media.

Media Renderer

Media renderer dropdown options

The media renderer offers six different themes to display the media. The choice of media renderer is completely up to the individual user. No one theme offers any additional functionality, it only affects the look of the media list. To change renderer just select the preferred one from the drop down list. The new theme will then automatically be applied. Your preferred choice will automatically be saved once the form is closed.

Media Views

Media view options
Media view options

There are several media views that can be applied to the media list. They are:

Gallery View

Gallery View using Noir theme
Gallery view using Noir theme

Thumbnail View

Thumbnail view using Noir theme

The gallery view will render the selected image in the middle of the image list, while the media items are rendered as thumbnails horizontally below. You can move between the media items by clicking on the thumbnail image with your mouse or simply using the left and right arrow keys.

The thumbnail view thumbnails each media item in a grid. Media items can be selected by the mouse or navigated by using the arrow keys.

Details Pane

Details view using Noir theme

The details pane lists each media item as a file listing, with detail on the file name, media dimensions and file size.

Thumbnail size

Thumbnail size slider

The media thumbnails can be displayed at three different sizes. Use the thumbnail size slide bar to adjust the thumbnail size. Your preferred size will be automatically remembered when the form is next opened.

Categories
Fact Sheet Fusion v2

Media Categories

Media Manager

Media Categories

Add Media Category dialog

Media Categories are containers (or folders) to help manage a large number of media. You can define as many Media Categories as desired. Media categories can hold any supported media types.

Adding a Category

Fact Sheet Fusion Add Media Category Dialog

To add a new media category either select the ‘Add’ option from the Categories menu, or right click in the Media Categories list and select ‘Add’ from the pop-up context menu. The add category dialog will appear. Enter the category name and click the add button. The new category will be added below the currently selected category.

Removing a Category

Delete Media Category confirmation dialog

To remove a Category give it focus by selecting it in the Media Category list. Then either select ‘Delete’ from the Categories menu, right click on the selected Category context pop-up menu, or simply press the delete key. Prior to deletion you will be given a warning you are about to delete. There is no undo to this action.

Warning

If you delete a media category containing media items then all the associated media items will also be deleted. If these media items are linked to project elements such as entities or topics the media will automatically be unlinked from them.

Sort descending button Sort ascending buttonSorting Categories

You can manually sort Media Categories to your preferred order by drag and drop. Just select the desired category, hold down the left mouse button and drag the category to the desired position within the Media Category list, then let go of the left mouse button. Alternatively you can sort the Media Categories into ascending or descending order. Either select your preferred sort option from the Categories menu or by right clicking the Media Category list and selecting the sort preference from the pop-up sort menu.

Importing Categories

If you wish to create several Media Categories at once then use the Import option. This will allow you to paste or type a list of categories. Each Media Category name should be placed onto a separate line. Once you have finished entering your Media Categories click the ‘Import’ button. The Media Categories will then be added to the list.