Feature note: This feature was added in version 2.0.5.118.
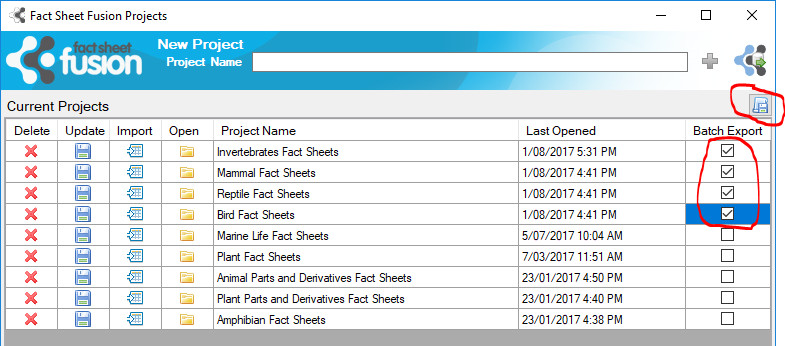
Batch export options within Projects dialog
Batch export allows selected projects to be exported without having to open each individually and performing the export separately. Each selected project uses its own defined export settings. The minimum export settings for each project must be set prior to being selected for Batch Export. See Export Fact Sheet settings for further information.
The batch export function will be of particular interest if you have customised or made changes to a common underlying project template or set of templates.
To initate the batch export, first select the desired projects within the Fusion database via the Batch Export column of projects listing. Next, click the Batch Export button () above the Batch Export selection column. Each selected project in turn will begin exporting. The export dialog for each project will load to show progress of the fact sheet export process. Subsidary exports defined in the export settings, such as the index, glossary and media lists will also be exported.
For more information about the Project dialog options see the Projects help topic.
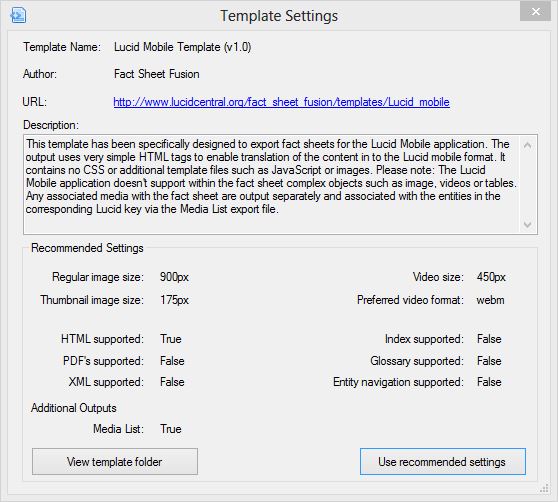
The Template settings dialog gives additional information about the selected template. The template author provides information about the features the template supports to help decide on the best export options.
As you can see in the example above the Recommended Settings section outlines image sizes and the supported features and formats of the template.
Tip
These are recommended settings, you can try additional options in the export dialog to see if you get a good result, for example a template may not have been designed specifically to support PDF output, but often the output will be acceptable.
If the template has an associated web page you may want to click on this to check what the template may look like and if there are any additional instructions or updates available.
View template folder
The View template folder button will open the selected template folder in Windows Explorer. This is useful if you like a template but wish to customize it. It is recommended that you make a copy of the template folder and customize this edition.
Note
If you copy a template for customizing you must edit the fsf_template_settings.xml file in your preferred text editor and adjust the name of the template to be unique.
Use recommended settings
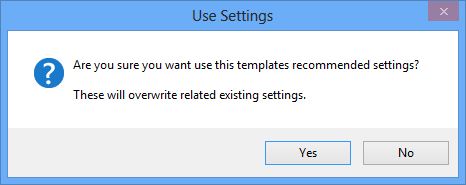
This option will apply all the recommended settings to the export dialog. If applied these settings will override any previous related settings already made in the Export dialog. You will receive a warning message regarding this prior to the settings being applied.
Use Template Recommended Settings confirmation dialog
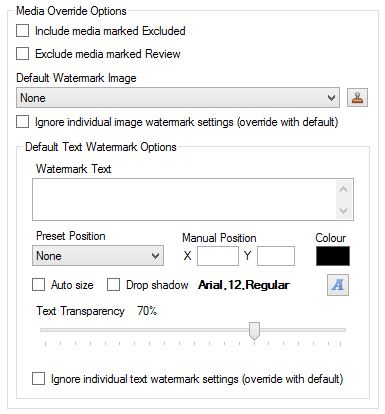
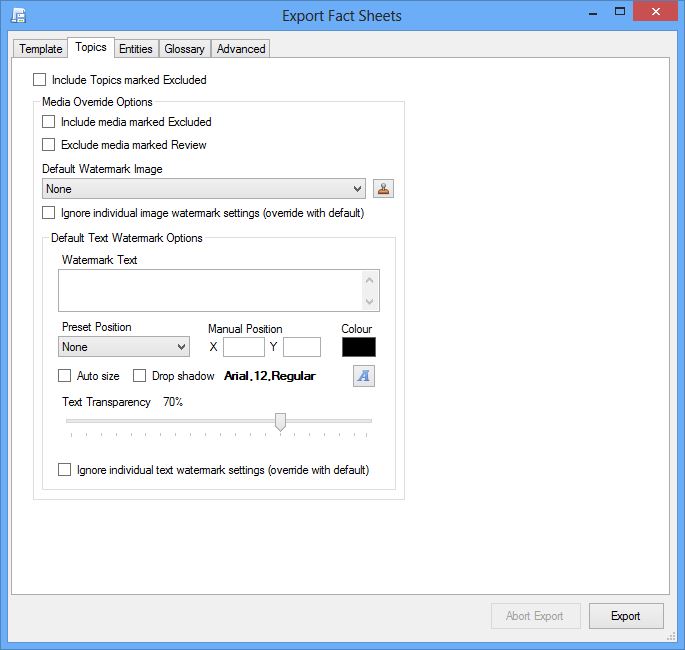
Media Override options found within the main fact sheet export dialog
Within the Export dialog the Topics tab, Entities tab and Glossary tab have media override options associated with them. These options allow you to set specific media options for these items to, override the global options set within the Template tab of the export dialog, or override the properties set on the media item within the Media Manager or on individual derived settings of media items.
Include media marked Excluded
Selecting this option will override any media marked as excluded and include it in the export.
Exclude media marked Review
This option will allow you to exclude any media marked for Review from the export.
Default Watermark Image
Default image watermark options
You can set a default watermark image to be applied to all images (associated with either Topics, Entities or the Glossary), using the default watermark image settings. To view or modify the selected watermark settings click on the Image Watermark Manager button (). The image watermark will only be applied to images that don’t already have image watermark settings defined, unless overridden by the Ignore individual image watermark settings option (outlined below).
Ignore individual image watermark settings (override with default)
Default image watermark override option
If selected, all individually applied image watermark settings applied to images will be ignored in favor of the default image watermark selected above.
Default Text Watermark Options
As with the default image watermark option, selecting this option will cause a default text watermark to be applied to all images during export, that don’t already have text watermark settings applied to them. The default text watermark can be applied to all images (associated with Topics, Entities or the Glossary), overriding individual image settings by applying the Ignore individual text watermark settings (override with default) outlined further below.
Watermark Text – Enter the text you wish to use as the watermark.
Preset Text Position – There are nine preset positions where the text watermark can be placed on the image. If a preset position is selected this will take precedence over a manually set position (see Position property below).
Position – The position property allows you to set an X & Y pixel coordinate in relation to the watermark text and the image. The text watermark will be positioned from its top left at the defined XY coordinates. Setting this property is often easier via the Image viewer as it will dynamically preview the watermark as the properties are changed. See the Image Viewer help topic for more information on this. The Position value will be overridden by the Preset Text Position if selected.
Text Watermark Color – Define the color of the text watermark.
Drop Shadow – Applies a drop shadow to the text watermark. The drop shadow can add more definition to the text making it clearer on the image it is applied to.
Font – Define the font type and size you prefer for the text watermark.
Text watermark Transparency – The transparency level of the text watermark determines how much of the underlying image shows through the text watermark. The transparency level can be between 1 and 100. The lower the value the more transparent the text will be. If the value is set too low the text may be very difficult to see in the main image. Setting a value of 100 means no transparency will be added to the text watermark.
Auto Size – The auto size option automatically sizes the font based on the size of the image it’s being applied to and the position that has been selected.
Ignore individual text watermark settings (override with default)
Selecting this option will override individual image settings and apply the default text watermark to all images.
Normally when a Fact Sheet Fusion database is exported, all media is stored within an Assets folder within the selected Destination folder, as defined in the Templates Tab of the Export dialog. As shown below.
\ \Assets\ \Image \Sound \PDF \Other \Video
However, under certain circumstances, it is desirable to choose another location for the media. For example, if fact sheets are destined for the Lucid Builder, it is preferable to export the media to the key’s Images folder, rather than to the Html folder. This will save doubling up media when it is to be attached to the Lucid key.
If an alternative location for the media store is defined, then relative paths within the fact sheets will be created to this location, unless the alternative location is defined on another hard drive. In the case of defining another hard drive absolute paths will be created. This is not recommended as it will require the same drive and folder location to be available, if the fact sheets are moved.
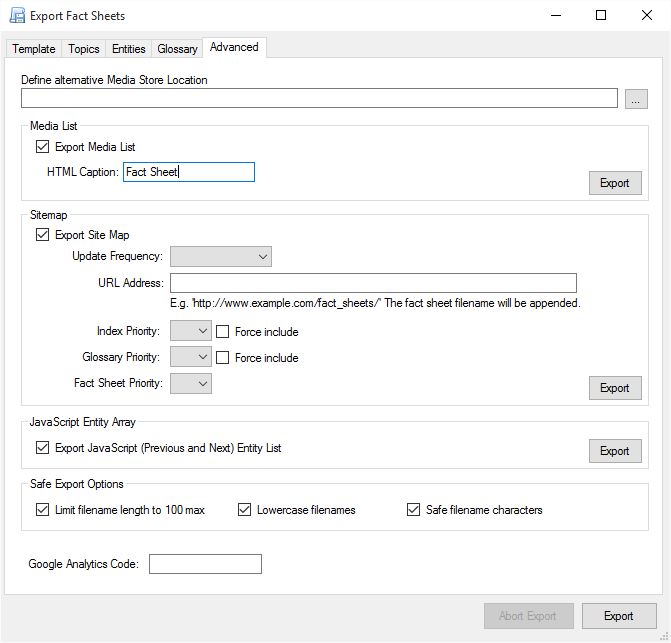
Media List
Media List Export options
The Media List is an XML file containing a listing of all exported fact sheets and their associated media items. You can select the export Media List check box prior to clicking the main Export button, in which case it will be included as a part of the main export process. Alternatively, you can export a media list without having to perform a full export by selecting the Media List Export button. It is also possible to export a media list while the main export is running. The Media List will then be added to the export jobs in process.
The HTML Caption is the label you wish to give the fact sheets within the Media List. Applications that use this list apply this caption when attaching the fact sheet within their data structures. For example, when Lucid imports from a Media List file it attaches the fact sheet and stores the HTML Caption, which is used within the Lucid Player Fact sheet menu. Normally this is why ‘Fact Sheet’ is an appropriate HTML Caption, though you can also use the Entity Name token [Entity]. This token will be replaced with the actual entity name during the Media List creation.
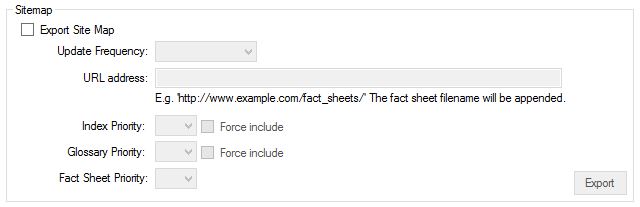
Sitemap
Site Map Options within the Advanced tab of the main fact sheet export dialog
Fact Sheet Fusion can create an XML based sitemap that can provide search engines and other webcrawlers about your content. The XML sitemap is not designed for human readers, the index page is the human equivalent of the sitemap.
For more information on sitemaps and their use please see www.sitemaps.org
Update Frequency
Set how often you think you may update the fact sheet content. This will let the search engine know how often it should come back and re-index your content.
URL Address
The URL address is the planned location on your website where the exported content will be copied. This should be the full internet address as shown in the example ‘http://www.example.com/fact_sheets/’. Using this example, it is be assumed that the exported content was copied to a root folder on the web server called ‘fact_sheets’.
Tip
After the exported content has been copied to the web server you should check that this URL address information is correct, otherwise the search engine could potentially not find the content and so may rank your site lower within its search results.
Priorities
The priority of URLs relative to other URLs on your web site. Valid values range from 0.0 to 1.0. (Default value is 0.5). This value does not affect how your pages are compared to pages on other sites—it only lets the search engines know which pages you deem most important for the crawlers.
Index Priority
Due to the nature of the index page and its links across to all other fact sheets it is recommended that the index page should have a higher priority than the fact sheets. The Force include option will include a reference to the index page, even if the index page has been excluded from the current export options.
Glossary Priority
Select the desired priority for your glossary page. The Force include option will include a reference to the glossary page, even if the glossary page has been excluded from the current export options.
Fact Sheet Priority
Select the desired priority for the fact sheets. Normally the default 0.5 is fine for this option.
Exporting
Check the Export site map checkbox if you want the sitemap created as a part of the main export process. You may also export the Sitemap separately from the main export process by clicking on the export button within the sitemap options. You can also select to export the sitemap during the main export process by clicking on the export button. This will add the sitemap creation task to the list of export jobs currently underway.
JavaScript Entity Array
JavaScript Entity Array export options within the Advanced tab of the main fact sheet export dialog
Often it is useful to have a JavaScript containing an array of the Entities, particularly in more sophisticated export templates. The JavaScript array can be used in other JavaScript’s, for example, providing navigation between fact sheets or searches etc. To take full advantage of this option, the export template must support it. You can check if your selected template supports this option via the Template Settings dialog.
Check the Export JavaScript (Previous and Next) Entity List checkbox if you want the JavaScript Entity Array created as a part of the main export process. You may also export the JavaScript Entity Array separately from the main export process by clicking on the export button within the JavaScript Entity Array options. You can also select to export the JavaScript Entity Array during the main export process by clicking on the export button. This will add the JavaScript Entity Array creation task to the list of export jobs currently underway.
Safe Export Options
Safe Export Options within the Advanced tab of the main fact sheet export dialog
These export options are normally reserved for specialised uses or destinations such as exporting for a mobile platform. Or they can be used simply to generate ‘cleaner’ filenames.
Limit filename length to 100 max – Selecting this option will automatically reduce any filenames for HTML pages, PDFs or images to 100 characters.
Lowercase filenames – All filenames output during export will be in lowercase.
Safe filename characters – All filenames exported will consist of a limited range of standard ASCII characters (a-zA-Z0-9_.). Spaces within a filename will be converted to underscores. This option is not recommend for languages that do not use this character set.
Google Analytics Code
Google Analytics is a popular (and free) choice for tracking the use of your website content. After you have signed up for a Google Analytics account and entered your website details you will be given a Google Analytics site code. Enter this code into the box. If the code is present during the export process the Google Analytics JavaScript, containing your code, will be automatically applied to each fact sheet.
Do not enter the Google Analytics JavaScript into the text box, only the tracking code. This tracking code should be in the following format: UA-XXXX-Y
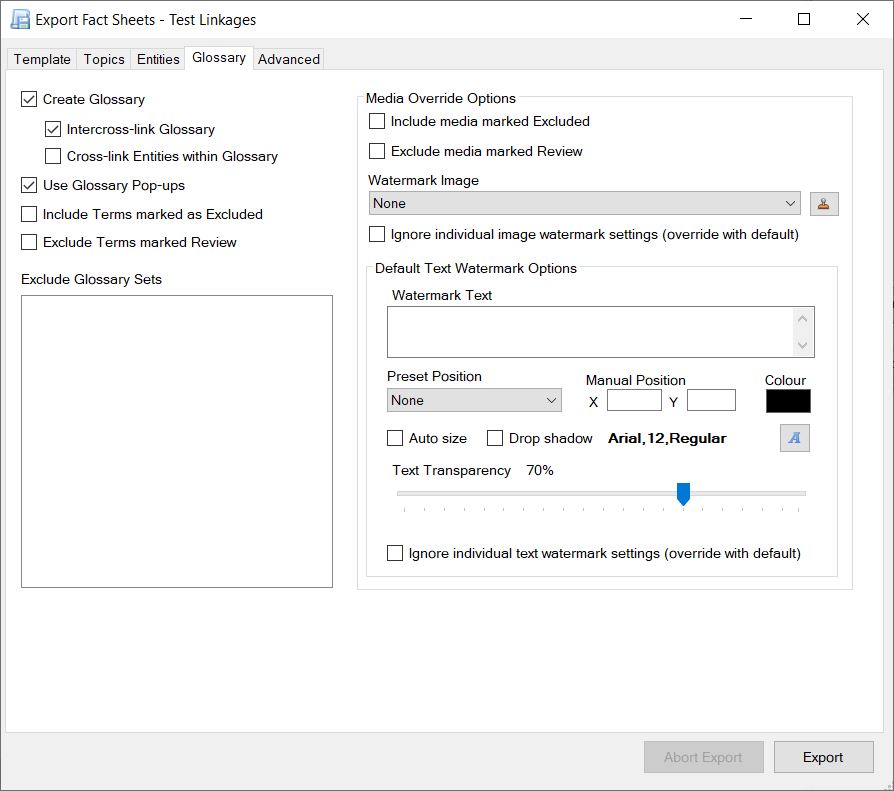
If selected, a glossary page will be created listing Glossary Sets and their associated terms.
Note
This assumes that the selected Export Template supports Glossary creation.
Intercross-link Glossary
Often glossary terms are used within the definition of other glossary terms. If this option is selected, glossary terms are cross-linked, allowing users to easily jump between terms or to view a glossary term definition, via a Glossary Pop-up.
Cross-link Entities within Glossary
If selected, any Entity names used within the glossary will be cross-linked back to their corresponding fact sheet.
Use Glossary Pop-ups
If selected, this option will add an additional class name to the glossary cross-links. This can then be used by an Export Template JavaScript, if supported, to create a tool tip box containing the terms’ definitions, when the mouse hovers over the link.
Include Terms marked as Excluded
This option allows you to override any glossary terms that have been marked for exclusion within the Glossary Manager.
Exclude Terms marked Review
This option allows you to exclude any terms that have been marked for Review in the Glossary Manager.
Exclude Glossary Sets
By default Glossary Sets are exported, unless marked as excluded by this export option. To exclude the Glossary Set check (tick) the corresponding box on the left hand side of the Glossary Set name.
If selected, an index page that lists all exported entities will be created. The page will be an index.htm (.pdf or .xml depending on the export type). Within the index page each entity listed will link to it’s corresponding fact sheet.*
Note
* This assumes the export template you have selected supports the creation of an index page.
Include Alternative Names
Entities may have alternative names associated with them. If this is the case you can also have Alternate Names listed within the index page. They will be treated exactly the same as a regular entity name and will contain a link to the corresponding Entity fact sheet they are associated with – i.e. the main Entity named fact sheet. For example, you may have an Entity called Acacia that has Wattle and Thorn tree as Alternative Names. The index will contain all three names and they will all link to the same fact sheet called Acacia.
Include Media
If selected, any media associated with the Entity will also be listed within the index, if the selected export template supports this.
Include Entities marked as Excluded
Select this option if you wish to include all Entities that have been marked to be excluded from the export.
Exclude Entities marked Review
By default, Entities marked for review are included in the export. However you can excluded these entities by selecting this option.
Index second part of Entity Name
Forces the entity sort order for the index page creation to use the second part of the entity label (if available). If you are dealing with scientific names as your entities and are creating fact sheets for a few or single genera, the index A…Z shortcuts can become superfluous.
For example, you were creating fact sheets for Eucalypts, which have over 800 species all starting with ‘Eucalyptus’, the Index A…Z shortcut menu would only be active for ‘e’ leaving the user to scroll through hundreds of species to find what’s of interest. This option allows you to sort the Index based on the second text element of the entity name, if it’s available. This generally will allow for a greater spread of names within the Index A…Z shortcut menu.
Include Inter-crosslink Entities in Topics
If selected, Fact Sheet Fusion will automatically create cross-links (hyperlinks) to Entity names it finds within the topic text.
Automatic abbreviated binomials
Often when scientific names are written they are abbreviated. For example, Escherichia coli is often referred to as E. coli. Fact Sheet Fusion can automatically look for these abbreviated names when creating cross-links. Therefore there is no need to enter the abbreviated name as an alternative name.
Include Alternative Names
Fact Sheet Fusion can also look for alternative names when cross-linking content. Cross-links on alternative names always link back to the Entity named fact sheet.
Override Inter-crosslinking exclusions
Using this option you can override topics that have been set to exclude cross-linking.
Inter-crosslink Glossary in Topics
If selected, Fact Sheet Fusion will cross-link on any glossary terms that are found within the Topic text.
Glossary cross-linking limit
By default, Fact Sheet Fusion will cross link on every instance of a found glossary term with the the topic text. The Glossary Cross-linking limit option allows you reduce the number of times a term is cross linked within the topic text to either 1, 2, 3, 4, 5. Unlimited (Default).
Note
If you have elected to limit the glossary term crosslinker, it will match first on exact matches, including case sensitivity.
For example, if you have a Glossary Term 'tree' with the following topic text and the limiter set to one (1):
"Tree is 60-70m tall. Seedlings of this tree have completely different leaves."
The glossary crosslinker will apply the crosslink as follows (yellow hightlight):
"Tree is 60-70m tall. Seedlings of this tree have completely different leaves."
Notice how the captialized first instance of 'Tree' isn't crosslinked due to the limit and an exact match being found within the text.
Override Glossary Cross-linking exclusions
If selected, any glossary terms that have been marked to be excluded from cross-linking will be overridden and the glossary link included.
Include Entities marked as Excluded
This option forces the inclusion of Entities that have been marked as Excluded from the export process. These Entities will have a fact sheet generated during the export process.
Exclude Entities marked Review
This option excludes any Entities marked as Review from having a fact sheet created during the export process.
Default Author
Optional. Enter the name or names of the default Author/(s). This information can be included in the META data within the fact sheet’s Head tags, if the selected export template supports this.
Tip
The Default Author field allows for token replacement. E.g. [EntityName] and [Topic:].
Default Description
Optional. Enter the default text for the fact sheet description META tag, if the template supports it.
Note
If the description field is set on an individual entity this will take precedents over the default description text.
Tip
The Default Description field allows for token replacement. E.g. [EntityName] and [Topic:].
Only Include Subsets
If entity subsets have been defined in the project these can be selected to limit the export to those entities contained within the subset(s).
Note
Limiting entities via subsets will effect entity cross linking (if selected) and the creation of the index page (again if selected) as they will be limited to the entities found in the subset(s).
If you have marked certain Topics to be excluded from the export process, you can override this setting by selecting the Include Topics marked Excluded.
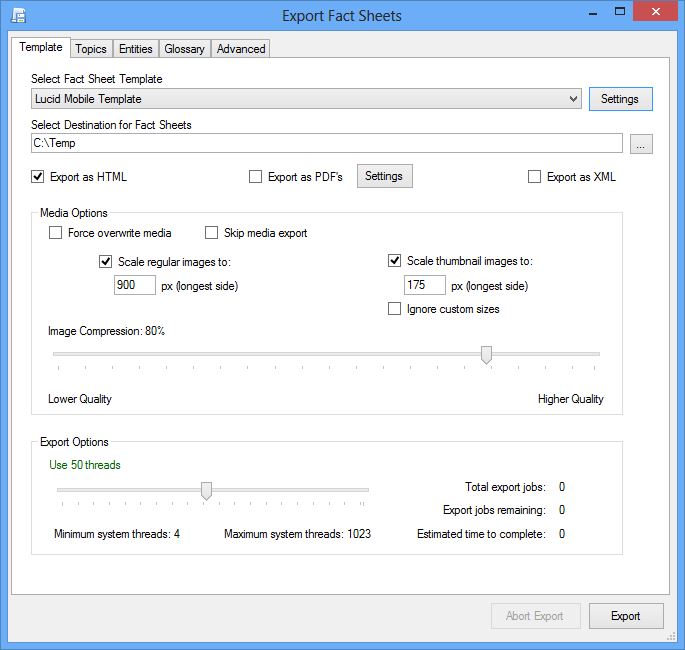
The Template tab contains a minimum set of options required to begin exporting.
To begin with, select a fact sheet template from the drop down list. All installed templates will be listed within the drop down.
Template Settings
The template settings provide you details on the selected template. It also outlines the recommended settings for the template, which can be automatically applied.
Destination
Select a destination folder for your exported fact sheets. It is recommended that you choose an empty folder to ensure you can see exactly what is exported if you need to copy the fact sheets to a web server or some other destination. To select an export destination folder select the file browser button. Warning: Exporting will overwrite any existing fact sheets or media of the same name in the destination folder.
Export File Types
You can select one or more export formats for your fact sheets.
HTML
The fact sheets will be exported in Hyper Text Markup Language (HTML) format. The HTML export structure will look like that shown below, within the destination folder:
The fact sheets will be exported in Portable Document Format (PDF). All of the fact sheets and associated images are embedded within the PDF file, rather than being exported to a separate folder and referenced.
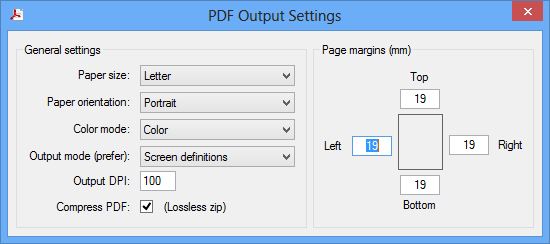
PDF Settings
PDF Output setting dialog
There are a number of additional settings for PDF export. All settings will be saved automatically when the dialog is closed.
Paper size
All paper sizes supported by your operating system will be loaded into the paper size drop down list.
Paper orientation
The paper orientation can be set to either Portrait or Landscape.
Color mode
Output the PDF in either Color or Grey scale.
Output mode
Most templates have style definitions for how the fact sheet should look both on screen and in print. Normally if you are selecting to export to PDF you may prefer to select print definitions, rather than screen definitions, though the choice will depend on personal preference and the template design.
Output DPI
The output DPI you define depends on the quality you wish to print at. For example it is common for printers to support 300 DPI or higher, however it is not always necessary to output at this level to achieve a good print result. The higher the DPI output the larger the file size.
Compress PDF
If selected the PDF will be internally compressed using ZIP.
Page Margins
Allow you define the amount of empty space around the edge (margin) of the document.
XML
This option exports the fact sheets in eXtensible Markup Language (XML). The output folder structure will be the same as the HTML export.
Media Options
The media options defined in the Template tab are global in nature. They apply to all images associated with the fact sheets, glossary and index.
Tip
Exporting media is the most expensive computing operation of the export process. If media has already been exported, and the only changes made are to the text portion of the fact sheet (i.e. Topic text), export will be much faster if the skip media option is selected.
Force overwrite media
This option will cause the media to be output, even if it already exists in the destination folder.
Skip media export
Selecting this option will stop the media from being exported. This can be useful if you have already exported the media previously and have only changed the text of a fact sheet.
Scale regular images
If selected, you will need to define a preferred image size in pixels. During export, all images greater than this dimension will be resized. Non web friendly formats such as Bitmaps and TIFFs will be converted to the JPEG format.
Tip
Regular images are normally not shown directly in a fact sheet due to their size. They are usually accessed by clicking on the thumbnail version, which then opens the regular sized image for display. How the regular image is accessed and displayed depends on the export template you select.
Scale thumbnail images
If selected, you will need to define a preferred size for the thumbnail images. The images will be scaled to this dimension during the export process.
Note
Watermark options are not applied to thumbnail images.
Image compression
Image compression involves a balance between image quality and size, since the compression process discards image information. Less compression means a higher quality image, while selecting more compression can mean a small file size but pixelated, blurry images. For most purposes, a compression level between 60-90 will be suitable. Only image formats that support compression, such as JPEG, will have compression applied.
Below is an example of extreme compression (poor quality) vs low compression (high quality).
Very high compression, but low quality image example File size: 2 Kilobytes.
Very low compression, but high quality image example File size: 23 Kilobytes.
Both images are 200 pixels wide by 145 pixels high at 96 DPI (dots per inch).
Export Options
Fact Sheet Fusion uses a technique called multi-threading to perform the export tasks. This can be likened to breaking down the export job into hundreds (or thousands) of individual tasks, then employing multiple workers to perform these tasks at the same time. This is particularly useful under modern computer architecture that employs multiple CPU cores and large memory spaces. The number of threads (workers) has been limited to 100, even though normally many more threads are available. Any more and the export tasks may overwhelm the operating system, making it unresponsive to other tasks it might be doing, such as checking emails…
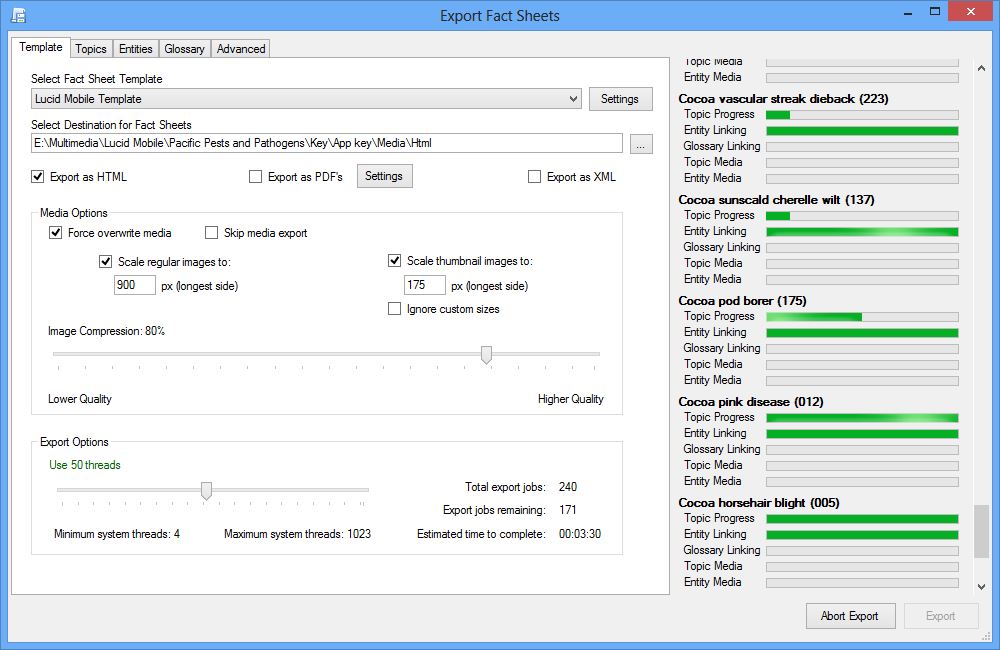
During the export process Fact Sheet Fusion will report the number of export jobs it has started and update the number that are remaining as it completes the export process, along with an estimated time to complete.
To begin the export process, click the Export button. Prior to the export beginning a minimum set of options need to defined, such as the export template, export destination and the export type (HTML, PDF and/or XML). If you have not met the minimum export requirements these options will be highlighted in the export dialog.
The screen shot above shows the Export process in action.
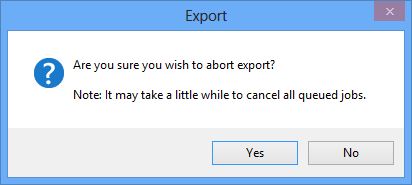
During export it is possible to abort the Export process. To do so, click the Abort button. Fact Sheet Fusion will confirm that you wish to abort before it stops all current export threads (workers).
The screen shot above shows the Export process in action.
Once you have finished entering your data and media for the fact sheets it is time to export. The export dialog has many options to customize the fact sheets. Each set of related options have been grouped under tabs within the export dialog.
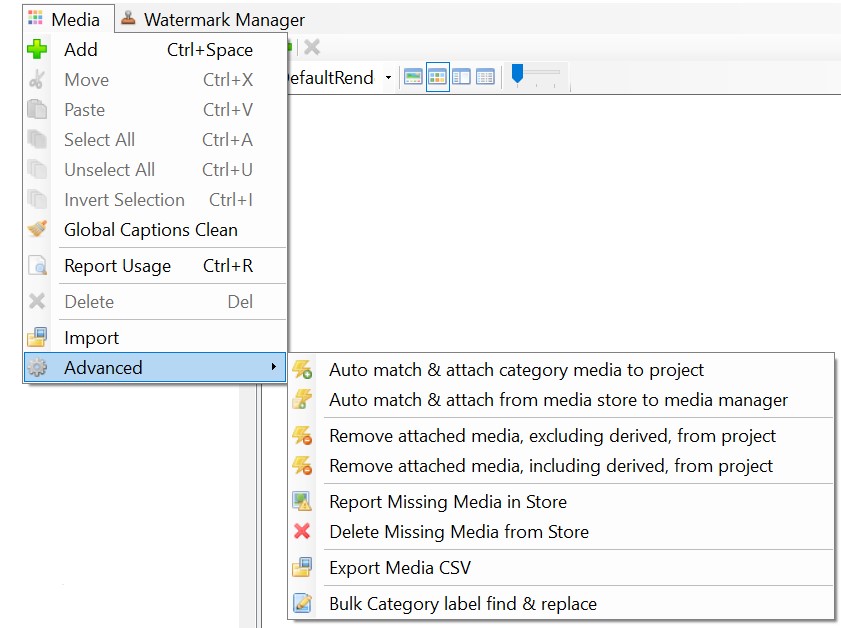
Fact Sheet Fusion has several options for advanced users when dealing with media. Please read the help on any of these options prior to using as in most instances there is no undo action available.
Auto match and attach category media option
This option will automatically attach any media found in the media manager entity categories to the corresponding project entities. This is useful for example after performing a large media import and saves having to attach each entities media items ‘by hand’.
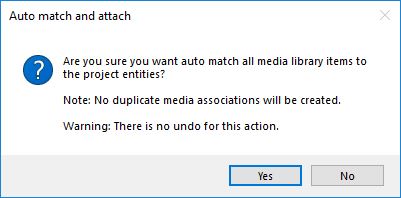
Auto match and attach confirmation dialog
Confirmation warning prior to proceeding with the auto attach function.
Auto match and attach from media store to media manager
This option will search the currently opened Fusion database category sub folders found in the ‘Media’ folder location for any media files that have not yet been attached. Any unattached media found is then automatically added to the media manager under the corresponding category. No duplicate attachments will occur. This option does not attach the found images to the project entities. For this option use the ‘Auto match and attach category media’ option as described above.
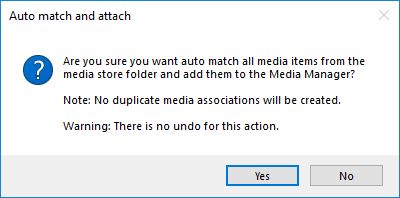
Auto match and attach to a from the media store confirmation dialog
Confirmation warning prior to proceeding with the auto attach media manager function.
Remove attached media, excluding derived, from the project
This option removes the entity media attachments for the project, excluding derived media attachments. This doesn’t delete media. It only removes the image links that have been associated with an entity in the current project. Derived images aren’t removed as this custom information associated with the image would be lost since it is stored on the basis of the link between the entity and the media item.
Remove attached media, including derived, from the project
This option removes the entity media attachments for the project, including derived media attachments. This doesn’t delete media. It only removes the image links that have been associated with an entity in the current project. Derived images are also removed. This will result in the loss of any custom associated information or setting options for that entity image.
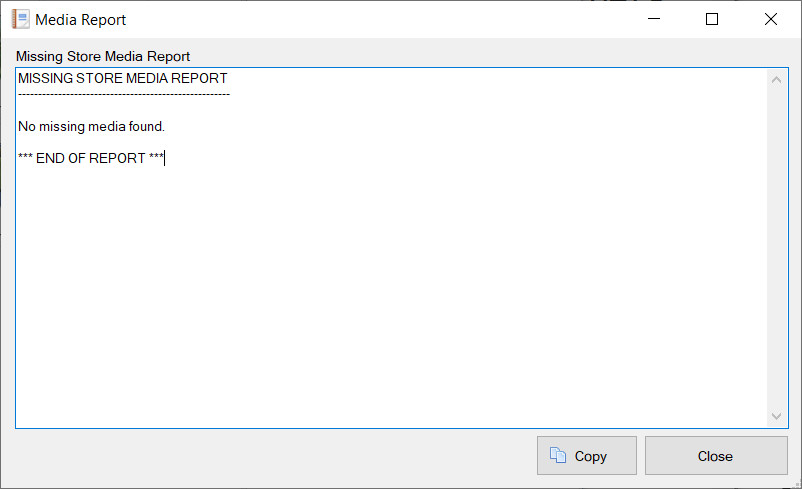
Report Missing Media from Store
Missing Media Report
All media stored within the media manager will be checked for missing files where moving, renaming or deleting may have taken place outside the scope of Fact Sheet Fusion, breaking the link between the Fact Sheet Fusion database and the file system. E.g. Via the operating system file manager.
Broken media within the Media Manager will not show a thumbnail, but rather a small media icon.
Note
It is highly recommended that you do not move, edit or delete media files found in the FSF database Media folder using the Windows file manager.
Delete Missing Media from Store
Manual changes to the Fusion databases Media folder content is strongly discouraged, however some advanced users like to manually delete unwanted media from the media store. When this happens it does so outside the scope of Fact Sheet Fusion. When the media manager is loaded these deleted files will be shown as broken media. This option can be used to clean out these now defunct records from the media manager.
Export Media CSV
References to all media items will be exported to a CSV file. The format (columns of data) mirror that of the CSV media import file format.
After selecting to export a file browser dialog will allow you to choose a folder and filename in which to save the CSV. Once completed you will see a completion dialog.
CSV Export finished dialog
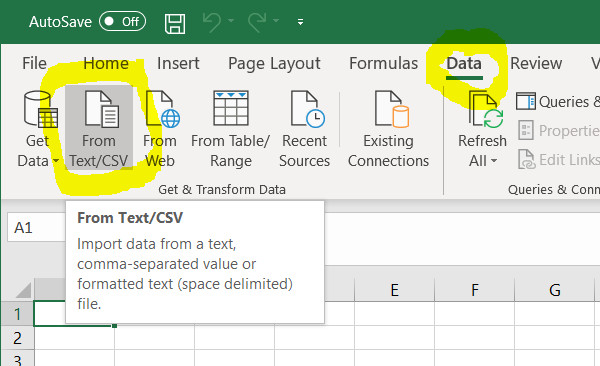
Opening the CSV in Excel
If you wish to open the CSV file in Excel, use the Data menu ‘From Text/CSV’ option, rather than trying to open it via the File…Open menu. As shown in the screen shot below.
Loading CSV into Excel
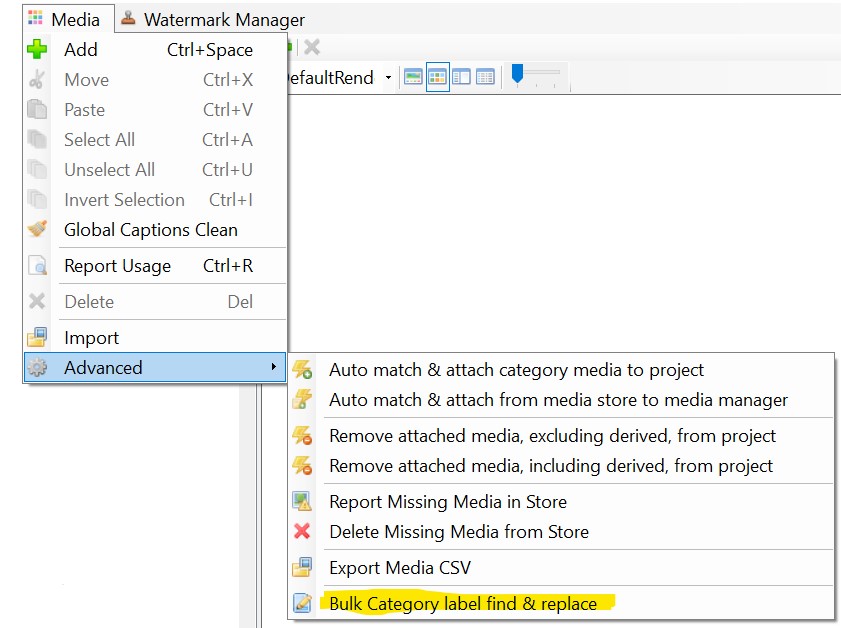
Bulk Category label find & replace
Media Manager Advanced option Bulk Category label find and replace
This advanced option allows you to find and replace text within media category labels.
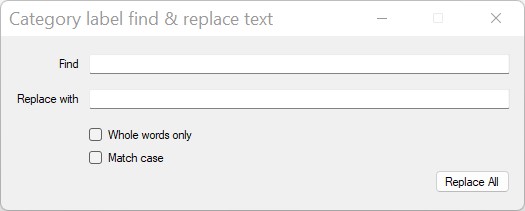
Bulk Category label find and replace dialog
Find
Enter the text you wish to find within the Category labels.
Note: If the find criteria is found in multiple places within the Category label each will be replaced with the replace criteria.
Replace
Enter the text you want to replace the find text with.
Note: The replace text can be left empty. When left empty the any text matching the find text within the label will be deleted.
Whole words only
If selected, the search for the find text within the Category label must have spacing. In other words the find text must not be part of another word.
For example, if we were to find on ‘and’ with the Whole words only option selected. The following would be the result in these examples.
And this label <— Would be found
Anderson is his name <— Would not be found
This label ends in and <— Would be found
This label ends in ‘and’ <— Would be not found
Match case
If selected, for a match to be found within the Category label the same letter case must match the find text letter case. Using the above example, with this option selected searching on ‘and’:
And this label <— Would not be found
Anderson is his name <— Would not be found
This label ends in and <— Would be found
Replace All
This will perform the find and replace on the media Category list using the options entered within the dialog.
After successfully updating any matching labels the Category list will be automatically refreshed.
While performing the find and replace operation each label change is checked to ensure it won’t cause a duplicate Category label. Where this is the case, a list of matching Category labels skipped will be listed for review.