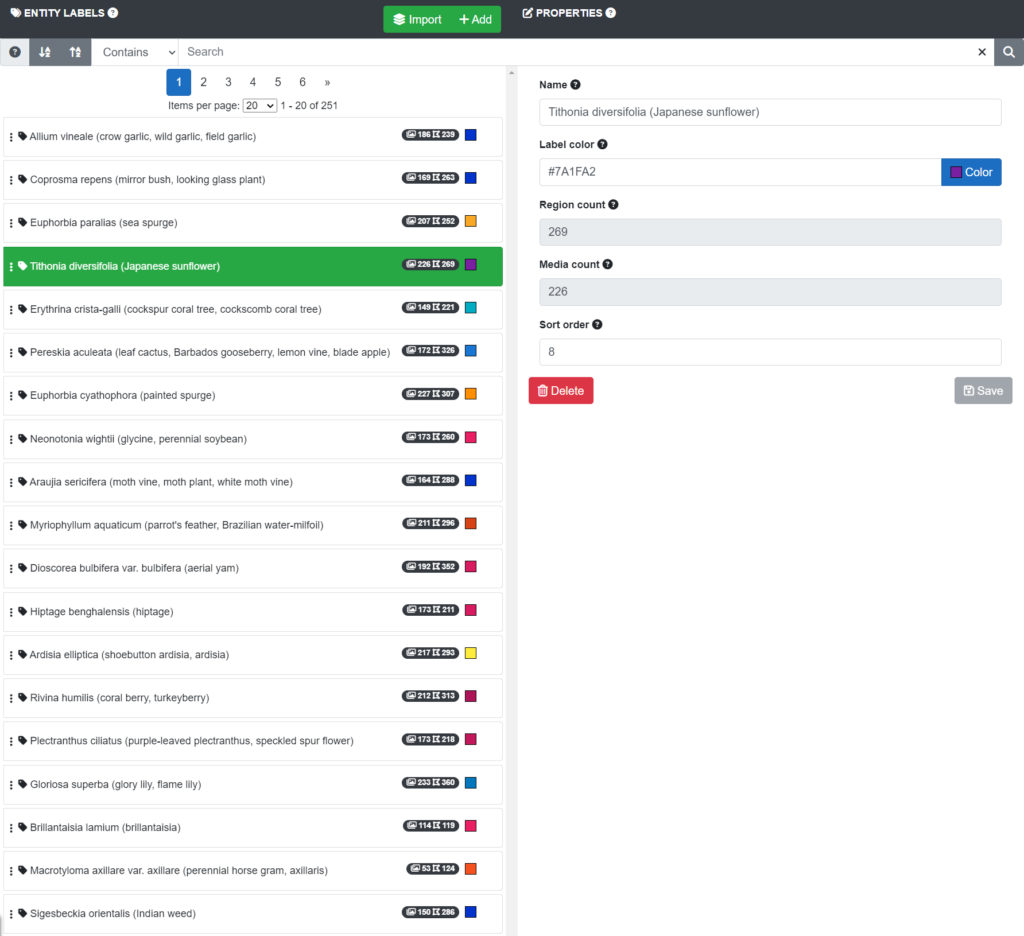
Entity labels represent the things you are trying to classify (identify). For example, a very simple set of entity labels could consist of ‘cat’, ‘dog’, ‘cow’ or ‘sheep’. Entity labels are then used to annotate (label) images or parts of images that contain that entity. This annotated image data is then used to train the AI.

Name
The name of the object/subject you are wanting to classify.
Note
You cannot have duplicate entity label names within your project.
Label color
Define a label color to help it stand out when multiple, but different, entity labels are used on the same image.
Region count
A count of how many times the entity label has been used. This value is read-only and not settable by the user. This along with the media count give an indication of the labels usage if you were considering deleting or merging the label.
Media count
A count of how many images the label has been applied. This value is read-only and not settable by the user. This along with the region count give an indication of the labels usage if you were considering deleting or merging the label.
Sort order
Optional – Set your preferred order of the label when listed with other labels.
Note
You can sort the entity labels ascending or descending, without having to set this on an individual basis.
Adding an entity label
To add an individual entity label click the Add button located at the top of the labels list. Multiple labels can be added in one action via the Import option. See the Import entity labels topic further below for more information on this.
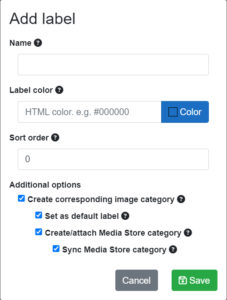
Name
Enter the name of the label. A label can comprise a maximum of 255 characters. Duplicate label names are not allowed.
Label color
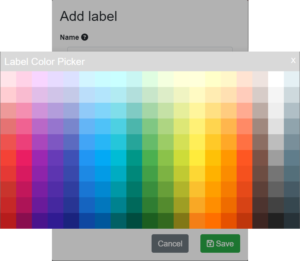
Enter or paste a valid HTML hex color code, or click the color button to select a color from the color selection dialog as shown above.
Sort order
Set your preferred sort order (numeric value) for the label. If left with the default value (0) it will be added to the top entity label list. The order can be be changed at anytime. Note the sort order value may change automatically if the sort order of other labels are changed. For example, via a drag and drop operation on the entity labels.
Additional options
Create corresponding image category
If checked this option will create an Image Category of the same name as the entity label, if it doesn’t already exist.
Set as default label
Enabling this option will set the label to become the default entity label associated with the image category. This option comes into effect when selecting an image category for region labeling (annotating). When the image category is selected for region labeling (of the images it contains) the default entity label, if defined, will be automatically selected as the region label to be applied. For more information please see the image region labeling help topic.
Create/attach Media Store category
If selected this entity label will be associated (linked) to a Media Store category of the same name as the entity label. If the Media Store doesn’t already have a category with the same name as the entity label it will be automatically created.
Sync Media Store category
If the Media Store already contained a category of the same name as the entity label, any images it contains will be automatically synchronized across the entity labels image category.
Note if the Media Store category contains a large number of images they may not immediately appear within the AI project image category as it can take some time to process them. You will receive a notification when the synchronization process has been completed.
Save button
Click the save button to create the entity label. After the entity label has been created it will be added the Entity Label list. Remember, if you happened to have set a preferred sort order for your label it may not be shown in the current page of entity labels. Use the search bar to find it or use the page options to browse the labels.
Cancel button
Closes the add entity label dialog without saving a label.
Importing Entity Labels
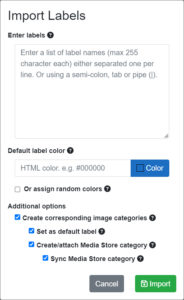
The import entity labels option allows you to enter a number of labels at once or copy and paste them from another source such as Excel. These labels will then be created with the default options set within the dialog.
Enter labels textbox
Each label entered into the ‘Enter labels’ textbox should be on their own separate line or be separated by either a semi-colon (;), tab, or pipe character (|). Each label must not exceed 255 characters. Any duplicates within the list (or that already exist) will be automatically removed during the creation process.
Default label color
Set a preferred color for all the labels by either manually entering a valid web hex color, or by choosing a color via the color selection dialog after clicking the color button to the right. Or alternatively, allow each to be assigned a random color. See the ‘Assign random colors’ options below.
Assign random colors
If selected, each entity label will be assigned a color at random.
Additional options
See the ‘Add individual entity label’ option above for information on these options as they function in the same manner.
Import button
Starts the import process to create the entered entity labels. Any immediate problems detected will be reported via pop-up ‘toast’ message. The finalisation of the entity labels creation process will be reported as a notification since this process may take some time, particularly if a large number of images are being synchronized from the Media Store.
Cancel button
Closes the import dialog without actioning any import process.
Edit an entity label
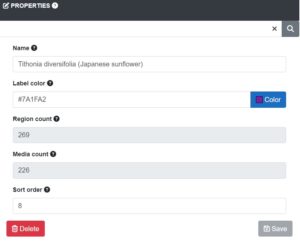
To edit an existing label select it by clicking anywhere on the label item row. This will load the entity for editing within the entity properties on the right of the interface. After making changes to the entity label text or properties click the save button to save the changes.
Deleting an entity label
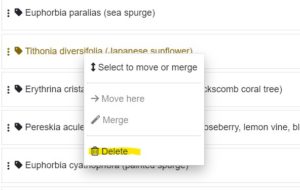
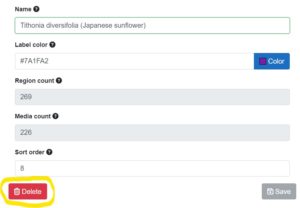
There are two ways in which to delete an entity label. Either select an entity label and click the delete button shown on the right, where the label properties are shown. Or right click on the entity label, within the label list, to be deleted and select the ‘Delete’ option from the context popup menu.
Using either delete method will trigger a confirmation dialog prior to its deletion.
Paging
Allows you to select the number of entity labels to list at a time and to move through pages of labels by clicking on the page numbers.
Sort order – drag and drop
You can drag and drop entity labels to new sort positions. To initiate the drag and drop operation hold down the left mouse on any part of the entity label row and drag it to the desired position with the entity list. If the sort position is beyond the current page you can use the select and paste method – see below for details.
Sort order – select and paste
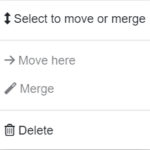
If the desired sort order is beyond the current page size you can use right click context popup menu to select the ‘Select to move or merge’ option, then page to the desired location and again use the context menu option ‘Move here’.
Merge entity labels
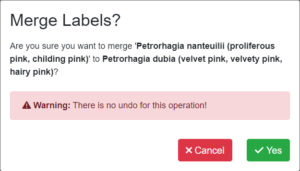
There may be instances where you wish to merge two entity labels (e.g., the collapse of two species into one). To do this use the right click context popup menu to use the ‘Select to move or merge’ option. Next, select the entity label you wish to merge with via the context popup menu ‘Merge’ option. A confirmation dialog will ask if you wish to proceed. Once the merge has been completed all image regions labeled with the selected label will become the label of the destination label.
Searching entity labels
If you have a large list of entity labels you can search for labels using the search bar. Simply type in the name or partial name of the label and click the search button. Any matching labels will then be listed. See ‘Search Options’ help for additional information on this topic.
