
There are a few different ways to add images to your AI project.
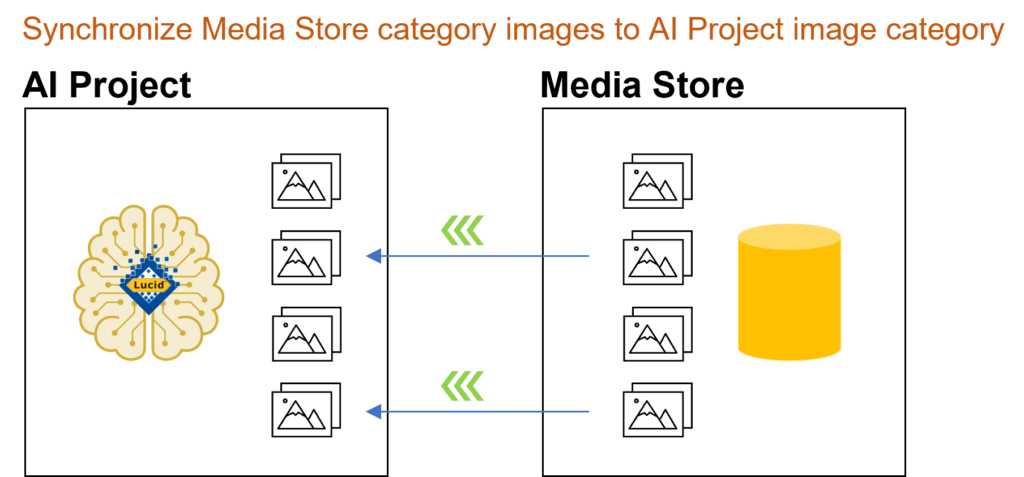
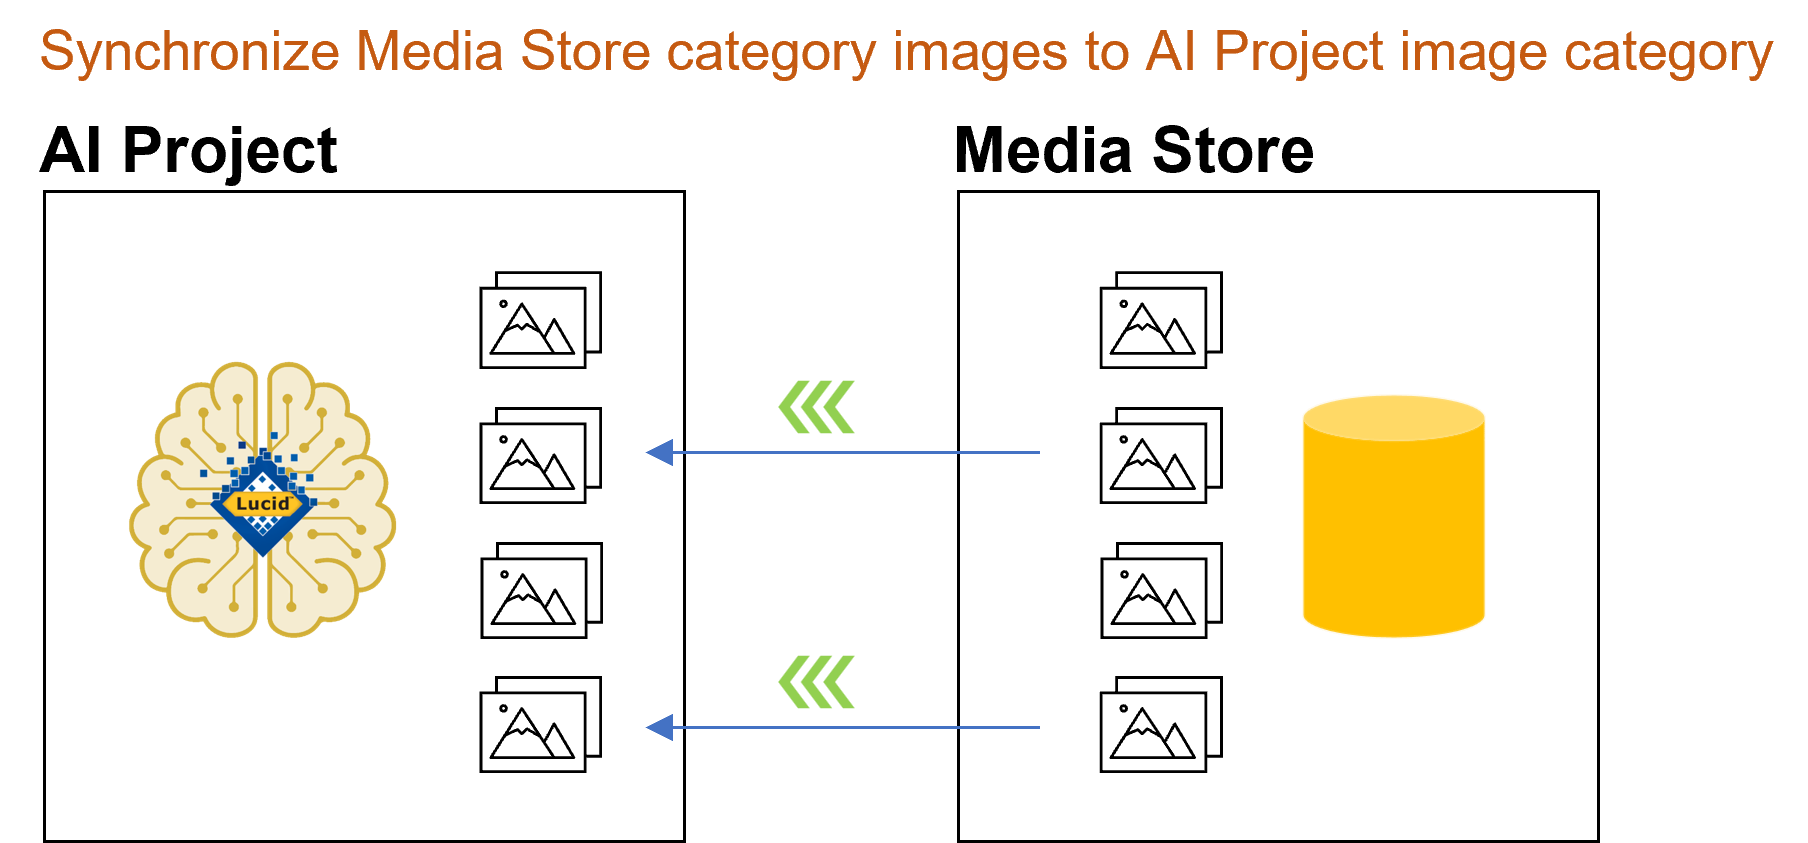
- When creating an Entity label you can elect to have it linked to an existing Media Store category folder and automatically synchronize it across to your project into the linked AI project image category.
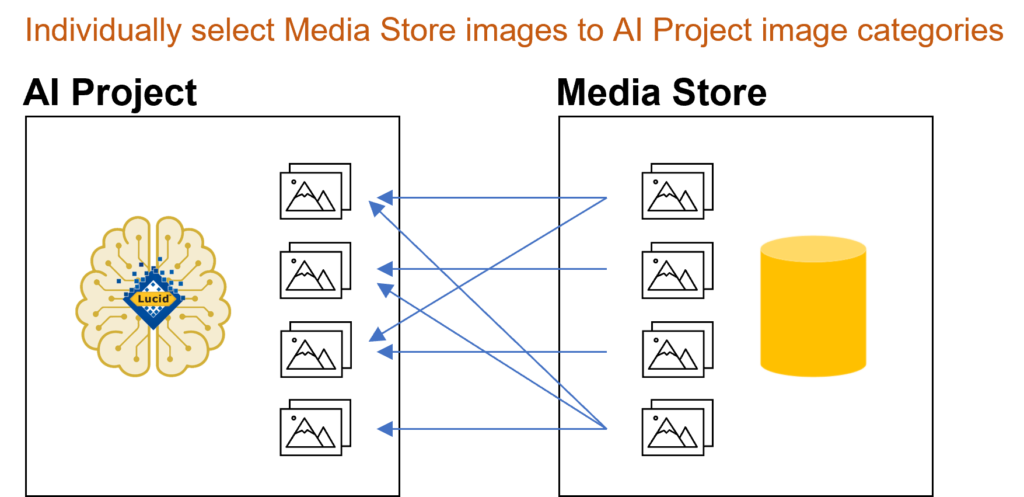
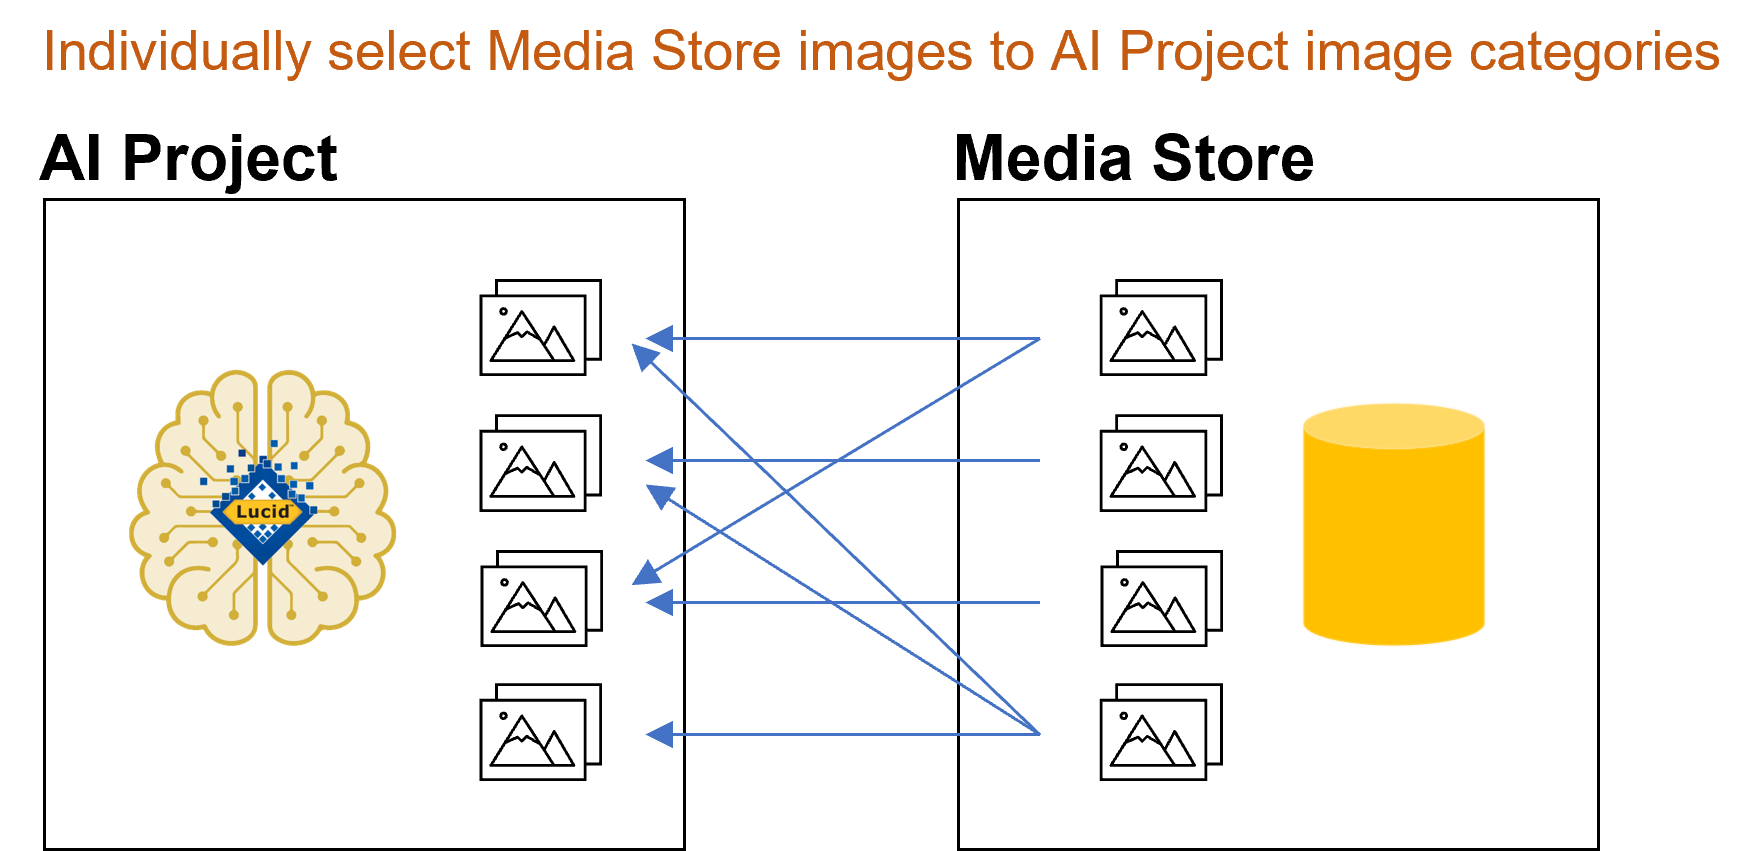
Lucid AI synchronizing Media Store category images to AI project image categories - Manually selecting images from the Media Store, via the Manage Images option, by selecting an existing AI Project image category, then selecting images from one or more of the attached Media Store categories.
Lucid AI Manually selecting images from Media Store categories into AI project image categories - Uploading images from your device, via the Manage Images option, by selecting an existing AI project image category, then electing to upload new images from your device.

Lucid AI Uploading new images to an AI project image category
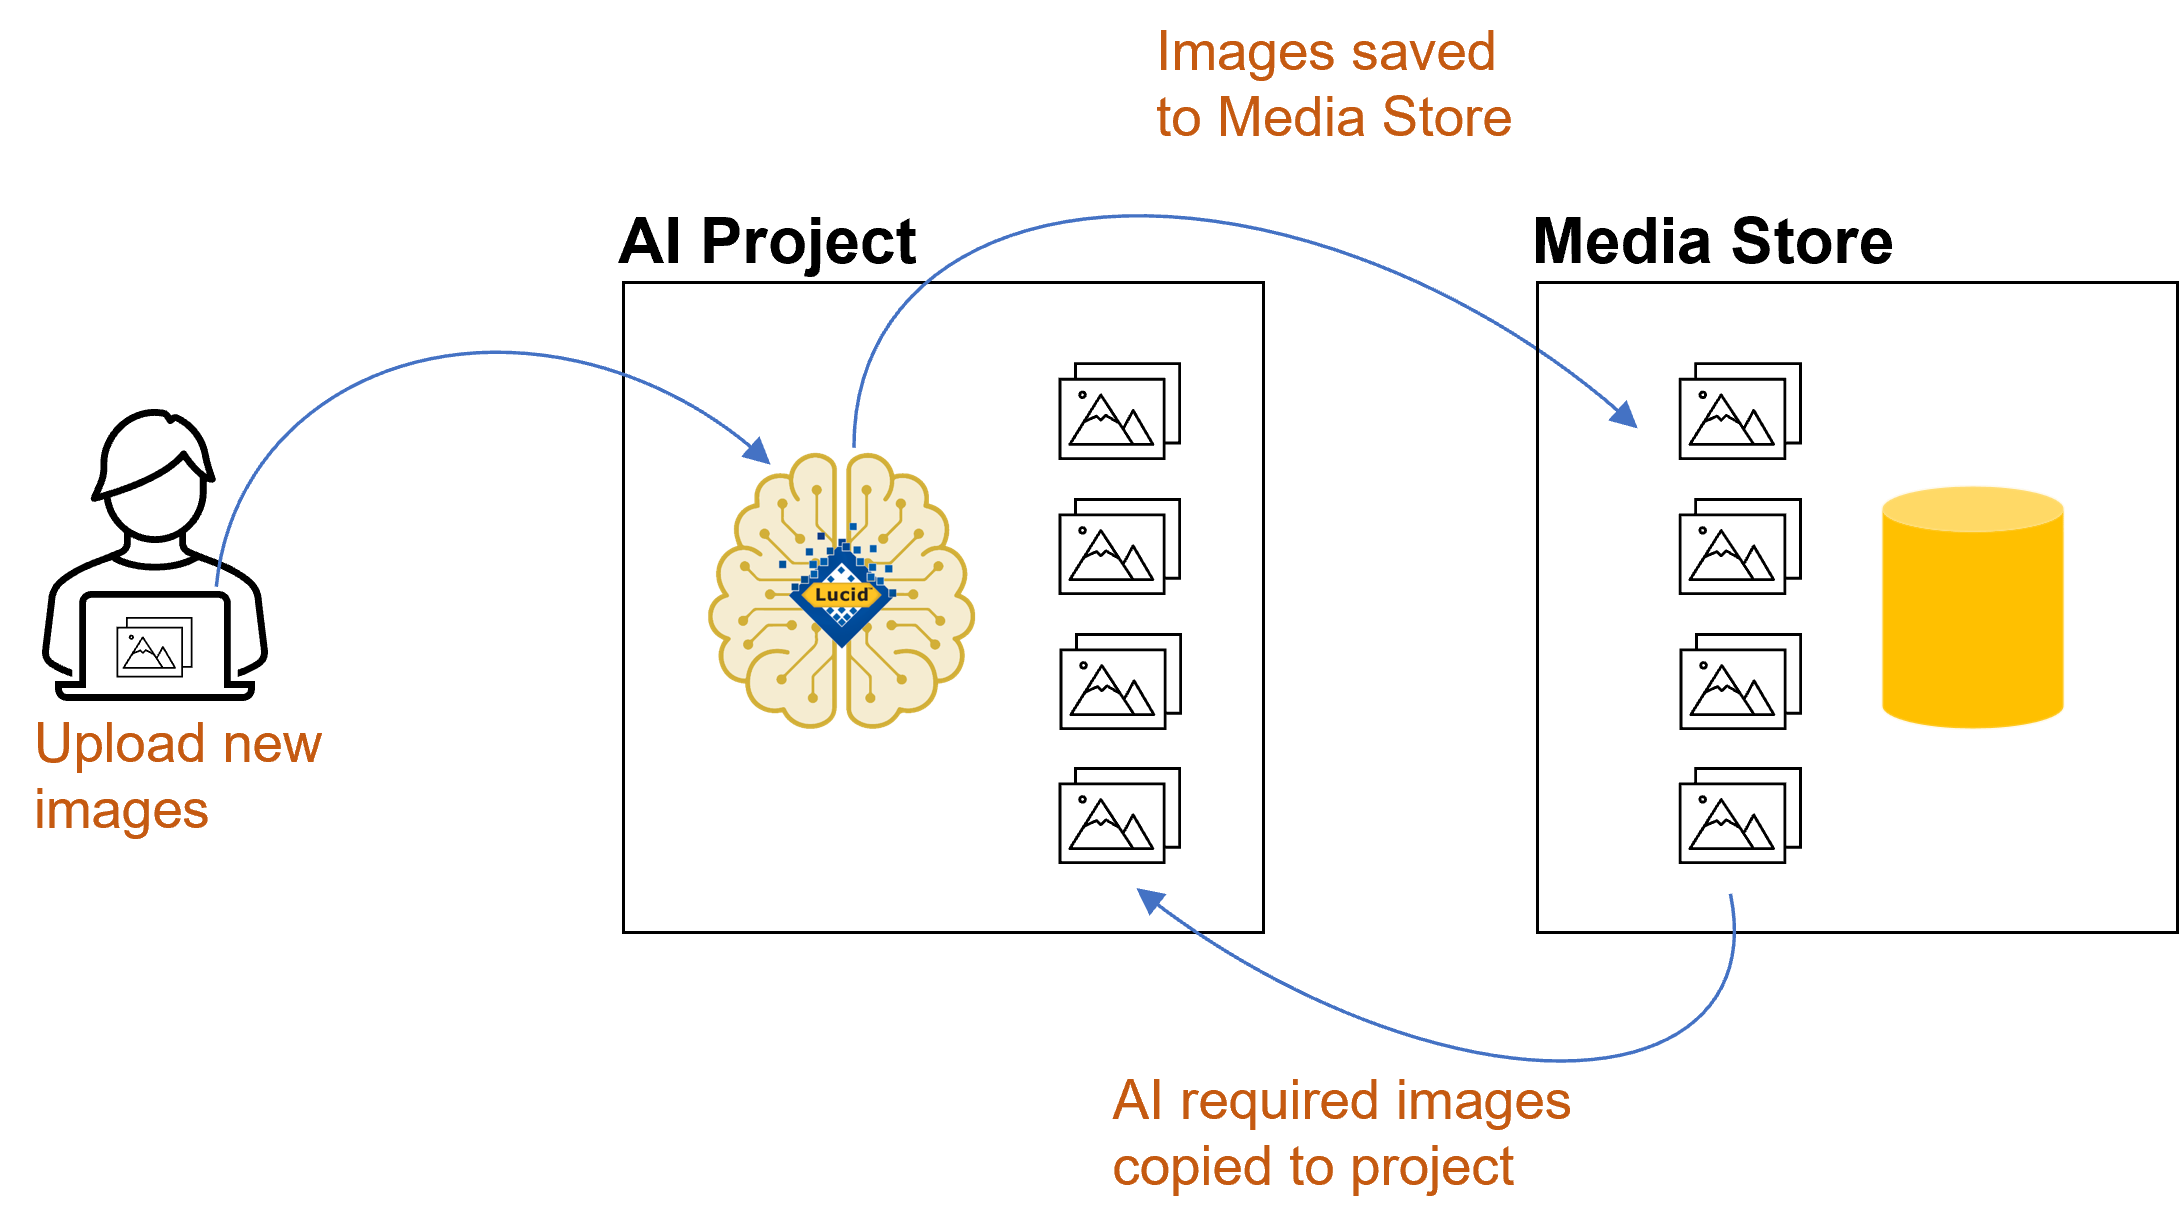
Note as shown above any images uploaded from your device are actually first uploaded to your Media Store and then added to the AI project image category.

Adding images from your Media Store
Images already held in your Media Store can be added to your AI project. This can be done automatically or manually.
Automatic synchronization of Media Store images
When creating your Entity labels you can create a corresponding Image Category folder or link to an existing Image Category folder. This Image Category folder can then also be linked to a Media Store category. This Media Store linkage allows the one-way synchronization of all images held in the Media Store category across to your AI projects Image Category.
Manually adding images from the Media Store
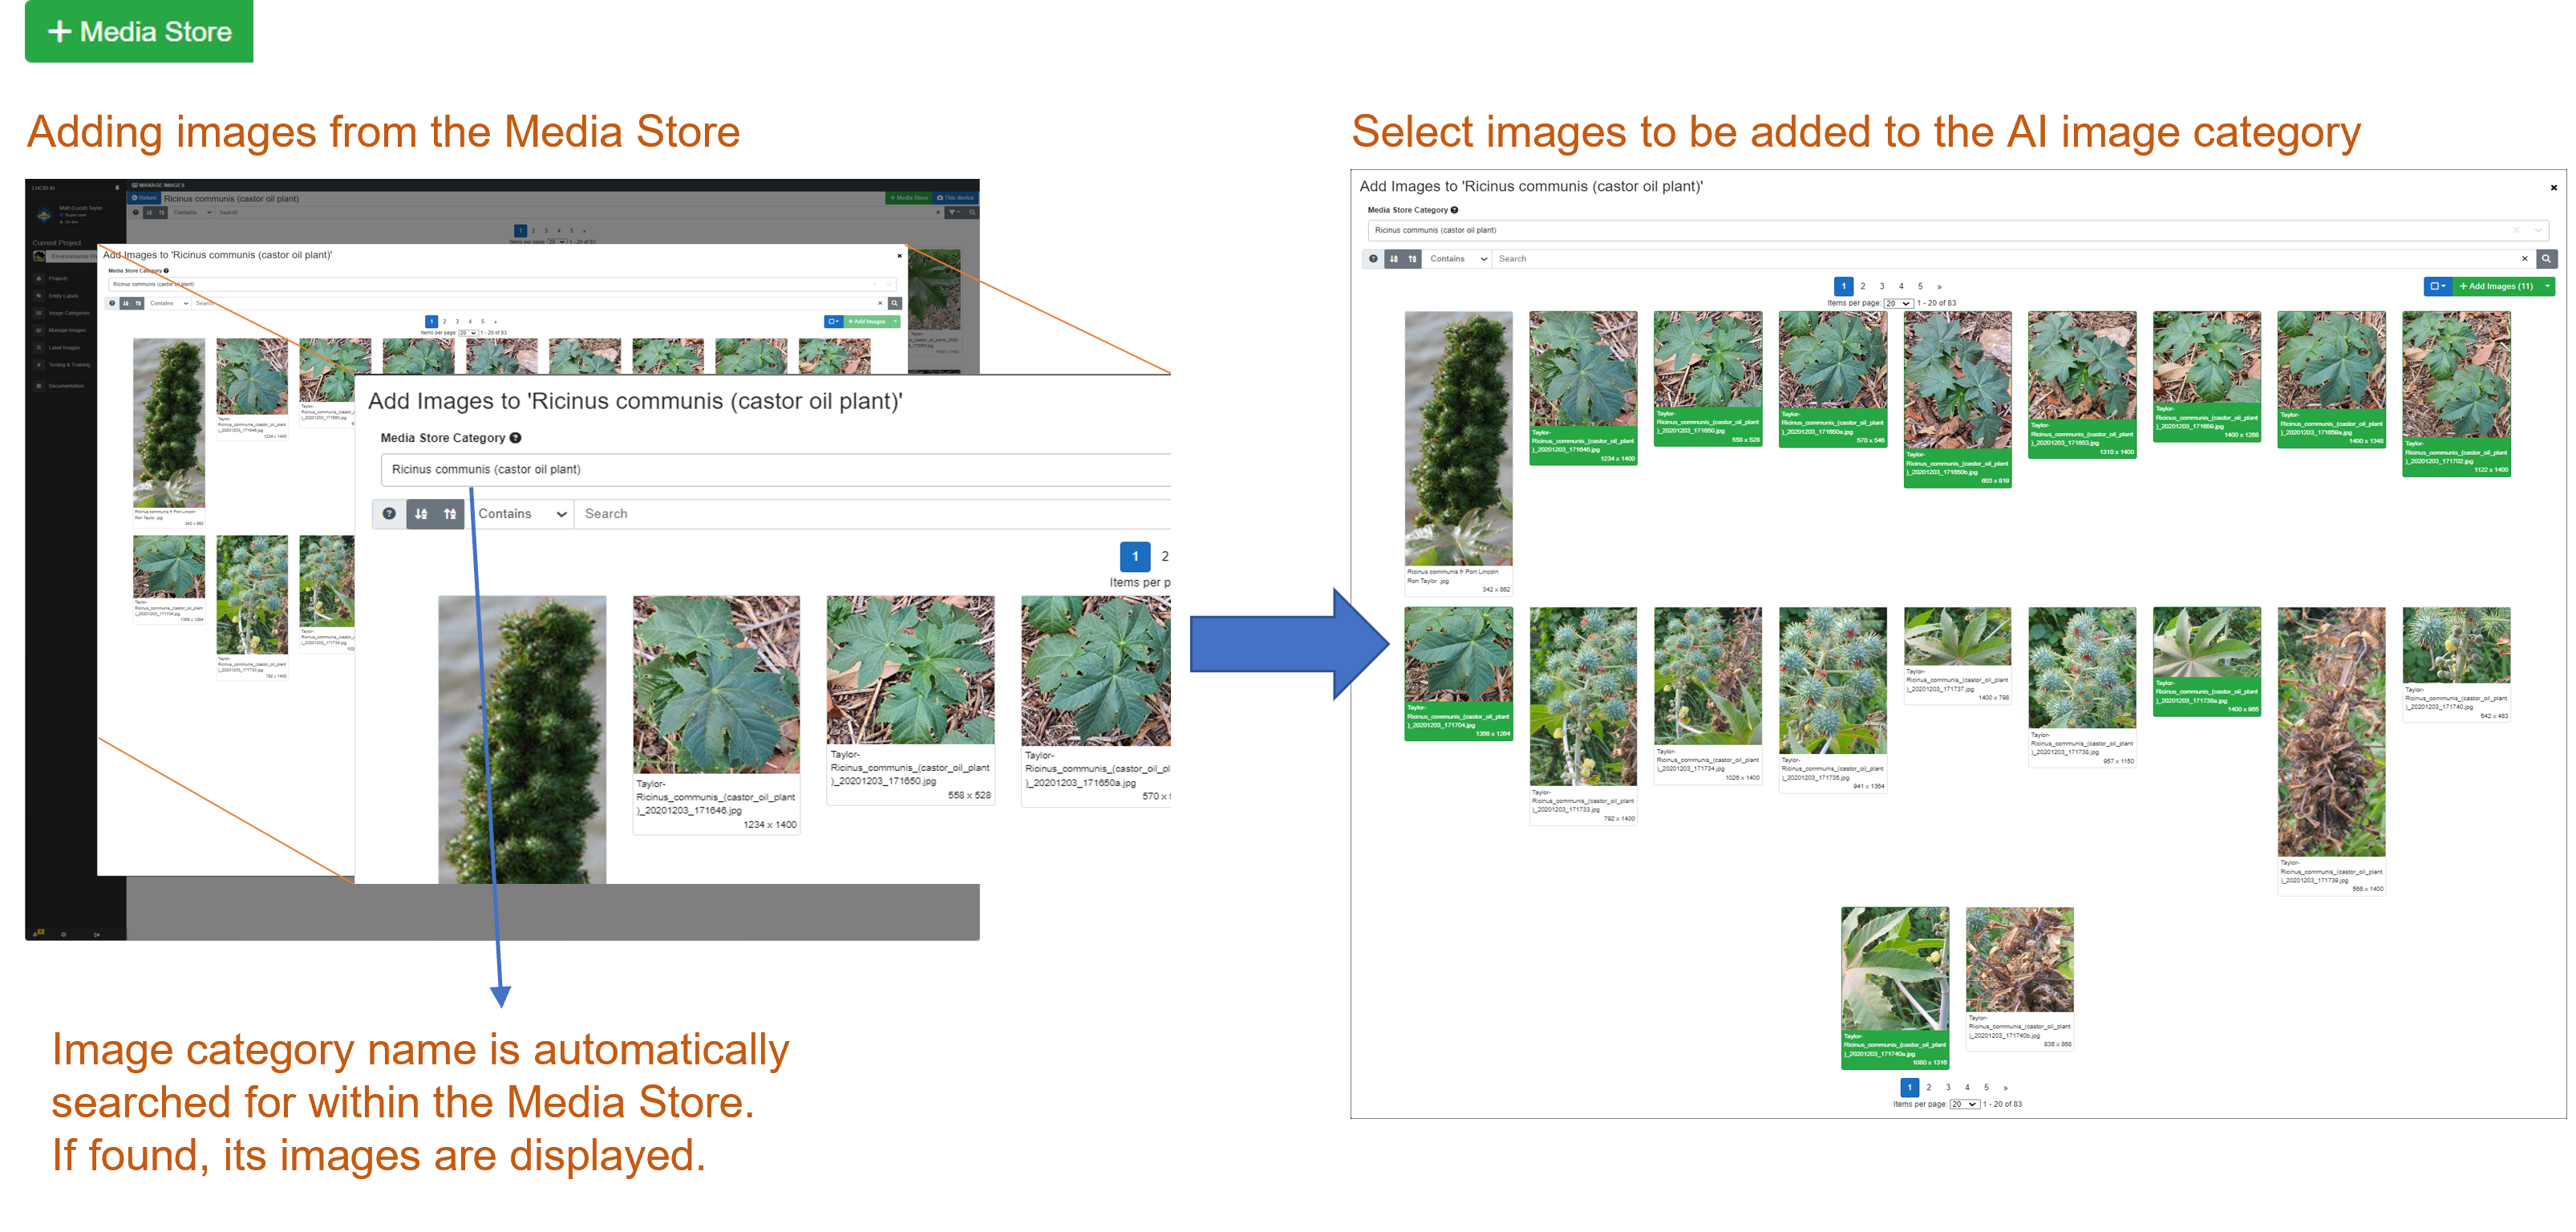
Images held in different Media Store category folders can be added to your AI Project Image categories. To do this first select the ‘Manage Images’ option in the left main menu. Select an image category and then select the green ‘+ Media Store’ button located at the top right of the screen. This will load an Add Images dialog. Within the dialog a search Media Store Category text box will be shown along with a search bars and images available further below. By default, the AI project image category name will be used to search for a corresponding Media Store category. If found, the images available in the Media Store will be shown below the search bar. If you wish to search for another Media Store category delete the current search text and start typing the name of the Media Store category you are interested in. A minimum of two characters need to be typed, this will trigger a lookup search for any partially matching Media Store categories. If a new Media Store category is selected any images it contains will be shown ready for selection.
Selecting images from the Media Store
As described above once the Media Store category has been selected the images it contains will be shown below. You can search and filter for particular images of interest – see the search bar help topic for more information on how to do this.
Individual images can be selected by clicking on the desired image. It will show as selected by being highlighted in green. You can continue to select images even if you move between pages of images if the Media Store category holds more than twenty (20) images. As images are selected or deselected the ‘Add images button selection count will be updated.
After selecting images, you can add them into the AI image category by pressing the ‘+ Add Images’ button.
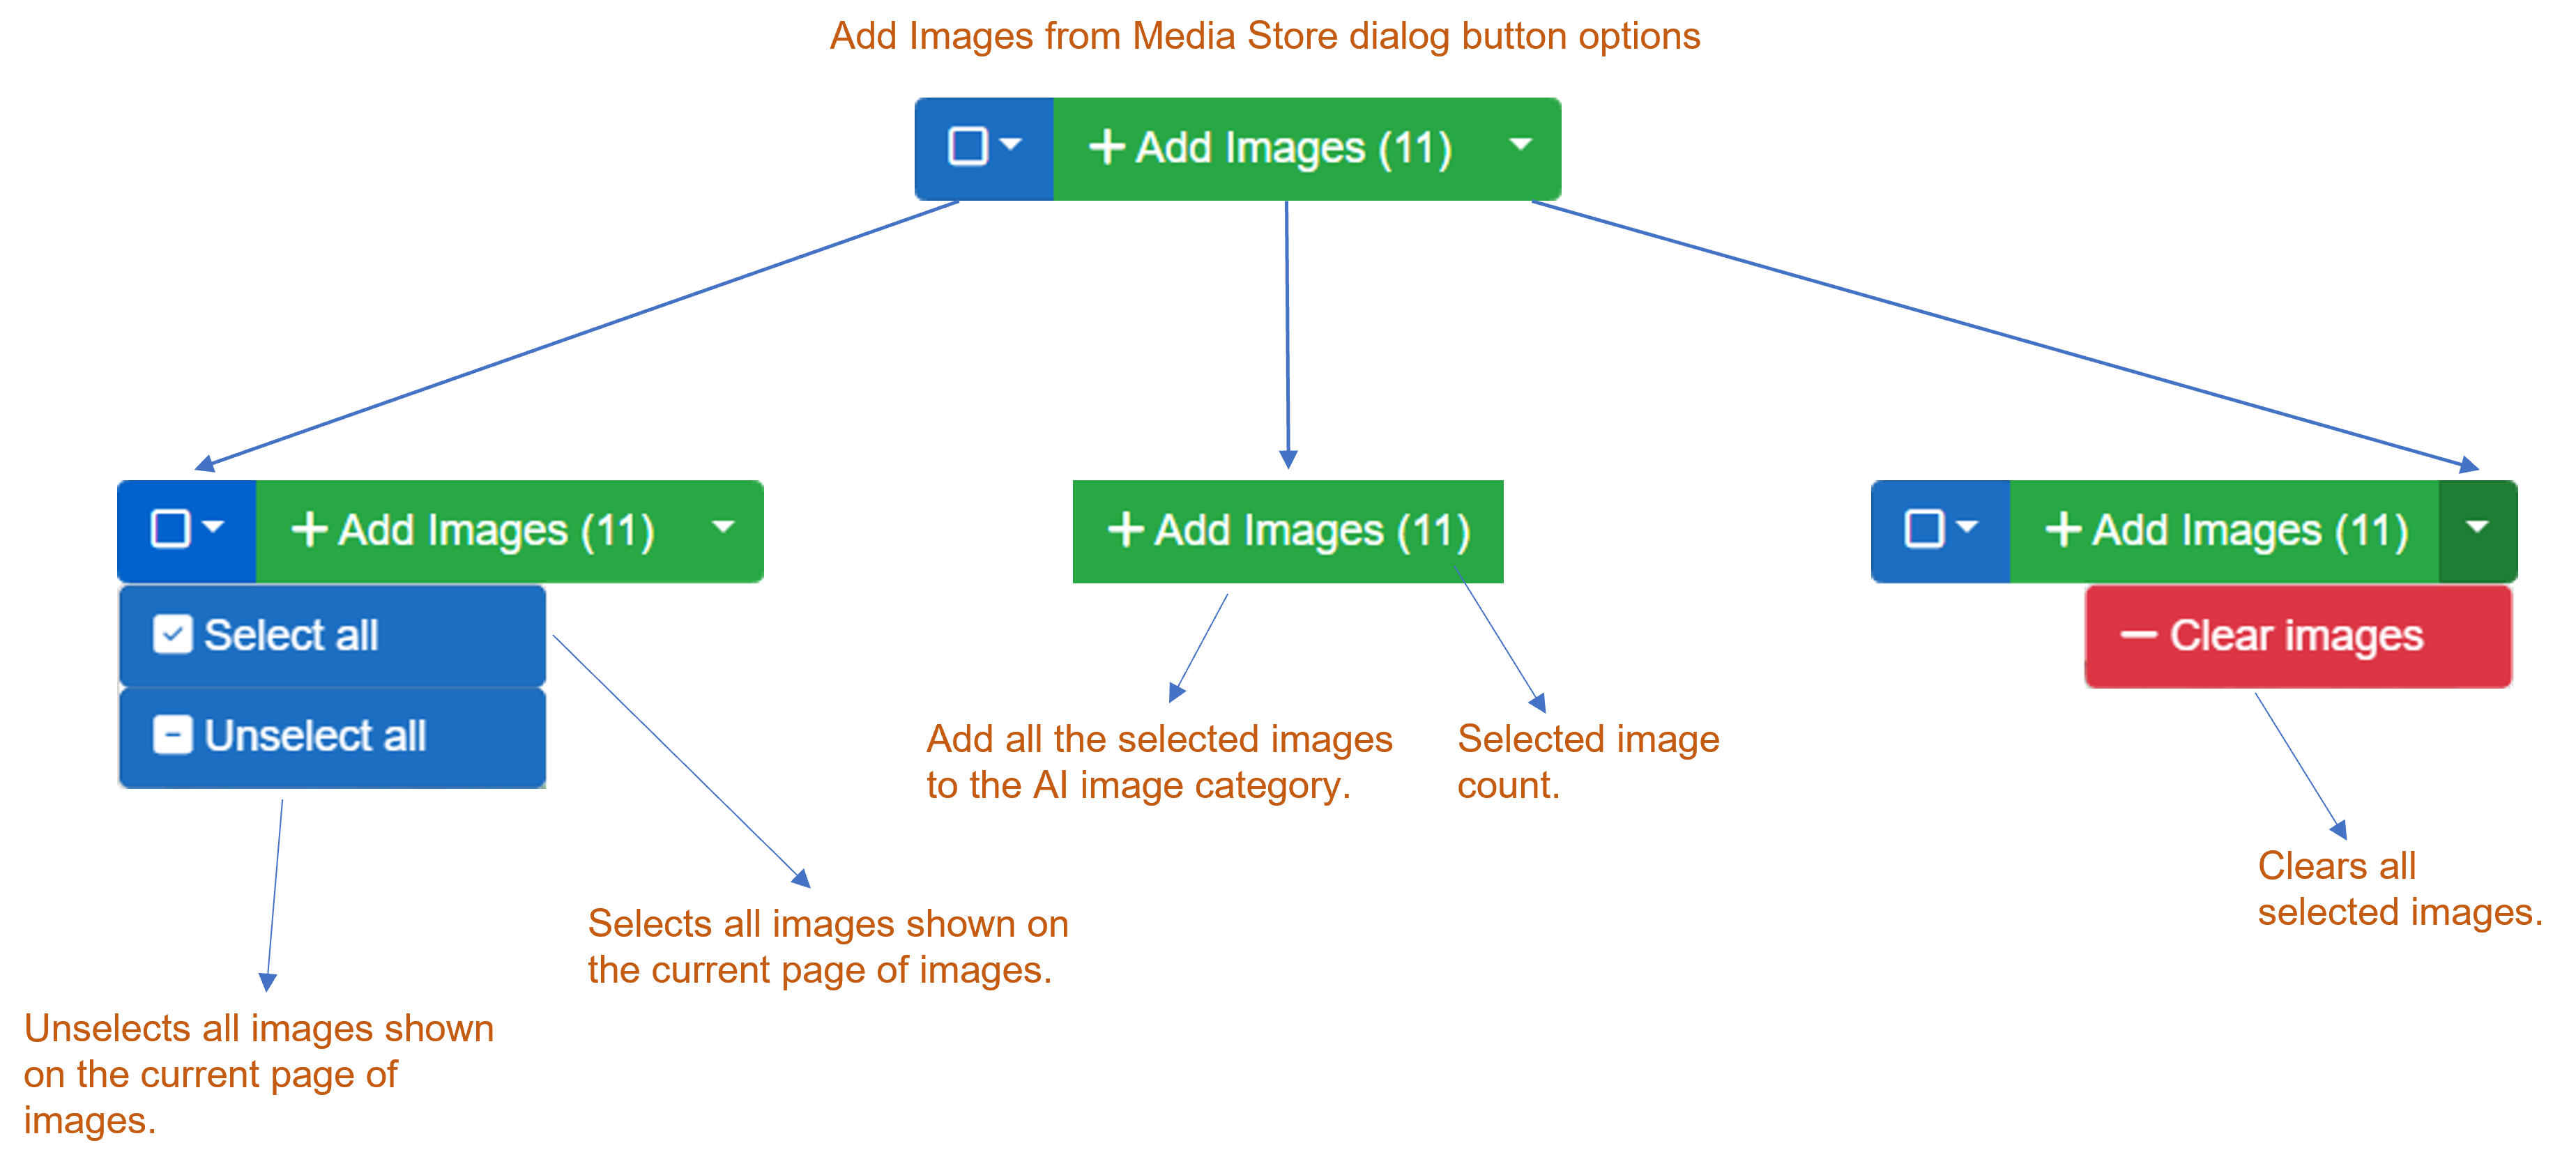
To select or unselect all images within the current page of Media Store images you can use the blue select dropdown options button left of the ‘+ Add Images’.
You can also clear all selected images waiting to be added please selecting the dropdown button on the right of the ‘+ Add Images’ button and selecting the Clear images option.
Uploading images from your device
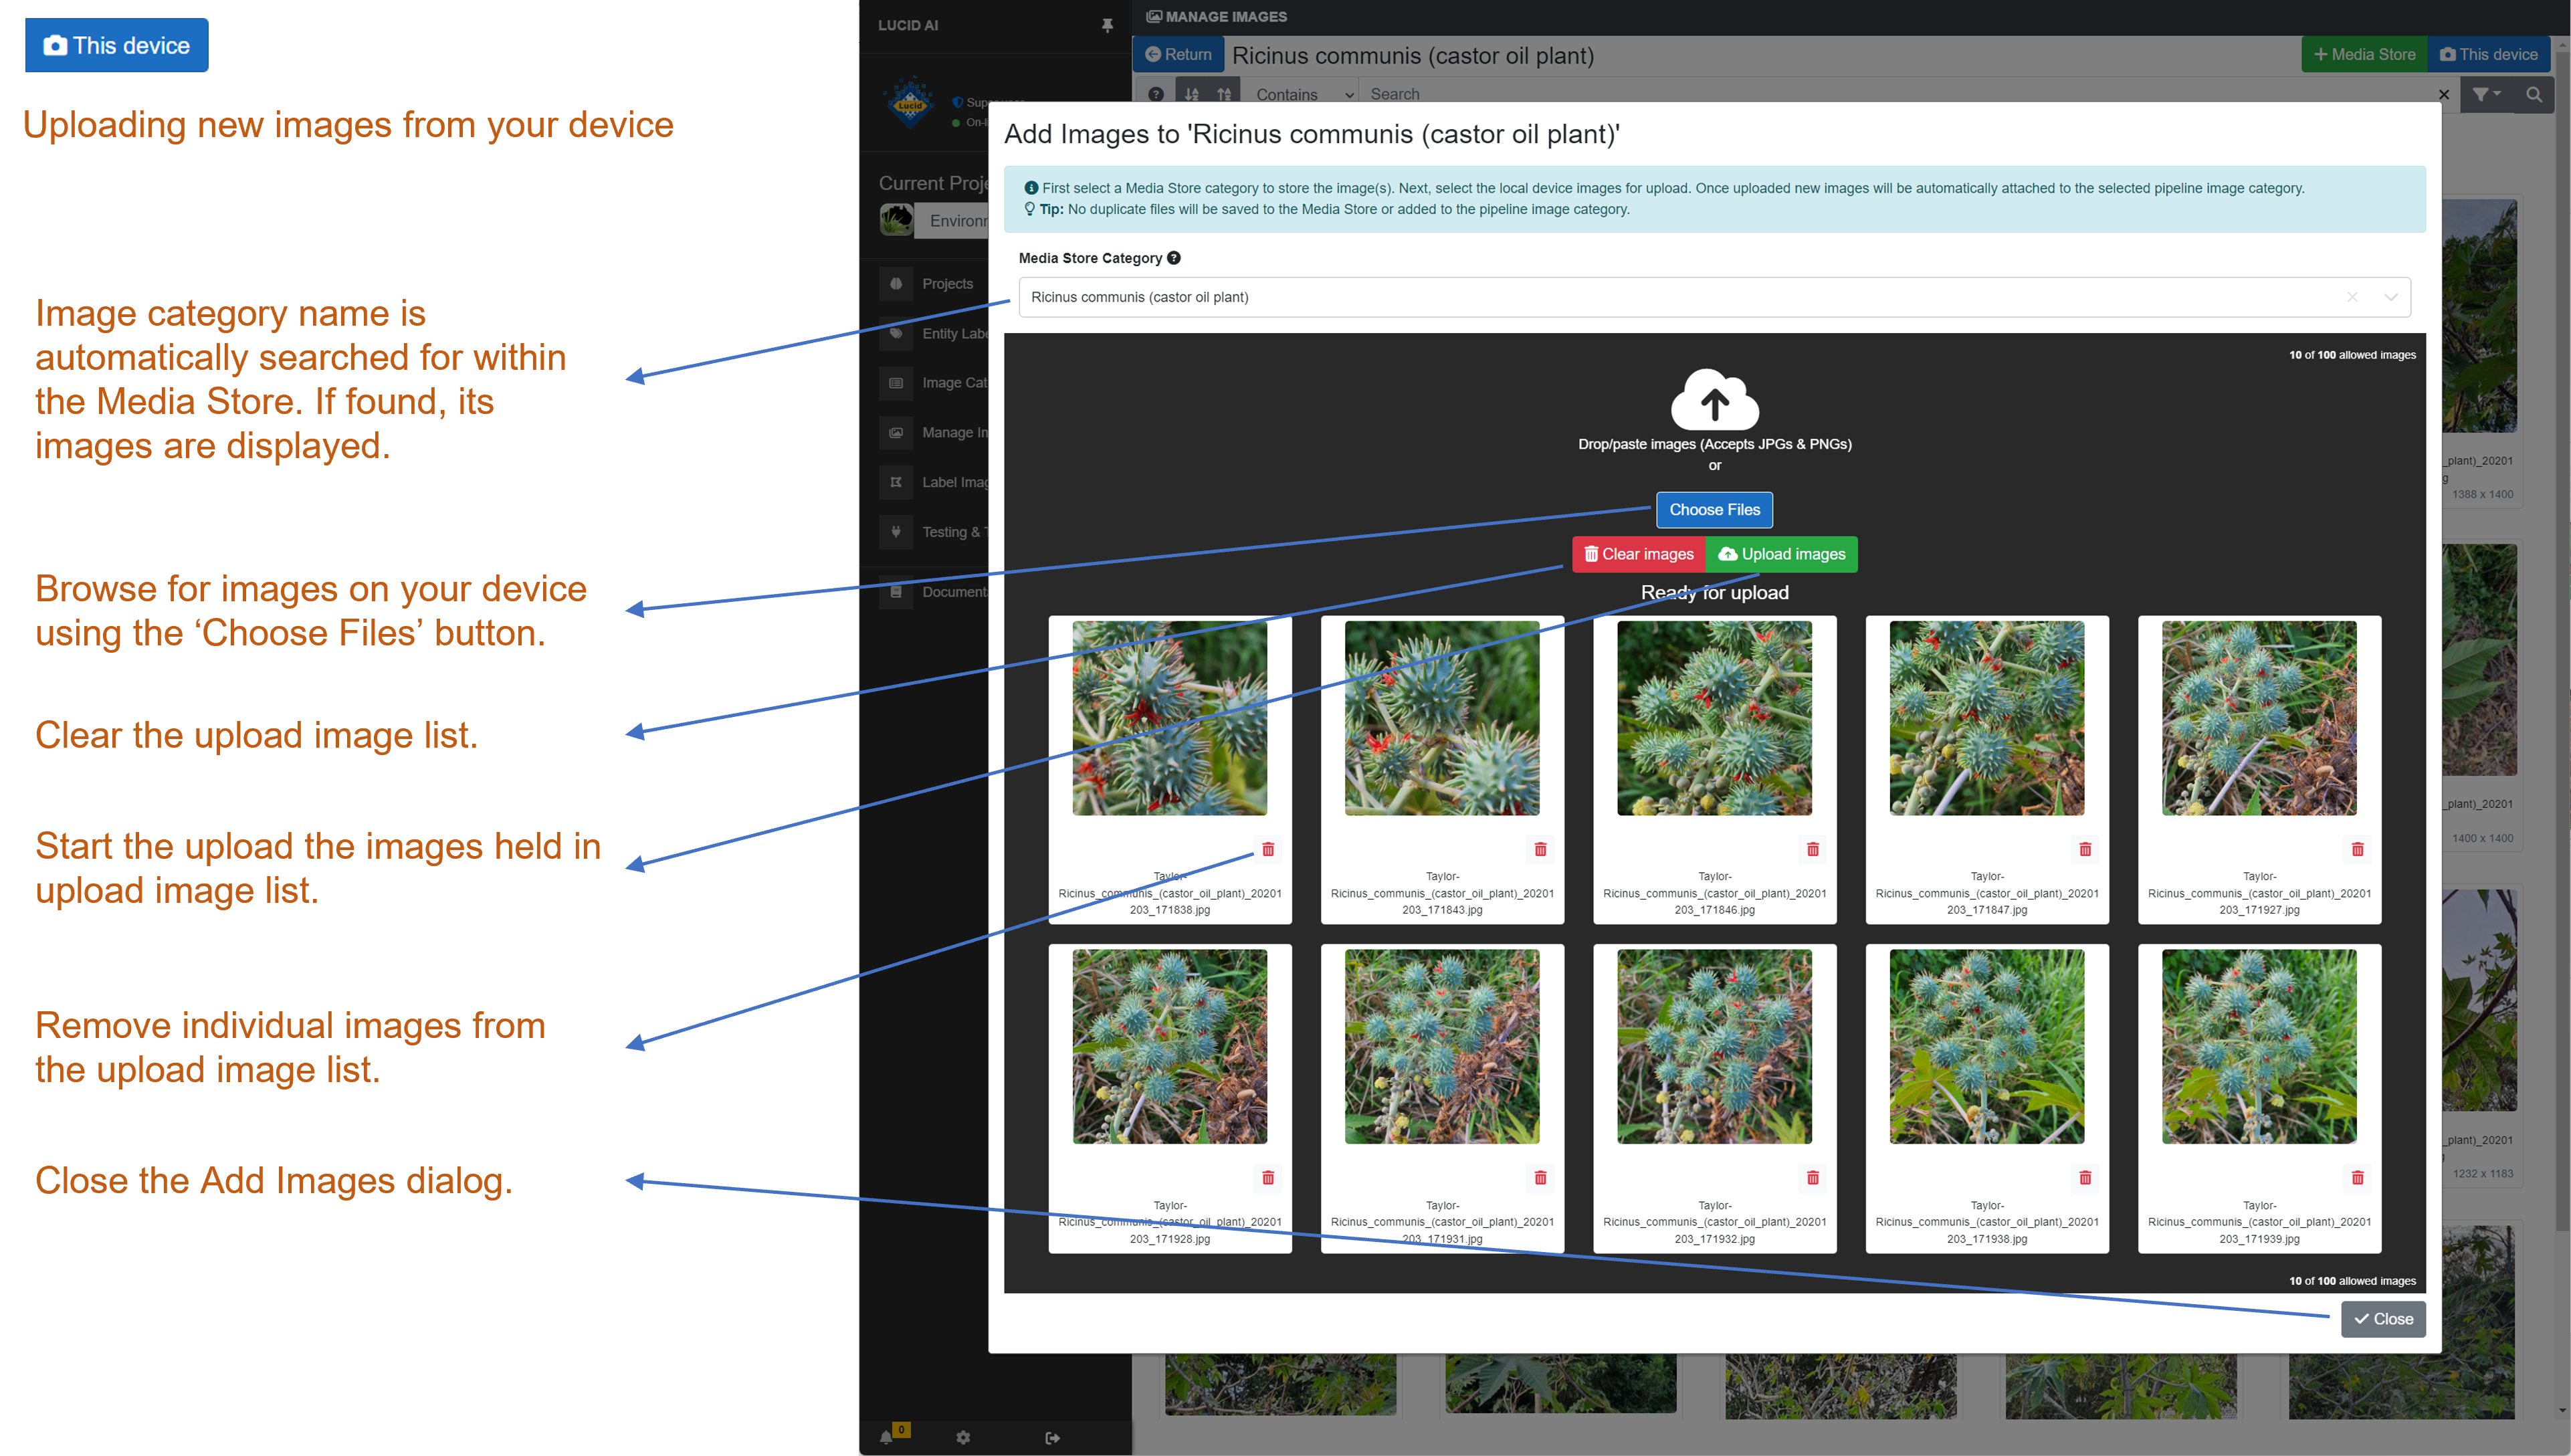
If you have new images, not already deposited into the Media Store, then you can upload these via the ‘Manage Image’ option and selecting the image category you want the image added. Next, select the blue ‘This device’ button located top right of the screen. This will open the add images dialog. Before any new images can be uploaded you first must select the Media Store category you wish to lodge them. By default, the select AI Project Image category name will be used to search for a corresponding Media Store category, if one is not found or you wish to use a different Media Store category then you can search for a category. Once a Media Store category has been selected you can add images found on your local device via the blue ‘Choose Files’ button. You can select up to 100 images at time for upload. Additional images can be added after each upload session has completed.
After the images on the local device have been selected, they will be validated (checked for file type and size etc) and displayed in the image upload list. If necessary, you can remove any unwanted images from the upload list by clicking on the small red trash can icon located at the bottom right of the image. Once satisfied with the upload image list click on the green ‘Upload images’ button. As each image is successfully uploaded a green tick icon will be overlayed on the image. Any images failing to upload will have a red cross overlayed.

