At the heart of creating your AI is image annotation. This is the process of defining your images with one or more entity labels. Essentially image annotation is like teaching a child what it’s looking at.
An ideal image for AI training would only show the entity (subject) we are wanting the AI to recognize, not contain superfluous background or other undesired entities. However, this is rarely the case. The image annotation tool within Lucid AI helps you get the most out of your images.
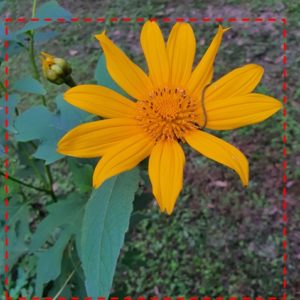
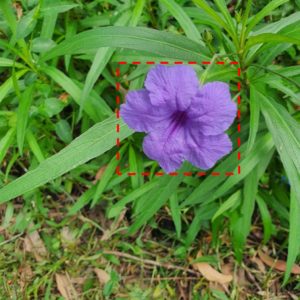
It allows you to quickly and easily define label regions. A label region can either be a whole image or part of an image. The Lucid AI image annotation tool allows you to define multiple regions for one or more entity labels, either as a rectangle or polygon. In many cases an image might provide the opportunity to create several regions.
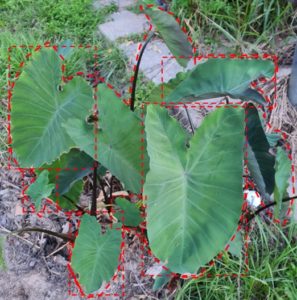
As shown in the example below, an image can be annotated with several entity labels, either of the same type or mixed labels. Label regions can also overlap.
To start annotating your images select the label images menu option and select an image category. Images contained within the category will be loaded ready for selection. Click one of category thumbnail images to begin. The larger version of the image will be loaded ready for labels to be applied.
Available entity labels will be loaded within the labels panel on the right. If your image category and entity label names match the corresponding label will be automatically selected for you. Otherwise, an entity label will need to be selected.
To begin labelling set the preferred zoom level of the image (if needed) and right click at a point on the image you would like to start a region. A pop-up context menu will appear. Select either a rectangle or polygon label type. Complete the desired region, excluding as much of the unwanted image data as possible such as background and other species.
Once a region has been created it can be adjusted via the round handles at the corners of the region. These allow the region size and shape to be changed. A region can also be moved about on the image, and its order within the stack of regions changed, so you can access any regions that may be behind another.
Once finished annotating your image click the save button located on the image toolbar (or press ‘ctrl + s’ keyboard combination). The return button will take you back to the pool of category images for selection of the next image to annotate (or press ‘ctrl + r’ keyboard combination).
Tip
If your project was created with automatic synchronization against an existing media store library, all the images by default will have had a whole image region created.
Zoom
Use the zoom in and out options to better view the selected image. The mouse wheel can also be used to zoom (in or out) the image while the mouse cursor is within the bounds of the image.
Region types
Two region types are supported. A rectangle and polygon region. Before a region can be created you must select an entity label the region is representing. See ‘Selecting entity labels’ further below for more information on this.
Rectangle region
The rectangle region type is the fastest to apply and should be used where it excludes as much unwanted background image data as possible.
Applying the rectangle region can be done in one of two ways.
Option 1. Select the rectangle region type from the toolbar. To start a rectangle region, hold down the Ctrl key and click within the bounds of the image to start the region from the position clicked within the image. There is no need to continue to hold down the Ctrl key once the region has started. To create another region, Ctrl click again to start the region drawing process again.
Option 2. Right click within the image and select the rectangle region option from the pop-up menu. This option will immediately start the rectangle region from the position the right click took place.
Polygon region
The polygon region type allows you to more precisely define a region around a desired area of the image. Applying the polygon region can be done in one of two ways.
Option 1. Select the polygon region type from the toolbar. To start the polygon region, hold down the Ctrl key and click within the bounds of the image to start. The start position is the location on the image where first clicked with the Ctrl key. There is no need to continue holding down the Ctrl key once the polygon drawing process has started.
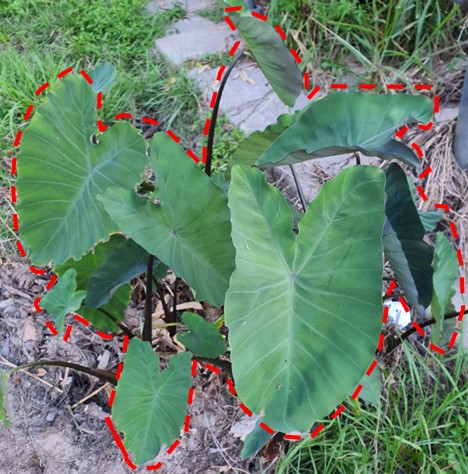
Option 2. Right click the position on the image where the polygon is to be started, then pick from the context pop-up menu ‘Create polygon region’.
Creating the polygon coordinates (points)
After starting the polygon using either option 1 or 2, the next setup is to define the coordinates (or points) of the polygon. Move the mouse to the next position from the starting coordinate and left click the mouse to add a new point. Continue this process until you have defined the polygon around the desired image region. To complete the polygon (join the last point to the first point) right click and from the pop-up context menu select the ‘Complete polygon’ option.
Tip
When creating the polygon there is no need to follow precisely along the edge of desired area as doing so can be very time consuming. The main goal is to reduce the amount of unwanted data. Eliminating it entirely would be too time consuming and unnecessary.
Ordering regions
When creating multiple regions on an image it is possible to have one region completely cover another. When this is the case the only way to access the covered region(s) (without deleting the region above) is to change the z-order of the covering region to below the region you are trying to access. You can change a regions z-order, downward or upward or to the bottom or top, by selecting it, then right click to access the ordering options on the pop-up context menu.
Note
The ordering of regions has no impact on the training data is only used to gain access to covered regions for editing or deleting.
Deleting a region
Select the region that is to be deleted, then press the delete key on your keyboard or the delete button on the toolbar. Alternatively, the right click pop-up context menu can also be used to delete the selected region.
Warning
There is no undo when deleting a region once the regions have been saved. If you’ve made a mistake deleting a region don’t save the regions and return to the image selection screen and re-pick the image.
Delete all regions
To remove all regions on an image, use the delete all regions option found on the toolbar. All current regions for the image will then be deleted.
Warning
There is no undo when deleting all regions.
Whole image region
To apply a whole image region quickly use the whole image region option found on the toolbar. A rectangle region will be automatically created covering the entire image using the currently selected entity label.
Find area of interest (Experimental)
This function is designed to find the most significant area of the image and automatically apply a region label to it. The current version of this feature is still experimental and has conservative settings. For example, this feature is not really designed for ‘busy’ images with lots of background features. In these cases, almost all the image would still be annotated. Rather this feature is designed for images with large out of focus areas or those where the subject has been photographed on a standardized surface. E.g. Seeds photographed on a piece of paper etc.
In the future this feature may be released with several options to determine how conservative it in looking for the area of interest.
Saving regions
Use the save button on the toolbar to save any new or changed regions on the image or use the keyboard shortcut ‘ctrl + s’. Any changes to regions will be lost if the large image view is closed back to the image selection screen and another image selected.
Selecting entity labels
An image region is a defined area of the image for a given entity label. There are no image regions without an entity label association. All available entity labels are listed on the right of the large image view. By default, if the image category name matches an entity label the corresponding entity label will be automatically selected. Otherwise, an entity label needs to be selected before an image region can be annotated on the image. Entity labels can be searched via the search toolbar above them. See ‘Search Options’ help topic for more information on this.
Tip
When automatic selection of the entity label occurs, it is bookmarked at the top of the entity list for easy reselection, if the entity label is changed.
