Multilingual support has been added to the Lucid Builder and Player applications, allowing the key author to customise the language string used within the Builder and Player user interface. Facilities to edit language resource files for both the Builder and Player have been added to the Lucid Builder.
Overview
Basic language files are included in the Builder and Player. These basic language files cannot be edited or customised, but can be used to derive new language files. These files are called “LucidBuilder_language.properties”, and “LucidPlayer_language.properties” respectively.
Customised language files are stored in a folder called ‘resource’ located in the Lucid workspace folder (typically your user profile folder on windows platforms. E.g., C:\users\<your username>\Lucid).
Reminder: The Workspace folder is defined the first time the Builder is run.
Lucid language resources are defined in text files, containing text of the format “property=value”, Thus, the term “accept_button=Accept”, consists of a property (accept_button), which is a string defining where the value is used with the application, and a value (Accept), which is the string value of the resource.
Language files are named using the following syntax:
– “LucidBuilder_language.properties”, with the locale (or language) information (such as a language code and country code) added to the name where appropriate. For instance, if a key developer wants to have a Spanish version of the Lucid Builder – then “LucidBuilder_language_sp.properties” defines a Spanish language resource file for the Lucid Builder. “LucidBuilder_language_sp_SP.properties” defines a Spanish language file, with the country code of Spain (SP) indicating the key is intended for use in Spain. An alternative regional or country code – such as “LucidBuilder_language_sp_EC.properties” indicates an Ecuadorian Spanish version – which is likely to have regional variations from the Spanish version used in Spain.
These Language files are hierarchical in nature, with the hierarchy based on the language or locale. So a series of Japanese language files are shown below
LucidBuilder?_language.properties
LucidBuilder?_language_ja.properties
LucidBuilder?_language_ja_JP.properties
LucidBuilder?_language_ja_JP_variant.properties
The first file in the above hierarchy is the base language file distributed with the Lucid Builder application. Japanese translated strings would be defined in the second file, and region or variant specific translations defined in the lower files. An example of a variant might be a Japanese weed key, where the term weeds is used instead of entities, etc. This allows more flexibility in translating and preparing translations based on region and other variants.
Here is an example Korean language file for the Builder interface.
To install, download the file (120kb) and then copy it to ‘resources’ folder, as describe above. E.g.,
C:\users\<your username>\Lucid\resources\
Once copied, open the Lucid Builder and via the ‘View…Languages’ menu option select the ‘Korean (CS1)’ language option to change the Builder language to Korean.
Please note this language file was kindly provided by Lucid user Soowon Cho, Chungbuk National University. Please check that this file is suitable for your needs.
Editing Language
Creating or editing language files from within the Builder can be done using the Tools…Edit Builder Language or Edit Player Language menu items.
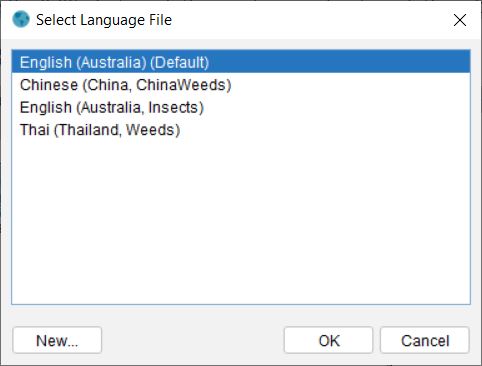
Selecting either of these menu items will open a dialog showing the language files (including the base language file) present on the system.

A new language file can be created using the New button, and then selecting the desired language locale and entering an optional variant on the sub dialog. Selecting a language file from the list will open the Edit Language dialog.
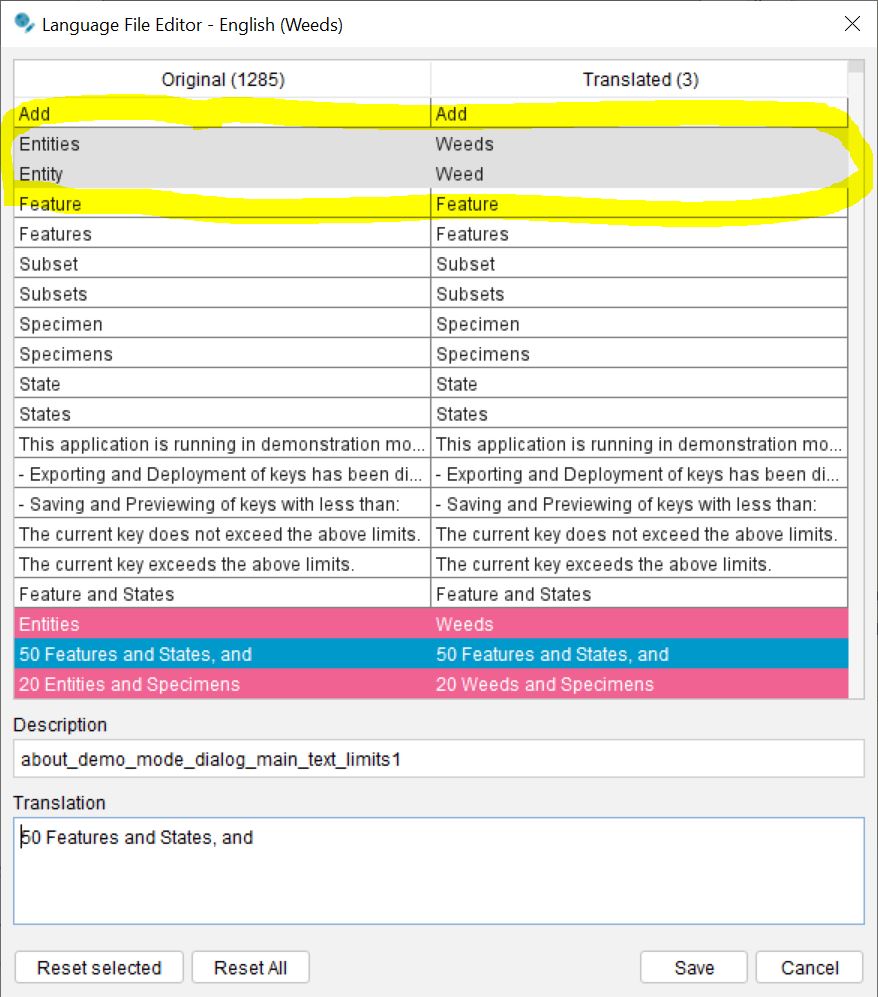
The Edit Language dialog simplifies the language file editing process by displaying the original and translated string for each language string. The original language strings are taken from the bundled default language files, the translated string is the string present in the selected language file. The dialog also shows a description of the currently selected string or where in the application the string is used.
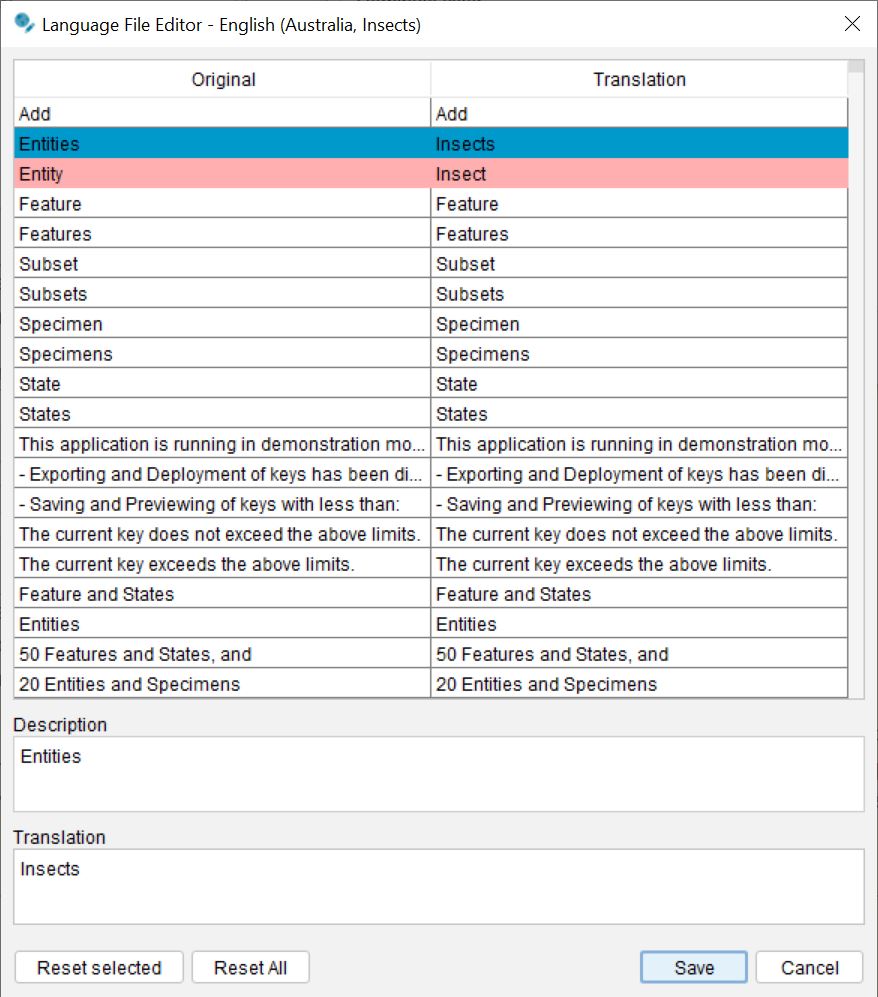
Additionally the dialog will also show the translated language strings from language files higher in the hierarchy. To easily differentiate between translations in the current file, and those in higher files, the rows in the table are colour coded. Strings translated in the current file are highlighted with a pink background. Strings translated in a higher language file are highlighted with a grey background.
Alternatively language files may be edited using a text editor or other text manipulation software, the language files must be named using the conventions described above and be located in the resource folder, also as described above.
Using Language Files
Alternative interface languages may be selected in the Builder by using the Language menu item located in the View menu, this will open the Select Language dialog displaying the available language files for use in the Builder.
The Select Language dialog displays a list of all Builder language files available, this includes the bundled base language file containing untranslated strings, and any translated language files located in the resource folder. Selecting a translated language file will update the interface of the Builder with the translated strings present in the selected file. Any interface strings not present in the selected file will be loaded from a file higher in the locale hierarchy, as described above.
Likewise, the interface language may be selected in the Player by using the Language menu item in the View menu. The Select Language dialog in the Player will show the base language file, and any translated Player specific language files located in the resource folder.
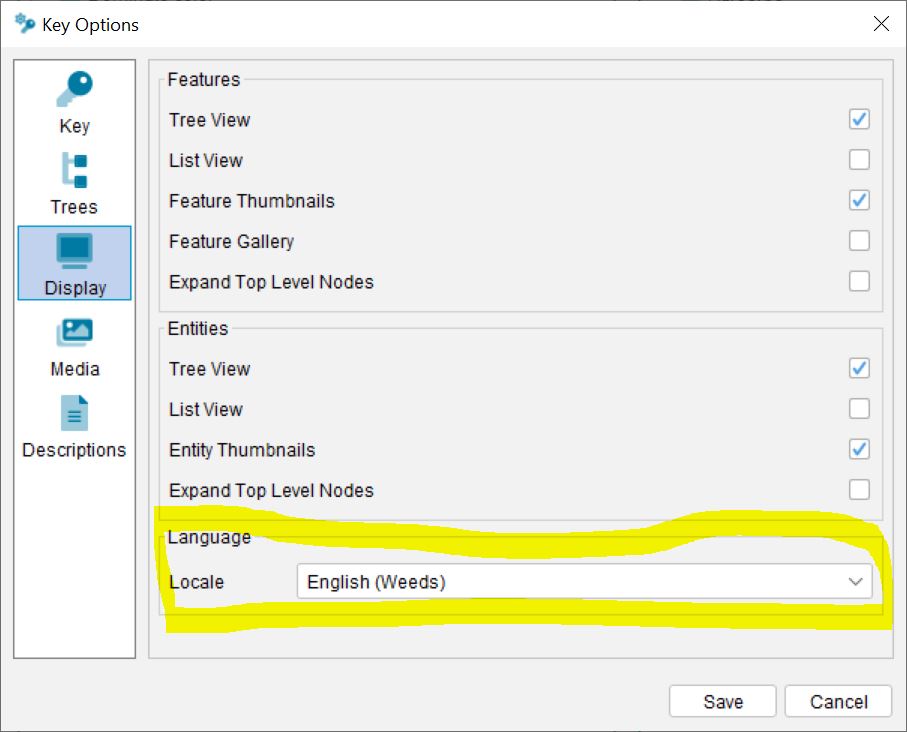
Specifying the Lucid Player Language File
You can set your preferred language for the Lucid Player, via the Key Options dialog under the Display tab.