Lucid Builder supports the direct attachment of images (JPG, GIF & PNG), PDFs and HTML (local files and URLs). It is important to understand how Lucid handles media, particularly HTML content due to its nature of referencing supporting files (E.g. CSS, JavaScripts and Images etc).
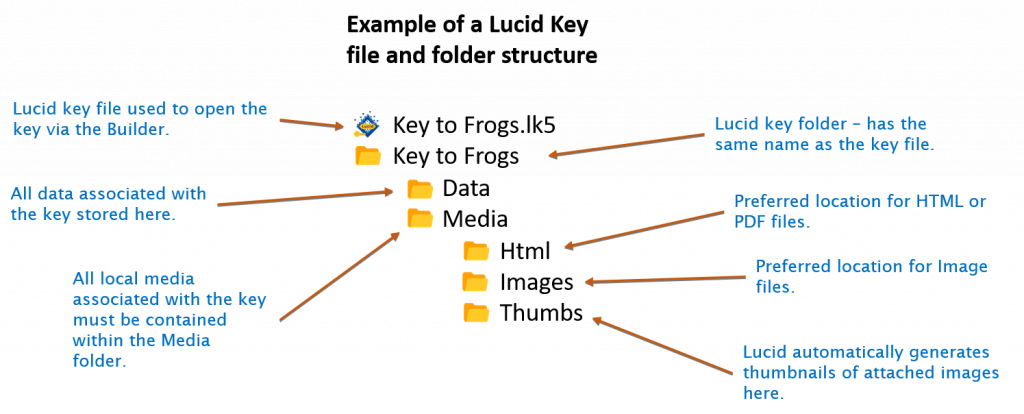

The reason all media files must be within the keys Media folder is to make the key deployment process a seamless single step process, without the need to remember to copy or deal with other supporting files. It also makes copying and backing up your key data much easier.
Lucid allows the attachment of media at all levels within the Feature and Entity trees. How much media you add, if any, is entirely up to you the key author. Media items can be manually attached or imported (and automatically attached).
Fact Sheet Fusion a companion application, often used by Lucid key authors, can dramatically speed up key media development and supports the import file format the Lucid Builder uses. It also supports exporting media suitable for the Lucid Mobile Platform.
For the purpose of this tutorial the HTML fact sheets for the Entities have already been created for you. You can locate these HTML files in the ‘Tutorial\Media\Html’ folder of the Lucid install folder on your computer. Copy the content of this tutorial Media folder, including the sub folders, to your key’s Media folder location.
To attach an HTML file to an item, such as a Feature or Entity, select that Feature or Entity with the mouse and then click the Media tab in the Properties Panel on the left hand side of the Builder interface.
For example, select darwinensis which appears under Camarophyllopsis. Next, select the HTML folder within the Media panel. The Attach Media button should then become available as shown below.
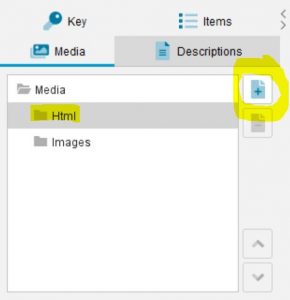
To attach an HTML file to darwinensis, click the Attach Media button . The add HTML options menu should now appear as shown below.
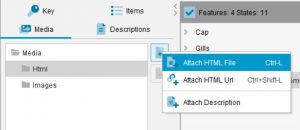
Select the first option ‘Attach HTML File’. The Attach HTML file browse dialog should now appear as shown below.
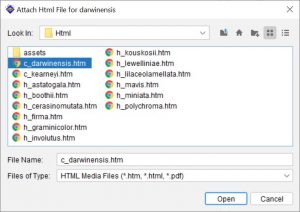
You should now see the prepared tutorial HTML files listed (assuming you have copied them to your keys Media folder). Select the ‘c_darwinensis.htm’ file and click Open. The HTML Attach dialog should now disappear and the selected HTML file ‘c_darwinensis.htm’ will now be listed under the Path information, indicating it is attached to Entity darwinensis (see below).
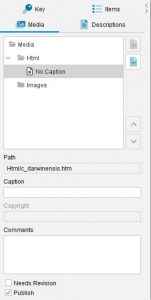
By default the Builder will assign ‘No Caption’ to the fact sheet. You can update this via the Caption field. For example, this could be ‘Fact Sheet’ or ‘Camarophyllopsis darwinensis’.
Tip
You can set the default caption text for HTML and Image attachments via the Key Options dialog (Media Tab).
Attaching an image works in the same way as the HTML file attachment. Select the ‘Images’ folder within the Media Panel, and then select the Attach Media button .
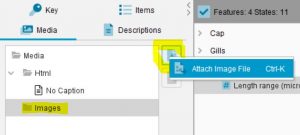
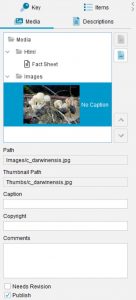
Images however can be browsed anywhere accessible to your computer. If an image is selected from outside your keys Media folder it will be automatically copied to the keys Media\Images folder. When the image is attached, regardless if it was attached within or outside the keys Media folder, it will be automatically thumbnailed. A copy of that thumbnail will be stored in the ‘Media\Thumbs’ folder. The thumbnails storage location within the ‘Thumbs’ folder will reflect the ‘Images’ folder. That is if an image was selected from a sub folder of the ‘Images’ folder, the thumbnail will be stored within the same sub folder structure within the ‘Thumbnail’ folder.
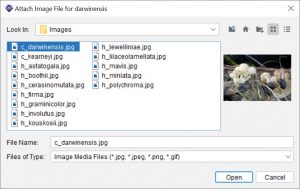
Once attached the thumbnail image will be shown within the Media Panel.
Tip
You can select more than one image or HTML file at time, via the Attach Media browse dialog, to attach to the Entity or Feature. Use the Control (Ctrl) to individually select multiple files or the Shift keys to select contiguous (i.e. next to each other) files.
By default the first attached image becomes the default thumbnail shown for the selected Feature or Entity. If you attach multiple images you can reorder the images using the Media Ordering buttons located at the bottom right of the media display within the Media Panel as shown below.
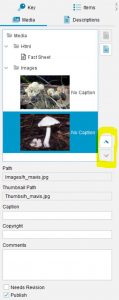
The order HTML files and attachments are presented to the user within the Player can also be controlled by the same Media Ordering buttons.
Tip
By default Lucid Builder thumbnails attached images to 128px (longest side - the aspect ration of the image is retained when thumbnailed). You can set your preferred thumbnail size via the Key Options dialog (Media tab). If the size is adjusted the Lucid Builder will ask if you wish to regenerate all the keys thumbnails. If you wish to do this at a later time you can do so via the main menu option Key...Media...Update Thumbnails.
Note
As a reminder, save your key on a regular basis and back up your key often to avoid data loss from unforeseen circumstances.
