Categories
Lucid Builder Tutorial

Tutorial 1 – Attaching Media to the Key

Lucid Builder supports the direct attachment of images (JPG, GIF & PNG), PDFs and HTML (local files and URLs). It is important to understand how Lucid handles media, particularly HTML content due to its nature of referencing supporting files (E.g. CSS, JavaScripts and Images etc).

Lucid Builder Key File and Folder structure
Lucid Builder Key file and folder structure.
Lucid Key backup reminder
Lucid Key backup reminder.

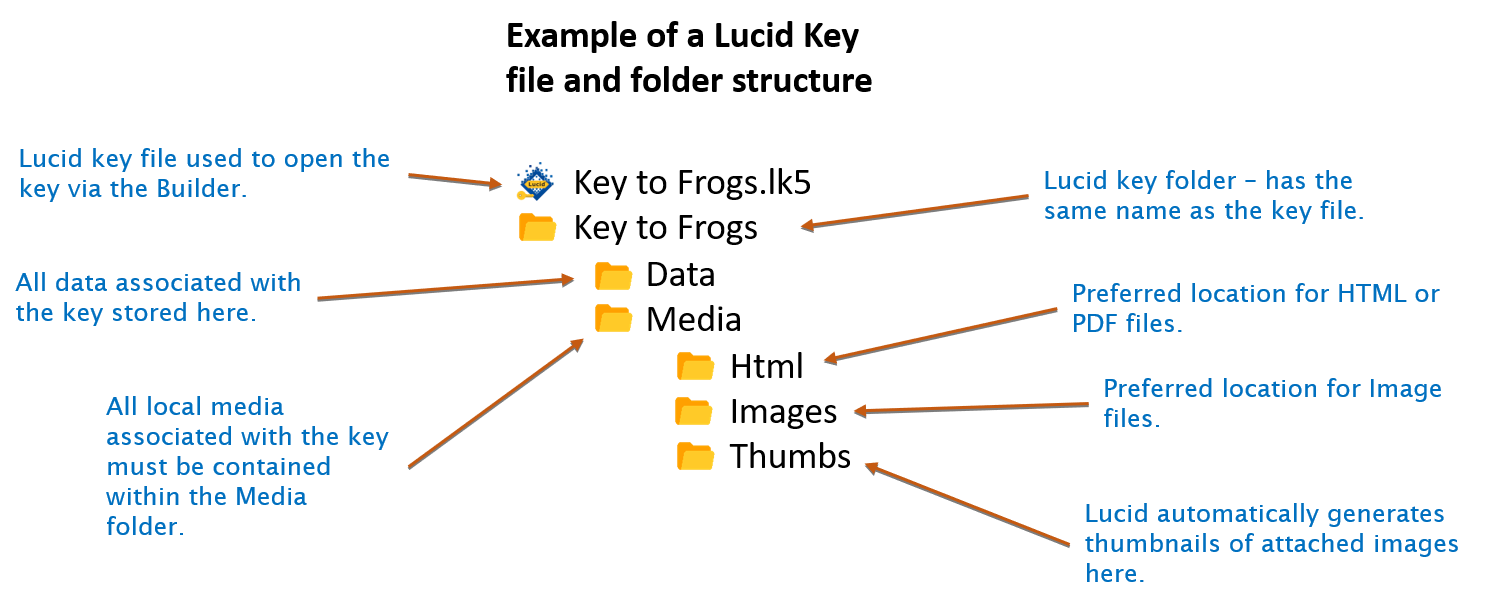
The reason all media files must be within the keys Media folder is to make the key deployment process a seamless single step process, without the need to remember to copy or deal with other supporting files.  It also makes copying and backing up your key data much easier.

Lucid allows the attachment of media at all levels within the Feature and Entity trees. How much media you add, if any, is entirely up to you the key author. Media items can be manually attached or imported (and automatically attached).

Fact Sheet Fusion a companion application, often used by Lucid key authors, can dramatically speed up key media development and supports the import file format the Lucid Builder uses.  It also supports exporting media suitable for the Lucid Mobile Platform.

For the purpose of this tutorial the HTML fact sheets for the Entities have already been created for you. You can locate these HTML files in the ‘Tutorial\Media\Html’ folder of the Lucid install folder on your computer. Copy the content of this tutorial Media folder, including the sub folders, to your key’s Media folder location.

To attach an HTML file to an item, such as a Feature or Entity, select that Feature or Entity with the mouse and then click the Media tab in the Properties Panel on the left hand side of the Builder interface.

For example, select darwinensis which appears under Camarophyllopsis. Next, select the HTML folder within the Media panel. The Attach Media button media add icon should then become available as shown below.

Lucid Builder Media Panel Add Media button enabled
Lucid Builder Media Panel Add Media button enabled.

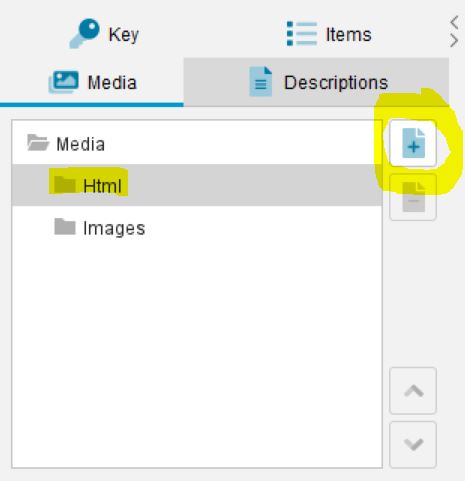
To attach an HTML file to darwinensis, click the Attach Media button media add icon. The add HTML options menu should now appear as shown below.

Lucid Builder Media Panel Add HTML pop-out menu
Lucid Builder Media Panel Add Html pop-out menu.

Select the first option ‘Attach HTML iconAttach HTML File’. The Attach HTML file browse dialog should now appear as shown below.

Lucid Builder Attach HTML file browser dialog
Lucid Builder Attach HTML file browser dialog.

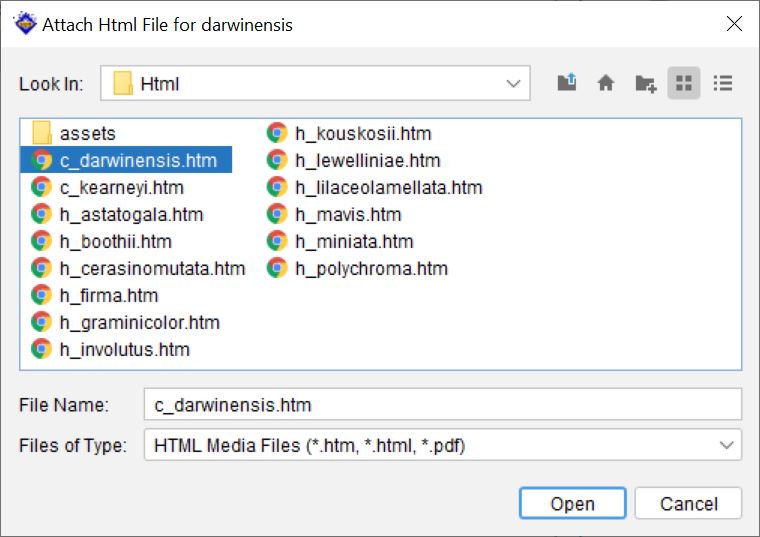
You should now see the prepared tutorial HTML files listed (assuming you have copied them to your keys Media folder). Select the ‘c_darwinensis.htm’ file and click Open. The HTML Attach dialog should now disappear and the selected HTML file ‘c_darwinensis.htm’ will now be listed under the Path information, indicating it is attached to Entity darwinensis (see below).

Lucid Builder Media Panel attached HTML file example
Lucid Builder Media Panel attached HTML file example.

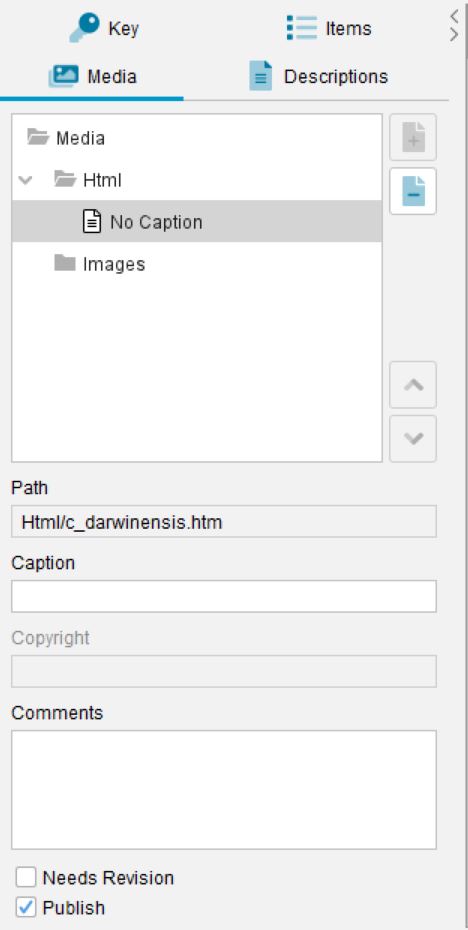
By default the Builder will assign ‘No Caption’ to the fact sheet. You can update this via the Caption field. For example, this could be ‘Fact Sheet’ or ‘Camarophyllopsis darwinensis’.

Tip

You can set the default caption text for HTML and Image attachments via the Key Options dialog (Media Tab).

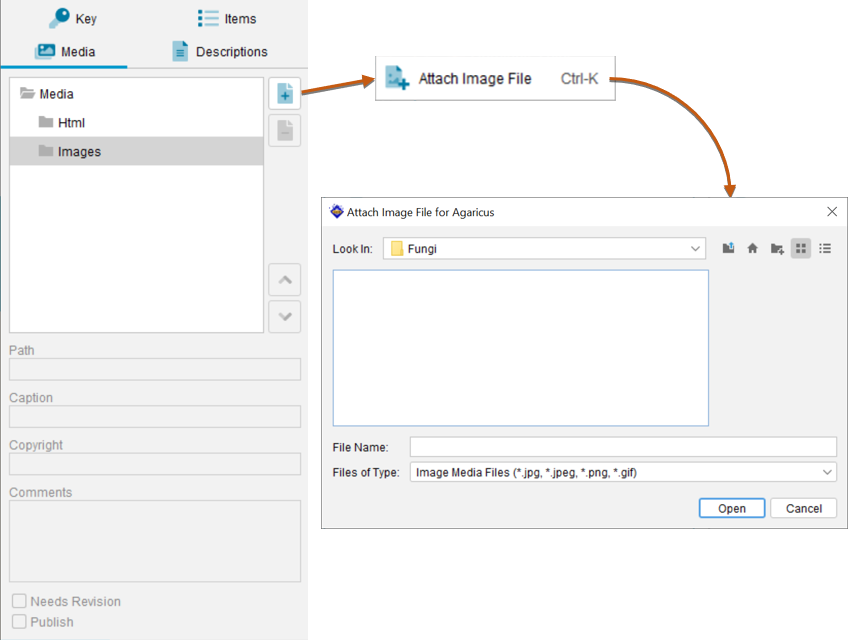
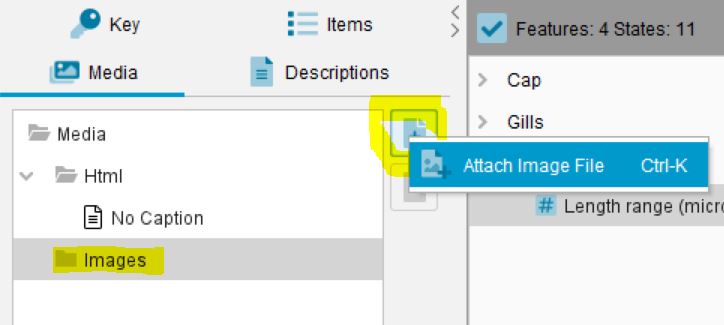
Attaching an image works in the same way as the HTML file attachment. Select the ‘Images’ folder within the Media Panel, and then select the Attach Media button media add icon.

Lucid Builder Media Panel Attach Image example.

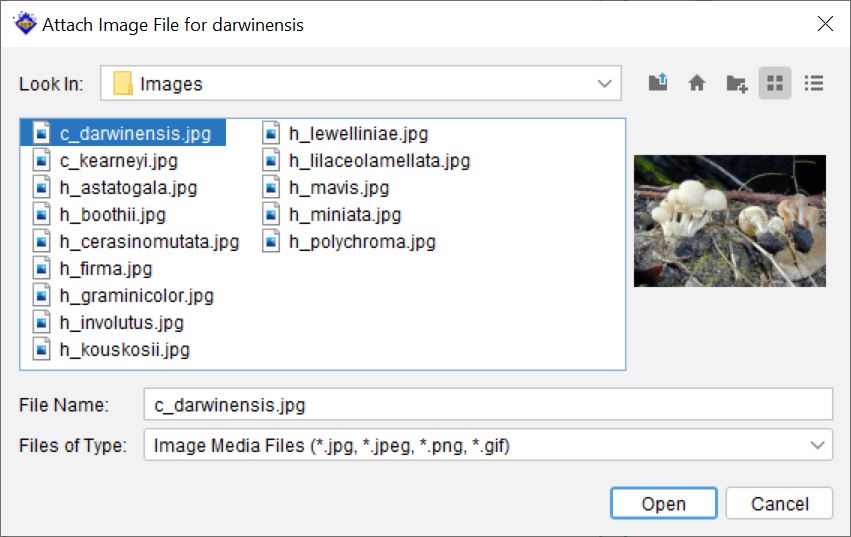
Images however can be browsed anywhere accessible to your computer. If an image is selected from outside your keys Media folder it will be automatically copied to the keys Media\Images folder. When the image is attached, regardless if it was attached within or outside the keys Media folder, it will be automatically thumbnailed. A copy of that thumbnail will be stored in the ‘Media\Thumbs’ folder. The thumbnails storage location within the ‘Thumbs’ folder will reflect the ‘Images’ folder. That is if an image was selected from a sub folder of the ‘Images’ folder, the thumbnail will be stored within the same sub folder structure within the ‘Thumbnail’ folder.

Lucid Builder Media Panel attach image browse dialog
Lucid Builder Media Panel attach image browse dialog.

Once attached the thumbnail image will be shown within the Media Panel. 

Lucid Builder Media Panel attached image example
Lucid Builder Media Panel attached image example.

Tip

You can select more than one image or HTML file at time, via the Attach Media browse dialog, to attach to the Entity or Feature. Use the Control (Ctrl) to individually select multiple files or the Shift keys to select contiguous (i.e. next to each other) files.

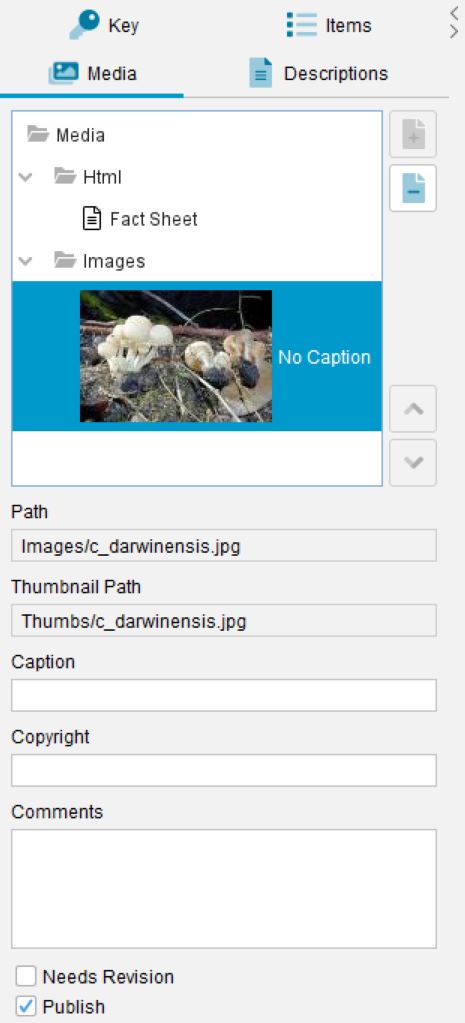
By default the first attached image becomes the default thumbnail shown for the selected Feature or Entity. If you attach multiple images you can reorder the images using the Media Ordering buttons located at the bottom right of the media display within the Media Panel as shown below.

Lucid Builder Media Panel reorder media buttons
Lucid Builder Media Panel reorder media buttons.

The order HTML files and attachments are presented to the user within the Player can also be controlled by the same Media Ordering buttons.

Tip

By default Lucid Builder thumbnails attached images to 128px (longest side - the aspect ration of the image is retained when thumbnailed). You can set your preferred thumbnail size via the Key Options dialog (Media tab). If the size is adjusted the Lucid Builder will ask if you wish to regenerate all the keys thumbnails. If you wish to do this at a later time you can do so via the main menu option Key...Media...Update Thumbnails.

Note

As a reminder, save your key on a regular basis and back up your key often to avoid data loss from unforeseen circumstances.

Categories
Lucid Player v4

Multimedia in the Lucid Player

Many Lucid keys provide images and web pages for Features, States and Entities, to help make an identification easier and more accurate and to provide extra information on the items in the key. For example, web pages and images attached to Features and States may help you decide which State of a Feature to choose, or provide background hints and tips on difficult features. Similarly, web pages and images attached to Entities may provide descriptions and extra information on the entities in the key, both to add to the available information and to help you choose whether an identification is correct.

Lucid Player Multimedia - Thumbnails off example.
Lucid Player Multimedia - Thumbnails on example
Lucid Player Multimedia - Thumbnails on example.

By default, items in the Features and Entities panels that have images attached will be preceded by the Lucid Player Image icon icon, while items that have web pages attached will be preceded by the Lucid Player Text icon icon.

Optionally, image thumbnails can be displayed in the Features and Entities panels for items that have images attached. To display thumbnails check either or both the Feature Thumbnails Feature thumbnail icon or Entities Thumbnail Entity Thumbnail icon options located on the main toolbar.

With the Image Thumbnails checked, features or entities that have images attached will be preceded by a small thumbnail of an image associated with that item.

To view a web page or image attached to an item click on its icon or thumbnail.

Categories
Lucid Builder v4

Lucid Builder Check Media

The Builder Media Check function will parse either the Feature or Entity Tree media attachments and check on the corresponding files for their specified file system location. If any missing media items are reported on a per Feature or Entity basis depending on which check option is currently selected.  

Lucid Builder Check Media dialog
Lucid Builder Check Media dialog – Features check example.
Lucid Builder Media Check dialog - Entities missing media example
Lucid Builder Media Check dialog – Entities missing media example.

Tip

You can leave the Media Check dialog open while you review/fix the missing media list in the Builders main interface. You can also copy and paste the report text, if needed.

Categories
Lucid Builder v4

Importing and Exporting

Lucid supports import and export via a number of file formats:

  • Lucid Interchange Format (LIF) files are simple, text-based files that are used to import keys from the Lucid Builder Version 2.

  • Lucid Interchange Format version 3 (LIF3) files are XML-based files that can store all Lucid key data, allowing you to back up your key or to exchange it with other key developers.

  • Lucid XML Dataset (XML Dataset) files are XML-based files that can store all Lucid key data. The primary use is for uploading key data to the Lucid Key Server Player application.

  • CSV (Comma separated Value) files are text files with data items separated by commas. CSV files are used to import and export key data between the Lucid Builder and spreadsheet program such as Microsoft Excel, or databases such as Microsoft Access.

  • Media List files are XML-based files that contain entities and their associated media.

  • Simple text files can be used to import and export the feature and entity trees.

Lucid Builder Data Import and Export options

FILE TYPEDATA INCLUDEDIMPORTEXPORT
LIFFull keyYESNO
LIF3Full keyYESYES
XML DatasetFull keyYESYES
CSVFeatures, entities, score dataYESYES
Media ListFeatures and Entity media referencesYESYES
TextFeatures and EntitiesYESYES

In addition, DELTA (Descriptive Language for Taxonomy) files can be imported into the Lucid Builder via LIF files created by the Lucid Translator, available from the Lucidcentral website. See the Lucidcentral topic Notes for DELTA Users for more information.

LIF (Lucid Interchange Format) Files

Keys exported as LIF files from the Lucid2 Builder can be imported into the Lucid3 Builder using LIF (Lucid Interchange Format) files. A LIF file is a simple text file with sections for the different data elements (feature and entity lists, multistate and numeric score data, and multimedia attachments).

Note: The LIF file includes references to the directories holding media (html and image files) for the original key. If you have moved the key after creating the LIF file, you may need to modify the path for each of the five media directories. Open the file in a standard text editor, search for “[..Multimedia Directories..]” and edit the media references, changing the path in each reference to an appropriate path for the folder that holds the media:

[..Multimedia Directories..]

Sounds “C:\Program Files\Lucid\My key\Sounds\”

Images “C:\Program Files\Lucid\My key\Images\”

Macros “C:\Program Files\Lucid\My key\Macros\”

Text “C:\Program Files\Lucid\My key\HTML\”

Video “C:\Program Files\Lucid\My key\Video\”

LIF3 (Lucid Interchange Format version 3) Files

LIF3 files are xml documents containing all the data (feature and entity lists, item properties, score data and media attachments) for a key. LIF3 files can be used to back up keys, and for easily transferring keys from one computer to another.

Note: The LIF3 file for a key does not contain the key’s media, only references to where the media can be found. Therefore if you need to transfer a LIF3 file to another computer you should also copy the key’s media directories

You can do this by opening the LIF3 file in a standard text editor, searching “for media base_path”, and editing the path name of the Media directory. For example:


should be changed to:


where new_computer’s_path is the full path name including drive letter of the Media directory on the new computer.

CSV structure

Entity 1Entity 2Entity 3 ...etc
State 1ScoreScoreScore
State 2ScoreScoreScore
State 3 ...etcScoreScoreScore

Importing/Exporting Data

Lucid Builder Export Key dialog
Lucid Builder Export Key dialog.
To export a key, choose File > Export > Export Key from the menu, choose the file type and a location for the exported file, enter a name for the file and click Save. Flatten Entity Hierarchy – this option will covert the keys entity tree view into a flat list using List View names (edited or automatic). This is useful if preparing a key for the Lucid Mobile Platform, which doesn’t support tree view hierarchies or if you prefer a simpler entity list for a target user group. To export a feature or entity list, choose File > Export > Export Feature List or File > Export > Export Entity List from the menu. To import a key, choose File > Import > Import Key from the menu and browse for the appropriate file To import a feature or entity list, choose File > Import > Import Feature List or Import > Import Entity List from the menu and browse for the file.
Categories
Lucid Builder v4

Lucid Builder Removing Media

Lucid Builder remove media menu options

Remove Feature Media

Available via the Key…Media…Remove Feature Media menu option.

This options allows all media to be easily removed in one action from either the selected feature or state or all features and states.

Lucid Builder Remove Feature media dialog
Lucid Builder Remove Feature media dialog.

Media type options

Remove all image media

If selected, will remove all image attachments from the Features and States.

Remove all text media

If selected, will remove all HTML and PDF attachments from the Features and States.

Remove all descriptions

Not available for features. This option is only available when removing media from Entities.

Path type options

Remove File references

This option will remove any file based media referenced found in the Feature tree.

Remove URL references

This option will remove any URL based media references found in the Feature tree.

Option Buttons

All

If chosen, media (based on the above selected options) will be removed from all items found in Features tree. Prior to removal you will be asked to confirm the operation.

Lucid Builder remove media from all features and states confirmation dialog
Lucid Builder remove media from all features and states confirmation dialog.
Selected

If chosen, only media from selected items within the Feature tree will be removed. Prior to removal you will be asked to confirm the operation, as shown in the dialog below.

Lucid Builder remove media from selected features and states confirmation dialog
Lucid Builder remove media from selected features and states confirmation dialog.
Cancel

Will close the ‘Remove Feature Media’ dialog without any removal actions taking place.

Remove Entity Media

Available via the Key…Media…Remove Entity Media menu option.

This options allows all media, including descriptions, to be easily removed in one action from either the selected Entities or all Entities.

Lucid Builder remove Entities media dialog
Lucid Builder Remove Entities media dialog

Media type options

Remove all image media

If selected, will remove all image attachments from the Entities.

Remove all text media

If selected, will remove all HTML and PDF attachments from the Entities.

Remove all descriptions

This option will remove all automatically generated and attached descriptions created by the Builder. See Creating Natural Language Descriptions for more information.

Path type options

Remove File references

This option will remove any file based media referenced found in the Entities tree.

Remove URL references

This option will remove any URL based media references found in the Entities tree.

Option Buttons

All

If chosen, media (based on the above selected options) will be removed from all items found in Entities tree. Prior to removal you will be asked to confirm the operation.

Lucid Builder Remove Media from all entities confirmation dialog
Lucid Builder Remove Media from all entities confirmation dialog.
Selected

If chosen, only media from selected items within the Feature tree will be removed. Prior to removal you will be asked to confirm the operation, as shown in the dialog below.

Lucid Builder Remove Media from selected entities confirmation dialog
Lucid Builder Remove Media from selected entities confirmation dialog.
Cancel

Will close the ‘Remove Entity Media’ dialog without any removal actions taking place.

Categories
Lucid Builder v4

Lucid Builder Media Lists

Applies to Matrix and Pathway key projects

Media List is an open XML based format that enables the Lucid Builder to import media data for Entities, Features or Couplets.

Lucid Builder Import Media List dialog

The media files referenced within the Media List file must be located within the keys media folder, normally within the HTML or Images folders, prior to importing. Unless you are using a Force or Ignore option within the ‘Other options’ dialog section.

Importing a Media List file

From the menu File > Import > Import Media List

Select the Media List file by browsing your computer file system. Before importing you have the following options.

Import Options

Import Feature/Couplet media

Match and import media specified by the selected Media File to the keys Feature or Couplet list, depending on the project key type.

Import Entities media

Match and import media specified by the selected Media File to the key Entity list.

Matching Options

Match partial names

Your media list may not contain an exact match for the Entity or Feature/Couplet name label listed in the Builder. For example, within your key you may have the taxonomic name for the Entity followed by a common name, where the media list file may only contain the taxonomic name. The builder can use a partial match method to link the media to the correct Entity or Feature. If no match can be found then the non-matching items from the Media List file will be reported prior to the import occurring.

Attach to best match

When the Builder is matching the Media List item to a Feature/Couplet or Entity it may encounter multiple valid matches, especial when the ‘Match partial names’ option is selected. The ‘Attach to best match’ will try to determine the best (closest matched) Entity or Feature/Couplet and only perform one attachment for that Media List item. If this option is not selected and the Builder encounters multiple valid matches, then the Media List item will be attached to multiple items in the Feature/Couplet or Entity tree.

Media Options

Import image media

Check this option if you want image media types from the Media List to be imported.

Import text media

Check this option if you want HTML media types from the Media List to be imported.

Import File references

Check this option if you want to import media items that are file references found in the selected Media List file.

Import URL references

Check this option if you want to import media that are URL references found in the selected Media List file.

Other Options

Remove Existing Media

This option will remove all the media associated with all the Entities or Features within the key, depending on which is selected in the Import Options section of the dialog. Use this with caution if you have manually attached other media to the entities prior to using this option. Re-importing a Media List that contains the same items will not cause duplicate media attachments within the key.

Create or replace thumbnails

If selected, during the import process, any image attachments from the Media List will be thumbnailed. Reattachments will also be thumbnailed. Thumbnail sizes will be set based on the maximum thumbnail dimensions set within the Key Options  dialog.

Force import of all media

The Builder will create the media linkage based on the Media List location reference, even if the media location doesn’t match what the Builder is expecting based on the keys Media folder structure.

Ignore missing files

The Builder by default checks for the presence of the file prior to attaching it during the import process, unless this option is checked. If this option is checked the Builder will create the media linkage in the key regardless if the media image exists where specified by the Media List. If you use this option, you are are expected to deal with any broken media linkages within the key. You can check for ‘broken’ or missing media attachments via the ‘Tools…Check Media’ report tool from the main menu.

Tip

The Fact Sheet Fusion content editor supports the export of media lists, which can be used in the Lucid Builder to quickly attach all your media.

Categories
Lucid Builder v4

Lucid Builder Setting Properties for Media items

Properties for media items (images and web pages) are set using edit and check boxes on the Media panel.

Lucid Builder Media Properties panel
Lucid Builder Media Properties panel.

The properties are:

Path and Thumbnail path – Displays the name and file system path of the selected file (and of its thumbnail for image files). This is not editable, and is displayed to enable you to locate files in the file system

Caption – When an image is displayed at full size in the Lucid Player it is annotated with a caption. The caption is also used to refer to the image in a menu list of images, when several images are attached to one item.

Copyright When an image is displayed at full size in the Lucid Player it is annotated with a copyright attribution. Use this box to enter copyright information for the image. The copyright button can be used to insert the copyright symbol (©) before the text.

Comments – When an image is displayed at full size in the Lucid Player it may be annotated with comments. Use this box to enter the comment text.

Needs Revision – Check this to bookmark (for yourself and other key builders) that a media item needs to be revised later. Media items marked as needing revision can also be excluded from the key deployment process.

Publish – Check this to specify that the currently selected media item should be published when the key is deployed. This option is checked by default.

Categories
Lucid Builder v4

Lucid Builder Viewing, removing and deleting items from the Media folders

To view files that are currently attached to any item, select the item in the Features or Entities panels. The files attached to the selected item will be listed.

To view the full image or full web page for any attached file, either double click on the image or web page icon or thumbnail, or right click on the media item name and choose Open. The file will be displayed at full size in a popup window.

Media files that have been attached to an item may be unattached from that item by selecting the file in the Media panel’s file list and clicking the Remove Media button, or right-clicking on the file in the appropriate directory and choosing Remove. The file will be removed from the currently selected item, but will not be deleted from the Media directory.

You may delete media files from the Media directory by right-clicking on the file in the appropriate directory and choosing Delete. The file will be removed from the currently selected item and from any other items to which it has been attached, then deleted from the Media directory.

Note

Deleting web page files from the HTML directory may cause broken links on other pages. Lucid does not check for this. Use a Link Checker application to ensure your keys HTML content doesn't have any broken links.
For a great free open source link checker see https://wummel.github.io/linkchecker/

Categories
Lucid Builder v4

Lucid Builder How to attach an image to a Feature or Entity

JPEG, GIF or PNG images may be attached to any Feature or Entity.  If an image is selected outside the scope of the keys Media folder, a copy of the selected file will be made to the key’s Images folder. Images are copied to the Keys Image folder (or sub folder) so that all images are accessible when compiling the key, even if the original images have been moved or are on an inaccessible drive.

To attach an image to an item (Feature or Entity), first select the appropriate item. Right-click the Images folder in the Media panel or click the Attach Media button. To attach a local image file, choose the Attach Image File menu option and choose the file using the Open File dialog box that appears.

Lucid Builder attach image options

Note

When attaching local image files to your key, remember that a copy of the original file is created in the key’s Images directory. Editing the original file will have no effect on the key. You may edit the copy of the image in the Images directory using third-party image manipulation software.

Categories
Lucid Builder v4

Lucid Builder Images and Image Thumbnails

Lucid Builder Key Options - Thumbnail settings
Lucid Builder Key Options – Thumbnail settings

When you attach an image to an item (Feature or Entity), the Lucid Builder will create a thumbnail image from the original, and store it in a Thumbs directory in the key’s folder with the same file name. Thumbnails are used for displaying the images in the Player’s Features and Images panels.

By default, thumbnail images are created with a maximum dimension (height or width) of 128 pixels, with the aspect ratio of the original image preserved by default. You may choose to set the thumbnail images to a size other than default maximum pixels by selecting from the menu Key…Key Options, then select the media icon.  Within the Media options enter your preferred maximum thumbnail dimension in pixels. The Builder will then offer to automatically recreate any existing thumbnails. A warning will be given prior to this action occurring due to the amount of time potentially required to complete this operation in large keys with many image attachments. Alternatively, you can manually trigger the recreation of the keys thumbnails, via the main menu option ‘Key…Media…Update Thumbnails’.

Lucid Builder update thumbnails menu option

In some cases, you may find it useful to create your own thumbnails instead of using the thumbnails generated automatically by Lucid. Remember to size the thumbnails to the dimensions specified in the Options dialog.