

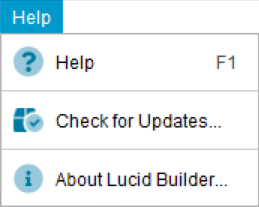
Opens the Lucid Builder on-line help, in your preferred web browser.
Check for any updates to the Lucid Builder that are available for your edition. An online connection is required for this action to function.
Please see Checking for Updates help topic for additional information.
Opens the About dialog where Lucid Builder version and copyright information can be found.
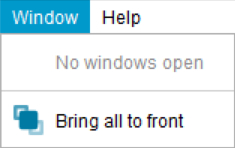
The Lucid Builder allows multiple dialogs to be opened at the same time. The Windows menu shows the currently opened dialogs, which you can select to bring them forward above the main Builder interface.
All opened dialogs will be brought to the front of the main Lucid Builder interface.


Available for Matrix key project types
Opens either the Features or Entities Import Items dialog depending on which panel (Features or Entities) you have selected. The Import Items dialog allows you to quickly build Feature trees or Entity trees very quickly by either typing or pasting existing data.
See the Adding items to the Feature and Entity trees help topic for further information.
Available for Pathway key project types
Allows Entities to be quickly added either by typing or pasting existing data.
Opens the Check Media dialog where any missing media for Features or Entities will be reported.
See the Check Media help topic for further information.
Opens the Key Reporter dialog. The Key Reporter allows you to query many aspects of your key such as unscored Entities, items without media, items needing revision etc.
See the Key Reporter help topic for further information.
Opens the Language Editor for the Builder interface.
See the Multilingual support help topic for further information.
Opens the Language editor for the Player interface.
See the Multilingual support help topic for further information.

Enables the removal of either all media from Features and States, or the removal of image media or text media from the selected Feature or State.
See Removing Media help topic for more information.
Enables the removal of either all media from Entities, or the removal of image media or text media from the selected Entity.
See Removing Media help topic for more information.
Forces the Builder regenerate the keys thumbnails from the attached images. This is useful if you have adjusted the preferred thumbnail size in the Key Options or have changed out images, outside the scope of the Builder (I.e. Via the file system). Regenerating thumbnails can be an intensive process for large keys with lots of images. You will be asked to confirm the action.
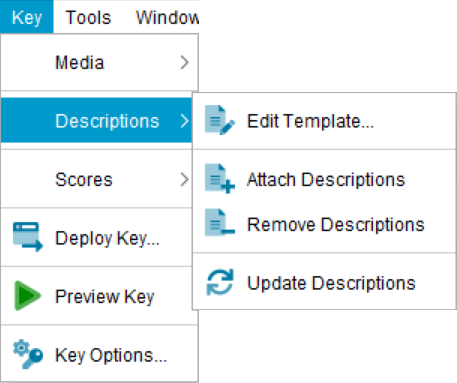
Opens the Natural Language Template Editor dialog.
Attaches HTML based descriptions (generated by the Natural Language generator) to all Entities in the Entities tree. These can be individually added (or removed) via the Media Properties panel for the selected Entity.
Removes all HTML based descriptions (generated by the Natural Language generator) from the Entities in the Entities tree. These can be individually removed (or added) via the Media Properties panel for the selected Entity.
Forces the regeneration of all Entity Natural Language description files, created by the Builder, based on your template and transform file.
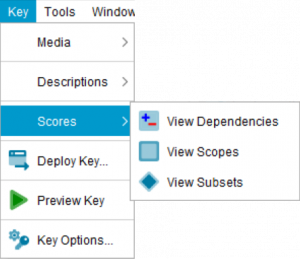
Opens the View Dependencies dialog that allows you to check on your dependency scoring. See the View Dependencies help topic for further information.
Opens the View Scopes dialog that allows you to easily view your scoped and not scoped Features. See the View Scopes help topic for further information.
Opens the View Subsets dialog that allows you to review your Subsets (and contained Features or Entities). See the View Subsets help topic for further information.
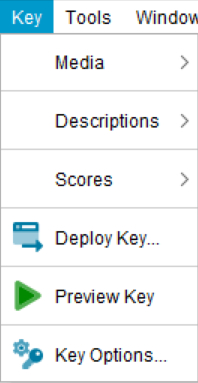
Opens the Deploy Key dialog. See the Deploying a key help topic for further information.
Allows you to preview your key by opening it in the Lucid Player, via your preferred web browser.
Opens the Key Options dialog, which allows you to set a number of preferences for your key. See the Setting key options help topic for further information.
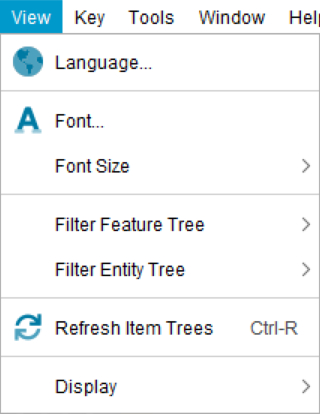
Opens the Language selection dialog for the Lucid Builder. A language file may be another language from what you are using (E.g. English, Spanish or Mandarin etc.), or a language can simply be a variant on a language, with customised strings to suit the key’s topic. For example, you may have an English language file variant for weeds, where all the terms for ‘Entity’ and ‘Entities’ are replaced with ‘Weed’ and ‘Weeds’.
See the Multilingual Support help topic for additional information.
Opens the Font selection dialog. You may prefer a different font than the default system font. Or your language may require a specific font, not set via your operating system.

Increases the font size within the Lucid Builder.
Decreases the font size with the Lucid Builder.
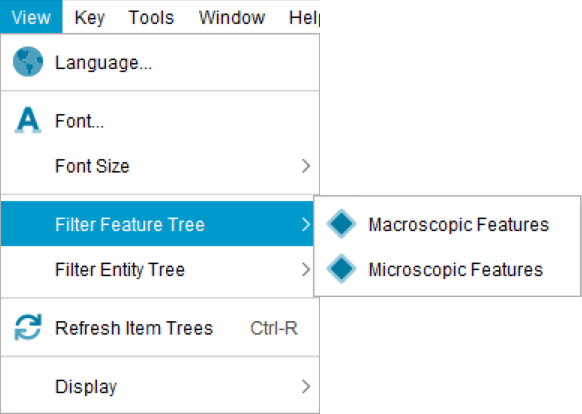
The options within the Filter Tree sub menu depend on what Feature Subsets have been created. All Feature Subsets will be listed as menu options. Each available Feature Subset can be toggled on or off by selecting or un-selecting the Subset within the menu. When a Feature Subset is toggled on, the Features scored for that Subset will be displayed, while non-scored Features for that Subset will be hidden. That is only Features that are scored in the selected Subsets will be displayed.
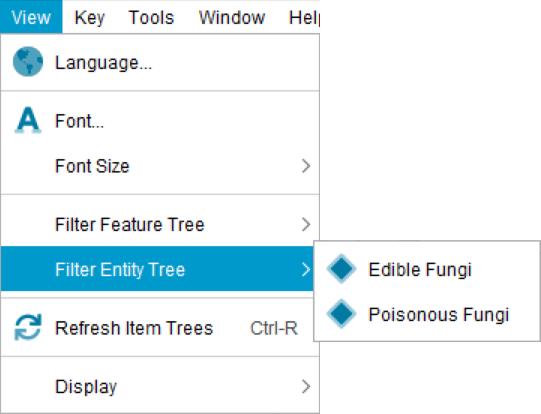
The options within the Filter Tree sub menu depend on what Entity Subsets have been created. All Entity Subsets will be listed as menu options. Each available Entity Subset can be toggled on or off by selecting or un-selecting the Subset within the menu. When an Entity Subset is toggled on, the Entities scored for that Subset will be displayed, while non-scored Entities for that Subset will be hidden. That is only Entities that are scored in the selected Subsets will be displayed.
This option can be used to force the Lucid Builder to re-render the Feature and Entities trees. This can be useful for example, if you have change screen resolutions or resized thumbnails outside the scope of the Builder and want it to refresh the display.
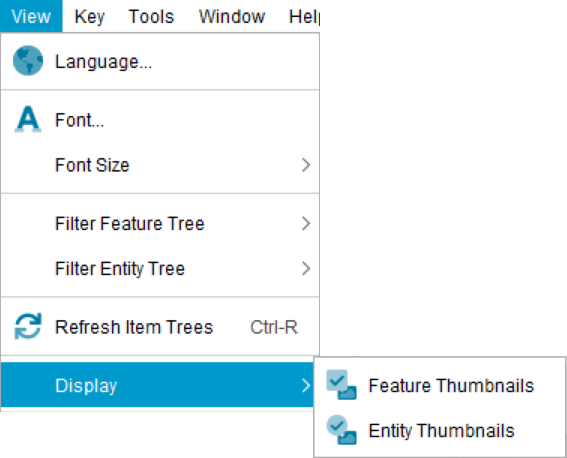
Toggle on or off the display of Feature (and States) thumbnails within the Features tree. The size of the thumbnail is set via the Key Options dialog.
Toggle on or off the display of Entity thumbnails within the Entities tree. The size of the thumbnail is set via the Key Options dialog.
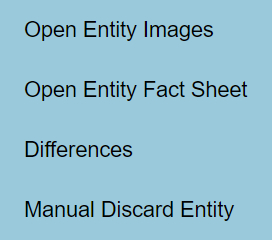
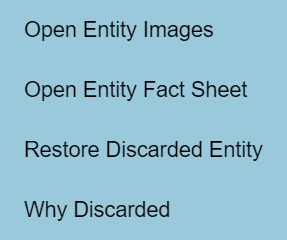
Additional commands available via the context pop-up menu. The context menu can be accessed by right clicking on an item (or an empty section) within the Entities Tree panel.
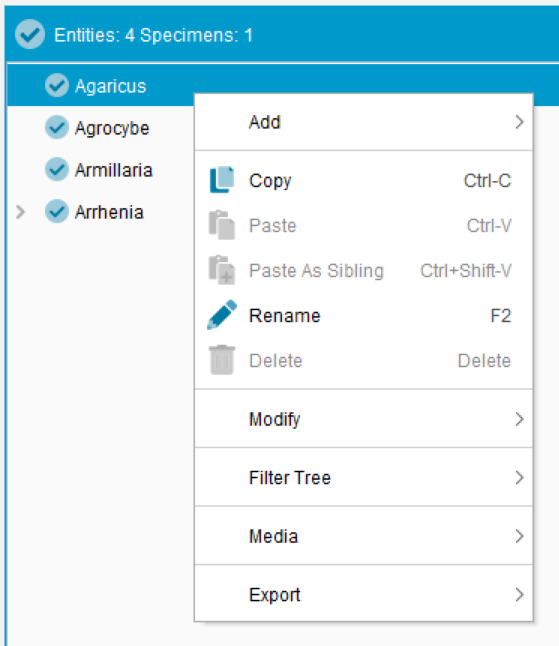
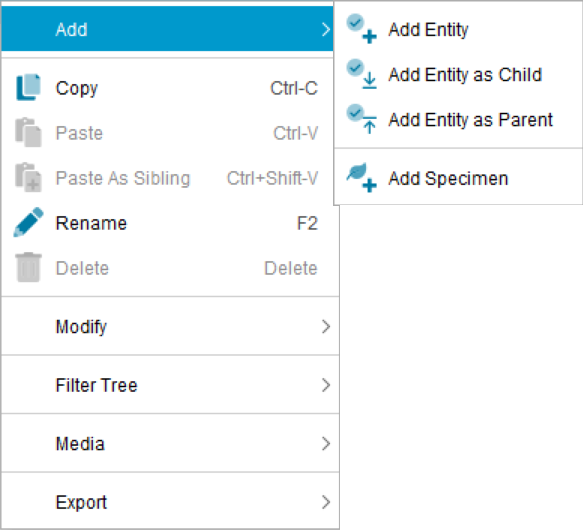
Adds a new Entity to the Entities tree. The Entity will be added at the same level within the tree based on where in the tree the context menu was initiated. The Add Entity option will only become available to select when it is logically appropriate. For example, the Builder will not allow an Entity to be created at the same or child level of a Specimen.
Adds a new Entity as child of the selected Entity within the Entities tree. The Add Entity as Child option will only become available to select when it is logically appropriate. For example, the Builder will not allow an Entity to be created at the same or child level of a Specimen.
Adds a new Entity as a parent of the selected Entity within the Entities tree. The Add Entity as Parent option will only become available to select when it is logically appropriate. For example, the Builder will not allow an Entity to be created as a parent if a Specimen was selected.
Adds a new Specimen to an existing Entity within the Entities tree. See the help topic on Specimens for more information.
Copies a selected Entity or Specimen to the system clipboard. A copy of the item may then be pasted elsewhere in the Entity tree.
If a copied item has children, all descendents will be copied along with the selected item. If an item has scores or other properties associated with it (media etc), all scores and properties will remain associated with the copied item and will be pasted with it.
Pastes a previously cut or copied item as a child of the selected item.
If a cut or copied item has children, all descendents will be cut or copied and pasted along with the selected item. If an item has scores or other properties associated with it (media etc), all scores and properties will remain associated with the item and will be pasted with it.
Pastes a previously cut or copied item as a sibling of the selected item.
If a cut or copied item has children, all descendents will be cut or copied and pasted along with the selected item. If an item has scores or other properties associated with it (media etc), all scores and properties will remain associated with the item and will be pasted with it.
Renames a selected item in the Entities tree. The item will be placed into edit mode for renaming. Rename can also be invoked by pressing the F2 key.
Deletes one or more selected Entities or Specimens.
If the Builder Preferences option Prompt for confirmation during tree delete operations is checked, a Confirm Delete dialog will appear to confirm that the operation should go ahead. If Prompt for confirmation during tree delete operations is unchecked, the item will be deleted immediately without confirmation.
The selected item will be permanently deleted from the key. This operation cannot be undone.


The Modify sub menu allows you to convert Entity types (Grouping Entity, Entity, Specimen). The menu option available is determined by the Entity type selected. For example, a single Entity can be converted to a specimen if it is the only child Entity. To convert all child Entities of a Grouping Entity, you must first select all child Entities, then initiate the context menu. All the selected child Entities will then be converted to Specimens. The same process applies for converting Specimens back to regular Entities.
Converts one (or more) selected child Entities to Specimen Entities. All children of the Grouping Entity must be selected for conversion since a child Entity and Specimen Entity cannot be at the same level within the Entity tree.
Converts one (or more) selected Specimen Entities to child Entities. All Specimens of the Parent Entity must be selected for conversion since Specimens and Entities cannot be at the same level within the Entity tree.
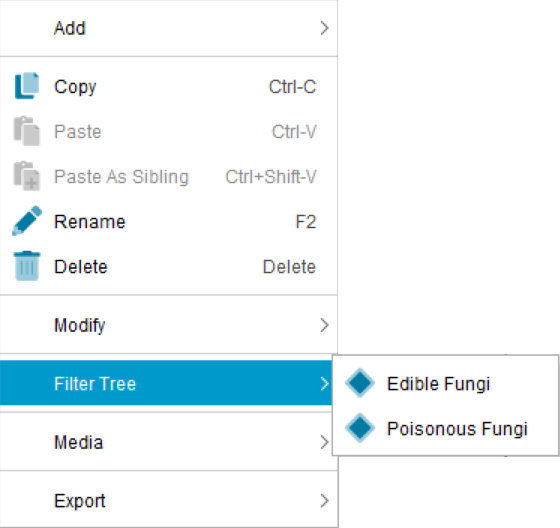
The options within the Filter Tree sub menu depend on what Entity Subsets have been created. All Entity Subsets will be listed as menu options. Each available Entity Subset can be toggled on or off by selecting or un-selecting the Subset within the menu. When an Entity Subset is toggled on, the Entities scored for that Subset will be displayed, while non-scored Entities for that Subset will be hidden. That is only Entities that are scored in the selected Subsets will be displayed.
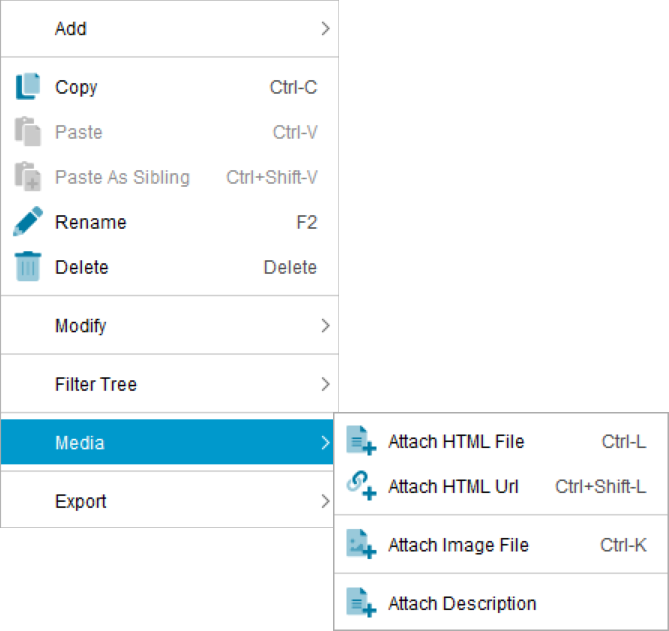
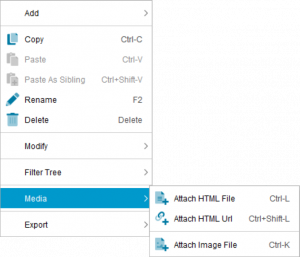
Allows the attachment of a HTML (or PDF) file present within your keys Media folder to the selected Entity or Specimen.
Allows the attachment of a Url based resource (E.g. web page) to the selected Entity or Specimen.
Allows the attachment of an image(s) to the selected Entity or Specimen. Multiple image files can be attached via the file browse dialog by using Ctrl (individual selection) or the Shift key (block selection).
Attaches a Description to the Entity. Descriptions cannot be attached to a specimen. For the Description to contain a description about the Entity you must create and/or attach a Description template (output template) for the key and associate this and the transform template (e.g. Sentence, paragraph or table etc) via the Key Options…Descriptions tab. See Creating Natural Language Descriptions help topic for more information.
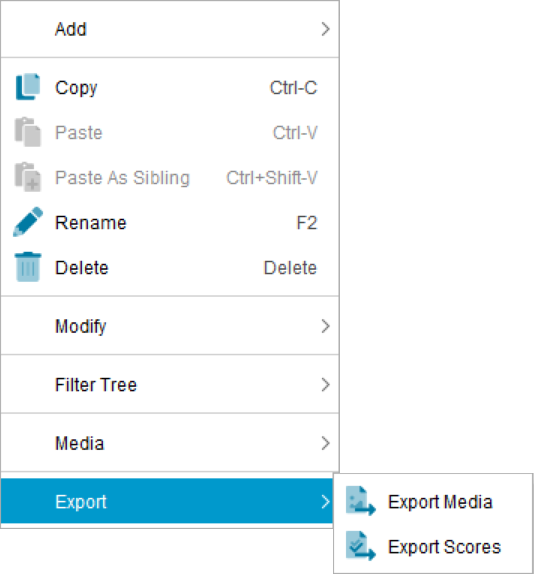
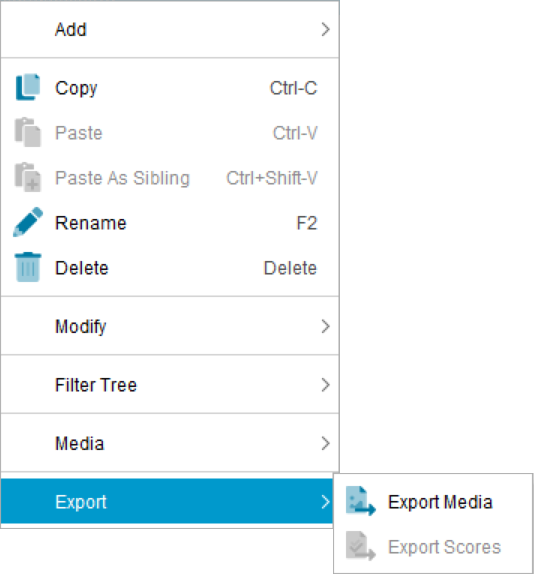
Creates a Media List file containing references to all media associated with the selected Entity or Specimen. The Media List file will be automatically saved to the same location as the key (I.e. Where the .lk5 file is located). The file name is automatically generated based on the tree path to the Entity or Specimen and will include the selected items label.
See Media File help topic for more information.
Creates a LIF3 file containing all the score information associated with the selected Entity or Specimen for all Features scored. The Export Scores function can be initiated from the Feature or a State of the Feature. The LIF3 file will be automatically saved to the same location as the key (I.e. Where the .lk5 file is located). The file name is automatically generated based on the tree path to the Feature or State and will include the selected items label.
See the LIF3 help topic for more information.
Applies to Matrix key projects
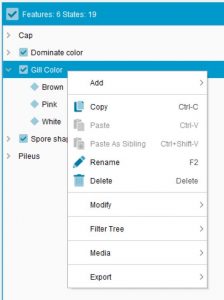
Additional commands available via the context pop-up menu. The context menu can be accessed by right clicking on an item (or an empty section) within the Feature Tree panel.
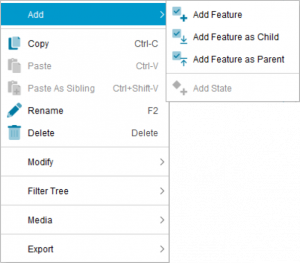
Adds a new Feature to the the Feature tree.
Adds a new Feature to an existing Feature as a child node. A Feature can only be added as a child node if it doesn’t contain any states.
Adds a new Feature as the parent of the currently selected Feature.
Adds a new State to the selected Feature. This option is only available where the selected Feature doesn’t already contain a Feature.
Copies a selected Feature, State to the system clipboard. A copy of the item may then be pasted elsewhere in the Feature tree.
If a copied item has children, all descendents will be copied along with the selected item. If an item has scores or other properties associated with it (media etc), all scores and properties will remain associated with the copied item and will be pasted with it.
Pastes a previously cut or copied item as a child of the selected item.
If a cut or copied item has children, all descendents will be cut or copied and pasted along with the selected item. If an item has scores or other properties associated with it (media etc), all scores and properties will remain associated with the item and will be pasted with it.
Pastes a previously cut or copied item as a sibling of the selected item.
If a cut or copied item has children, all descendents will be cut or copied and pasted along with the selected item. If an item has scores or other properties associated with it (media etc), all scores and properties will remain associated with the item and will be pasted with it.
Renames a selected item in the Features tree. The item will be placed into edit mode for renaming. Rename can also be invoked by pressing the F2 key.
Deletes one or more selected Feature or State.
If the Builder Preferences option Prompt for confirmation during tree delete operations is checked, a Confirm Delete dialog will appear to confirm that the operation should go ahead. If Prompt for confirmation during tree delete operations is unchecked, the item will be deleted immediately without confirmation.
The selected item will be permanently deleted from the key. This operation cannot be undone.
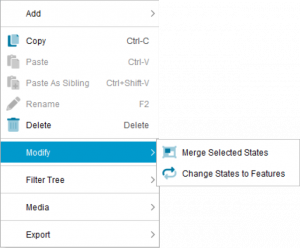
This option will take the selected States (two or more) and merge them into one State. It is important to understand the effect this will have on the scoring the merged State will retain from the merging process.
If score data is present on the merging States the following rules will apply as to what score data will be retained for the merged State.
In order, the following score types will take priority and will be applied.
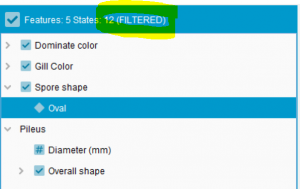
For example, if Agaricus had scores on the following feature:
![]() Spore shape
Spore shape![]() globose
globose ![]() (Absent)
(Absent)
![]() subglobose
subglobose ![]() (Rare)
(Rare)
![]() ellipsoid
ellipsoid ![]() (Present)
(Present)
If ‘globose’ and ‘subglobose’ were merged, the merged State would retain the ‘Rare’ score for the Entity ‘Agaricus’.
The selection order of the States is also important. The last selected State is retained for label purposes, but as described above the State score data is derived from the merging rules.
Converts all selected States of a Feature back to Features. That is the parent Feature is converted from a Multistate Feature back to a Grouping Feature.
TIP: All States of the Feature need to be selected before this option becomes available in the sub menu.
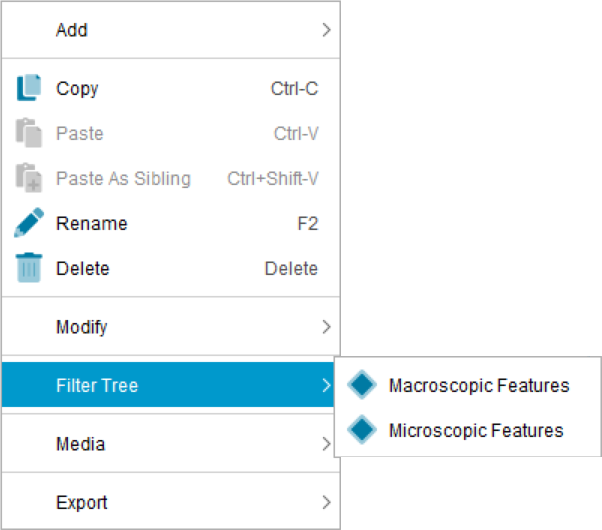
The options within the Filter Tree sub menu depend on what Feature Subsets have been created. All Feature Subsets will be listed as menu options. Each available Feature Subset can be toggled on or off by selecting or un-selecting the Subset within the menu. When a Feature Subset is toggled on, the Features scored for that Subset will be displayed, while non-scored Features for that Subset will be hidden. That is only Features that are scored in the selected Subsets will be displayed.
Allows the attachment of a HTML (or PDF) file present within your keys Media folder to the selected Feature or State.
Allows the attachment of a Url based resource (E.g. web page) to the selected Feature or State.
Allows the attachment of an image(s) to the selected Feature or State. Multiple image files can be attached via the file browse dialog by using Ctrl (individual selection) or the Shift key (block selection).
Creates a Media List file containing references to all media associated with the selected Feature or State. The Media List file will be automatically saved to the same location as the key (I.e. Where the .lk5 file is located). The file name is automatically generated based on the tree path to the Feature or State and will include the selected items label.
See Media File help topic for more information.
Creates a LIF3 file containing all the score information associated with the selected Feature and its States for all Entities. The Export Scores function can be initiated from the Feature or a State of the Feature. The LIF3 file will be automatically saved to the same location as the key (I.e. Where the .lk5 file is located). The file name is automatically generated based on the tree path to the Feature or State and will include the selected items label.
See the LIF3 help topic for more information.
All edit operations for features, states and entities can be performed by selecting the appropriate item from the Edit menu. The menu items Cut, Copy, Paste, Paste as sibling, Rename, Delete, Toggle feature type (multi-state or numeric) and Change Feature to State can also be accessed by right clicking on a selected item and choosing from the pop-up menu (see further below for the additional commands available on this menu).
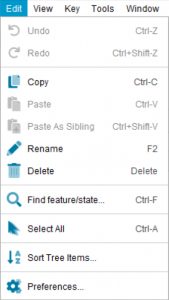
Undoes the last edit operation. See Undoing and Redoing edits for more information.
Redoes the last edit operation. See Undoing and Redoing edits for more information.
Cuts a selected feature, state or entity to the system clipboard. The item may then be pasted elsewhere in its tree.
If the Builder Preferences option Prompt for confirmation during tree cut operations is checked, a Confirm Cut dialog will appear to confirm that the operation should go ahead. If Prompt for confirmation during tree cut operations is unchecked, the item will be cut immediately without confirmation.
If an item to be cut has children, all descendents will be cut along with the selected item. If an item has scores or other properties associated with it (media etc), all scores and properties will remain associated with the cut item and will be pasted with it.
Copies a selected feature, state or entity to the system clipboard. A copy of the item may then be pasted elsewhere in its tree.
If a copied item has children, all descendents will be copied along with the selected item. If an item has scores or other properties associated with it (media etc), all scores and properties will remain associated with the copied item and will be pasted with it.
Pastes a previously cut or copied item as a child of the selected item.
If a cut or copied item has children, all descendents will be cut or copied and pasted along with the selected item. If an item has scores or other properties associated with it (media etc), all scores and properties will remain associated with the item and will be pasted with it.
Pastes a previously cut or copied item as a sibling of the selected item.
If a cut or copied item has children, all descendents will be cut or copied and pasted along with the selected item. If an item has scores or other properties associated with it (media etc), all scores and properties will remain associated with the item and will be pasted with it.
Renames a selected item in the Features or Entities tree. The item will be placed into edit mode for renaming. Rename can also be invoked by pressing the F2 key.
Deletes one or more selected Features, States, Entities or Subset.
If the Builder Preferences option Prompt for confirmation during tree delete operations is checked, a Confirm Delete dialog will appear to confirm that the operation should go ahead. If Prompt for confirmation during tree delete operations is unchecked, the item will be deleted immediately without confirmation.
The selected item will be permanently deleted from the key. This operation cannot be undone.
Finds an element within the selected Entity or Feature tree.
Selects all items in the currently selected tree.
Sorts items in the entities or features trees alphabetically. For more information on sorting options see the topic Sorting items in the feature and entity trees.
Provides options for configuring the Builder to suit your work practices.
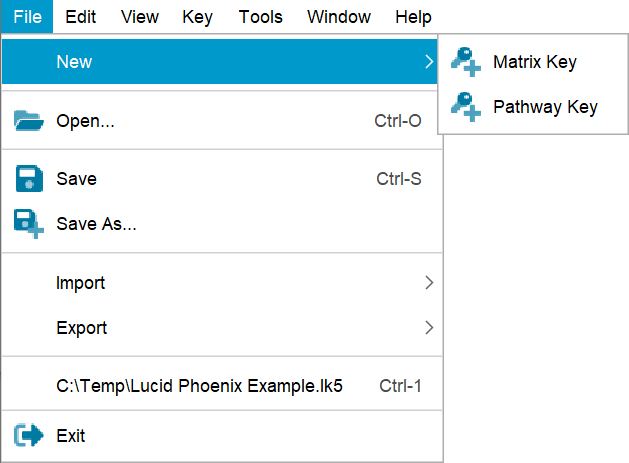
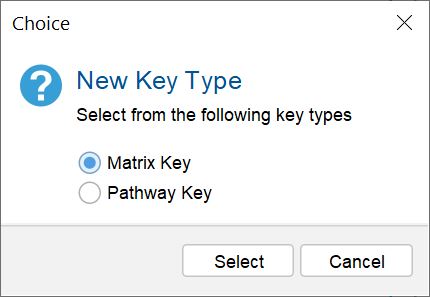
Select either ‘Matrix Key’ or ‘Pathway Key’ to create a new (blank) project of the selected key type.
New keys can also be created by clicking on the Create a new key button on the button bar. in this case a pop-up dialog will prompt to select which key type project to create.
If necessary, you will be prompted to save the currently open key before the new key is created.
Opens an existing Lucid key.
Keys can also be opened using the keyboard shortcut (Ctrl+O) or clicking the Open Key… button on the button bar.
If necessary, you will be prompted to save the currently open key.
Recently opened or saved keys can also be opened from the key list at the bottom of the File menu.
Saves the current key.
Keys can also be saved using the keyboard shortcut (Ctrl+S) or clicking the Save Key button on the button bar.
If the key you are working on has not been saved before, you will be prompted for the file name and destination to save the key to.
You should save your key often. Setting the Save key automatically option in Builder Preferences will help by automatically saving the key at specified time intervals.
Saves the current key for the first time.
New keys can also be saved using the keyboard shortcuts Ctrl+S or Ctrl+A, or clicking the Save Key As… button on the button bar.
You will be prompted for the file name and destination to save the key to.

Allows text files containing lists of entities or features, and keys (saved in LIF, LIF3 or CSV formats), to be imported into a new, or currently opened key.
See the topics Importing and Exporting items from text files and Importing and Exporting keys for more information.
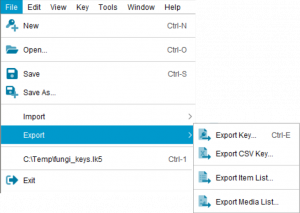
Allows export of the key’s entity and feature lists to text files, and export of the entire key to LIF3 and CSV formats.
See the topics Importing and Exporting items from text files and Importing and Exporting keys for more information.
A list of recently opened keys is displayed on the File menu, below Export key. It holds up to four keys and can be used as a shortcut to open a recently used key.
Quits the builder. If the currently opened key has unsaved changes, you will be prompted to save the changes before exiting.