
Tag: Pathway key

Categories
Pathway key exports
Categories
Pathway key options
The Builder has a number of settings for how a pathway key looks and operates in the Lucid Player. To adjust these options open the Key Options dialog via the main menu ‘Key…Key Options’.
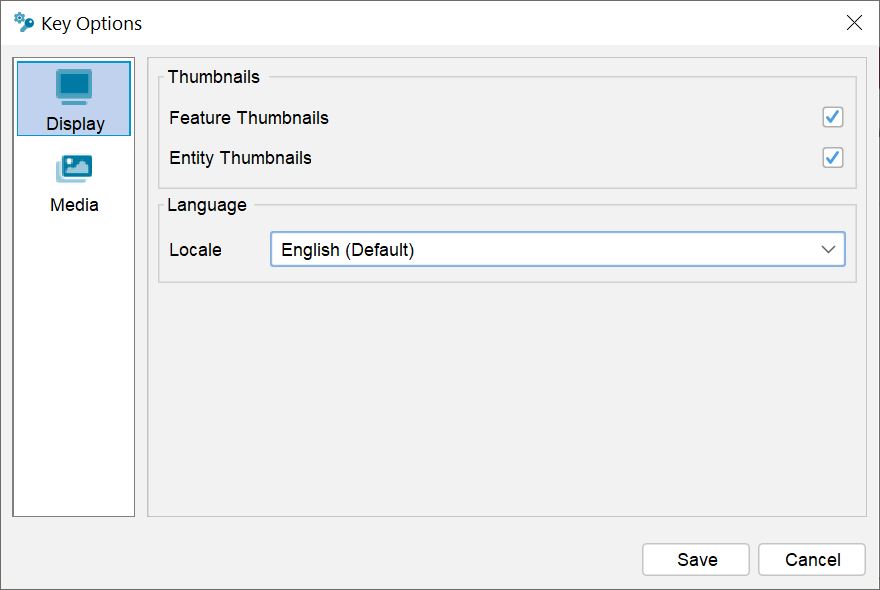
Display Options
Question/Lead Thumbnails – If selected, any thumbnails associated with the Questions and leads will be displayed within the Lucid Player. Note the user of the key will still have the option of toggling thumbnails on or off to suit their preference.
Entity Thumbnails – If selected, any thumbnails associated with the Entities will be displayed within the Lucid Player. Note the user of the key will still have the option of toggling thumbnails on or off to suit their preference.
Language
Locale – Allows the selection of a custom language file that should be loaded for the Lucid Player.
Media Options
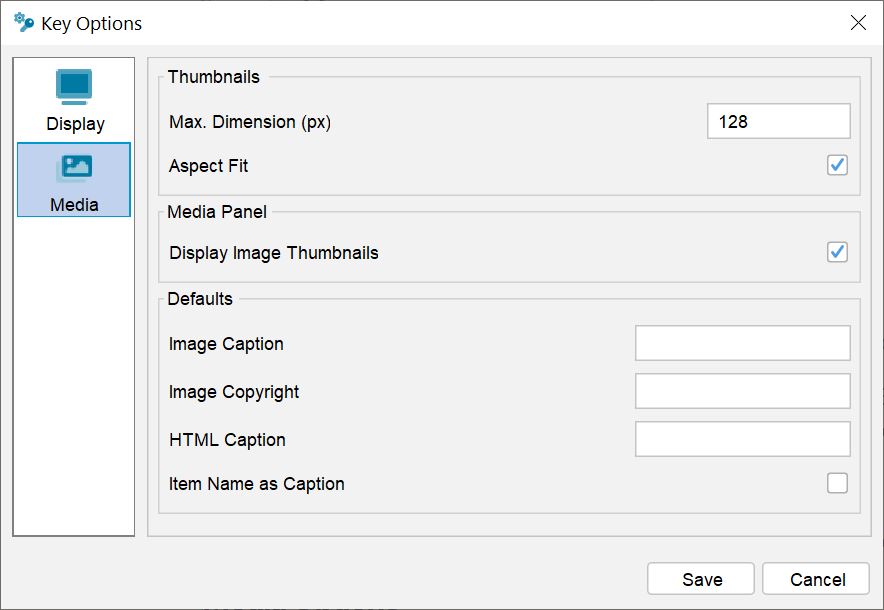
Media options determine the default settings for media when added to the key via the Builder.
Thumbnails
Max. Dimension (px)
The maximum height and/or width the thumbnail will be created to. See the ‘Aspect Fit’ option below for additional details that effect the thumbnail creation.
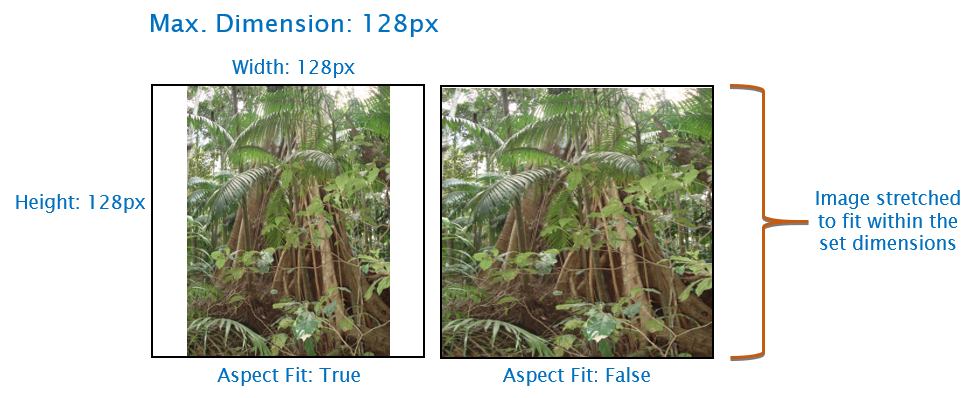
Aspect Fit
If checked (default), then the thumbnail will be created keeping its aspect ratio within the maximum dimension set. This stops the thumbnail from being distorted when fitting (size) to the maximum dimension.
Media Panel
Display Image Thumbnails
If checked, thumbnail images, rather than the filename will be displayed within the Builder’s Media Panel.
Defaults
Image Caption
The Image Caption allows you to set a default caption for images. The default caption will be applied within the Media Panel caption text box when the image is first attached. You can override the default caption by replacing it with your preferred caption text.
Image Copyright
The Image Copyright option allows you to set a default copyright label to images. You can override the default copyright label by replacing it with your preferred copyright text within the Media Panel.
HTML Caption
The HTML Caption allows you to set a default caption for HTML pages attached to the key. The default HTML caption text will be applied within the Media Panel caption text box when the HTML file is first attached. You can override the default caption by replacing it with your preferred caption text.
Item Name as Caption
If the Item Name as Caption is checked then the default caption for an attached image or HTML file will be the label text of the selected item (e.g. Question, Lead or Entity). You can override the default caption by replacing it with your preferred caption text within the Media Panel.
Categories
Importing existing pathway keys
The Lucid Builder contains am import facility that can convert existing paper based keys into the Builder pathway format. The import function can handle the two most common types of printed dichotomous keys, bracketed and indented. If your dichotomous key is only available in a printed format, scan the key using an Optical Character Recognition (OCR) program and save the key as a text file.
The import option is only available to use on a new empty key as import merging is not yet supported.
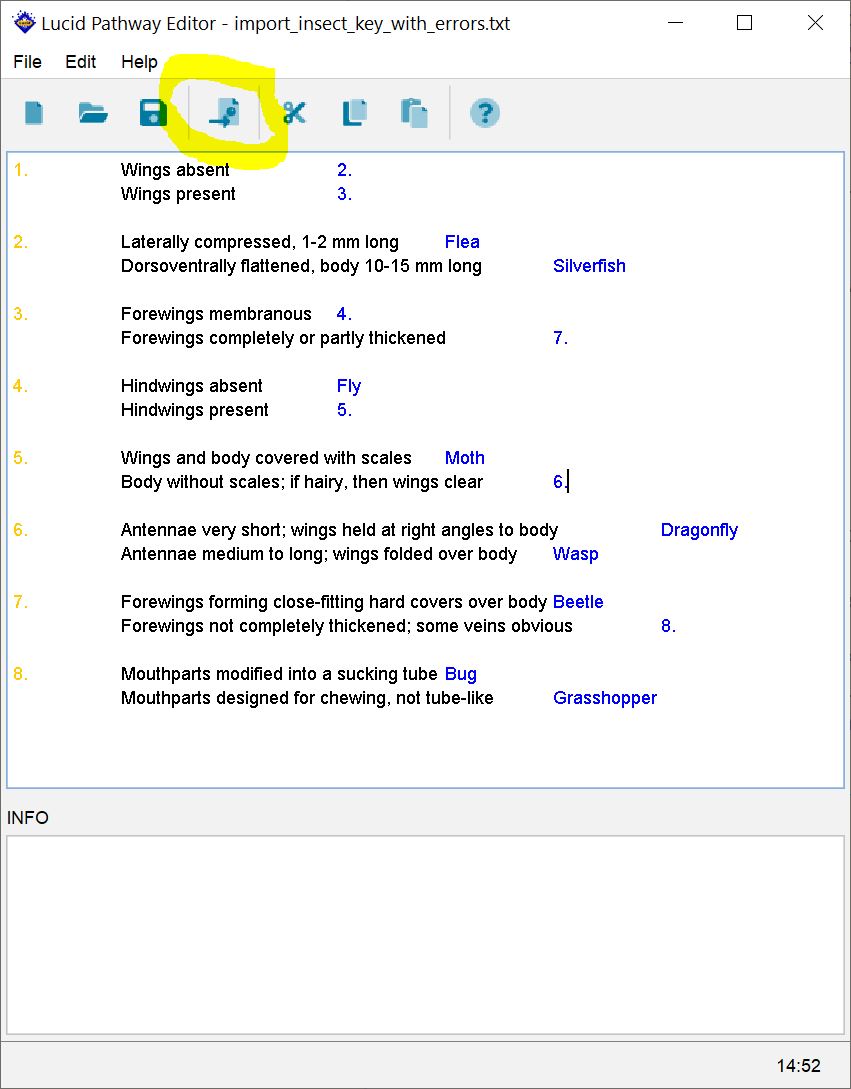
To import an existing key, start a new pathway key (save it) and then select ‘Import Key’ from the main menu ‘File…Import’ option. Browse to and select the desired key file to import. Once selected the pathway import editor will load file.
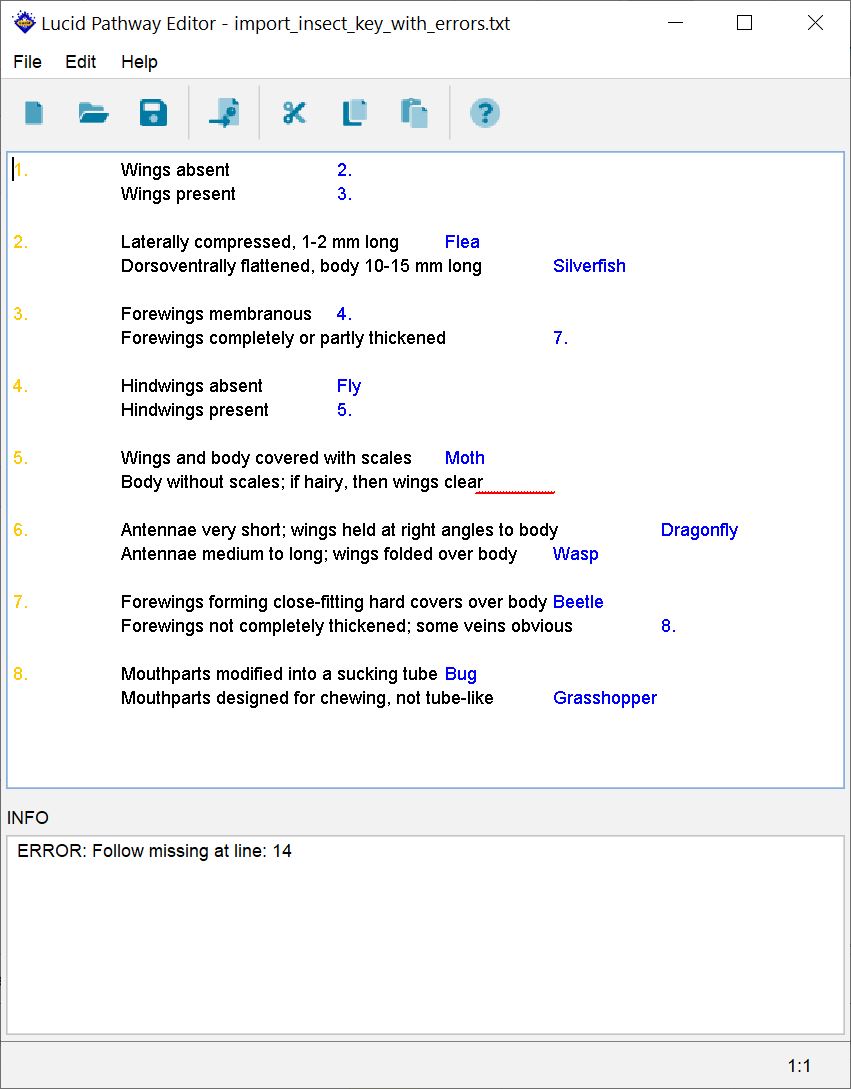
Once a key has been loaded into the Pathway Editor it is analysed. If problems are found within the key, a ‘To Do’ list is generated. Each error or warning found within the key is marked with a wavy underline, red for an error and blue for a warning, at the point within the line where the error occurs (see example above).
Each couplet item must be on one line.
Each couplet item must have an identifier, question text and a destination. The second item within a couplet does not need an identifier as this can be assumed from the couplet item immediately above it.
The importer will change the colour of the text that represents each part of the couplet item that has been identified. Between each component of the couplet item – identifier, question text and destination – there must be some form of separation. The separation can be in the form of spaces, tabs or three or more repeating characters. These separators are excluded when the text key is imported to the Builder.
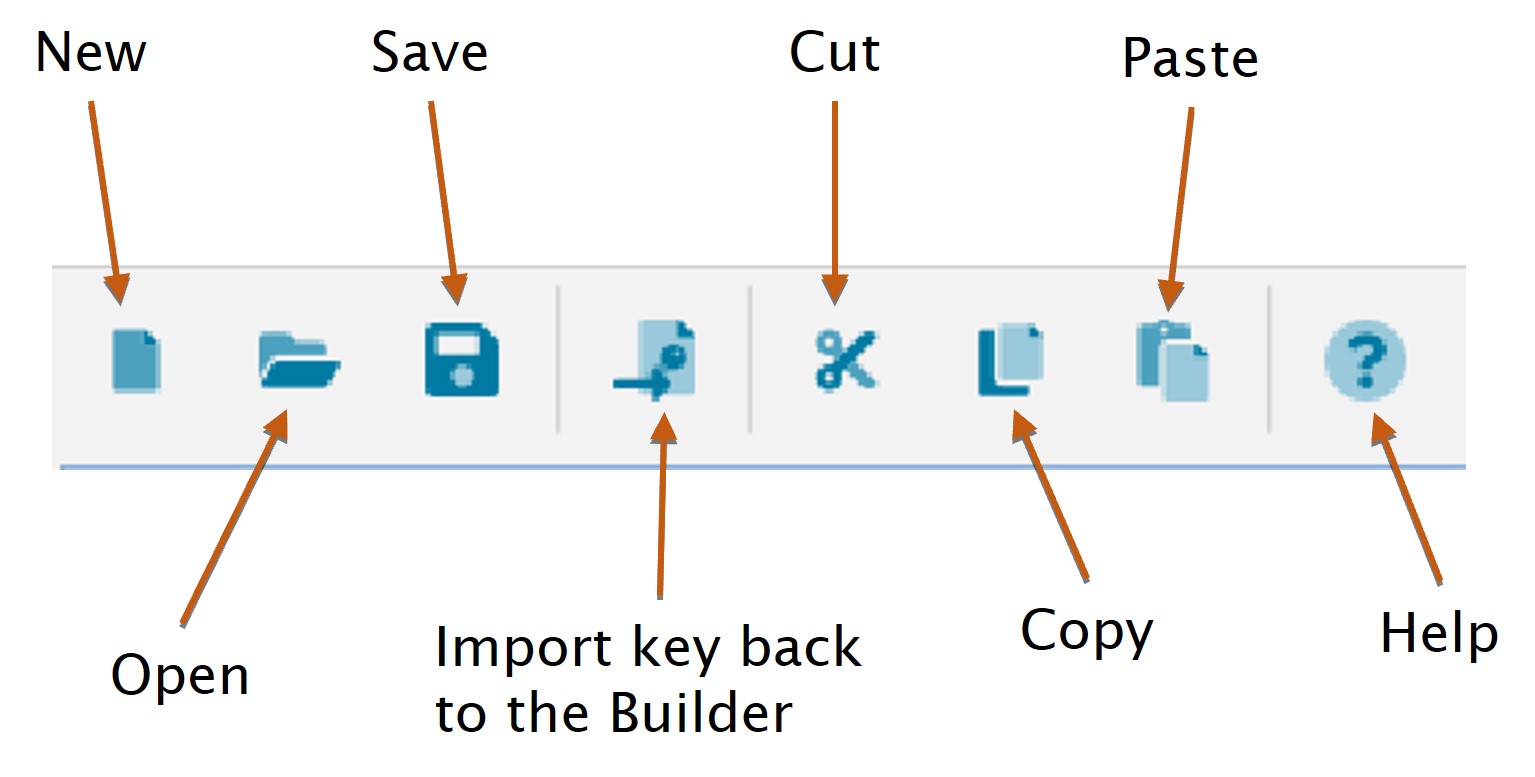
As errors or ‘To Do’ items are corrected within the key document window the key is re-analysed to find other errors that were hidden by previous errors. Each item within the ‘To Do’ list has a line number where the fault can be found within the document window. ‘To Do’ items can be clicked, this action takes the cursor to the line and position where the error is occurring within the key document window. Once all ‘To Do’ items have been resolved the key can then be imported back to the Builder using the Import key option as shown below.
Key importer toolbar
In a completed pathway key, every lead will either lead to another lead, or to an entity. No lead will lead nowhere, and no lead will lead to two or more entities.
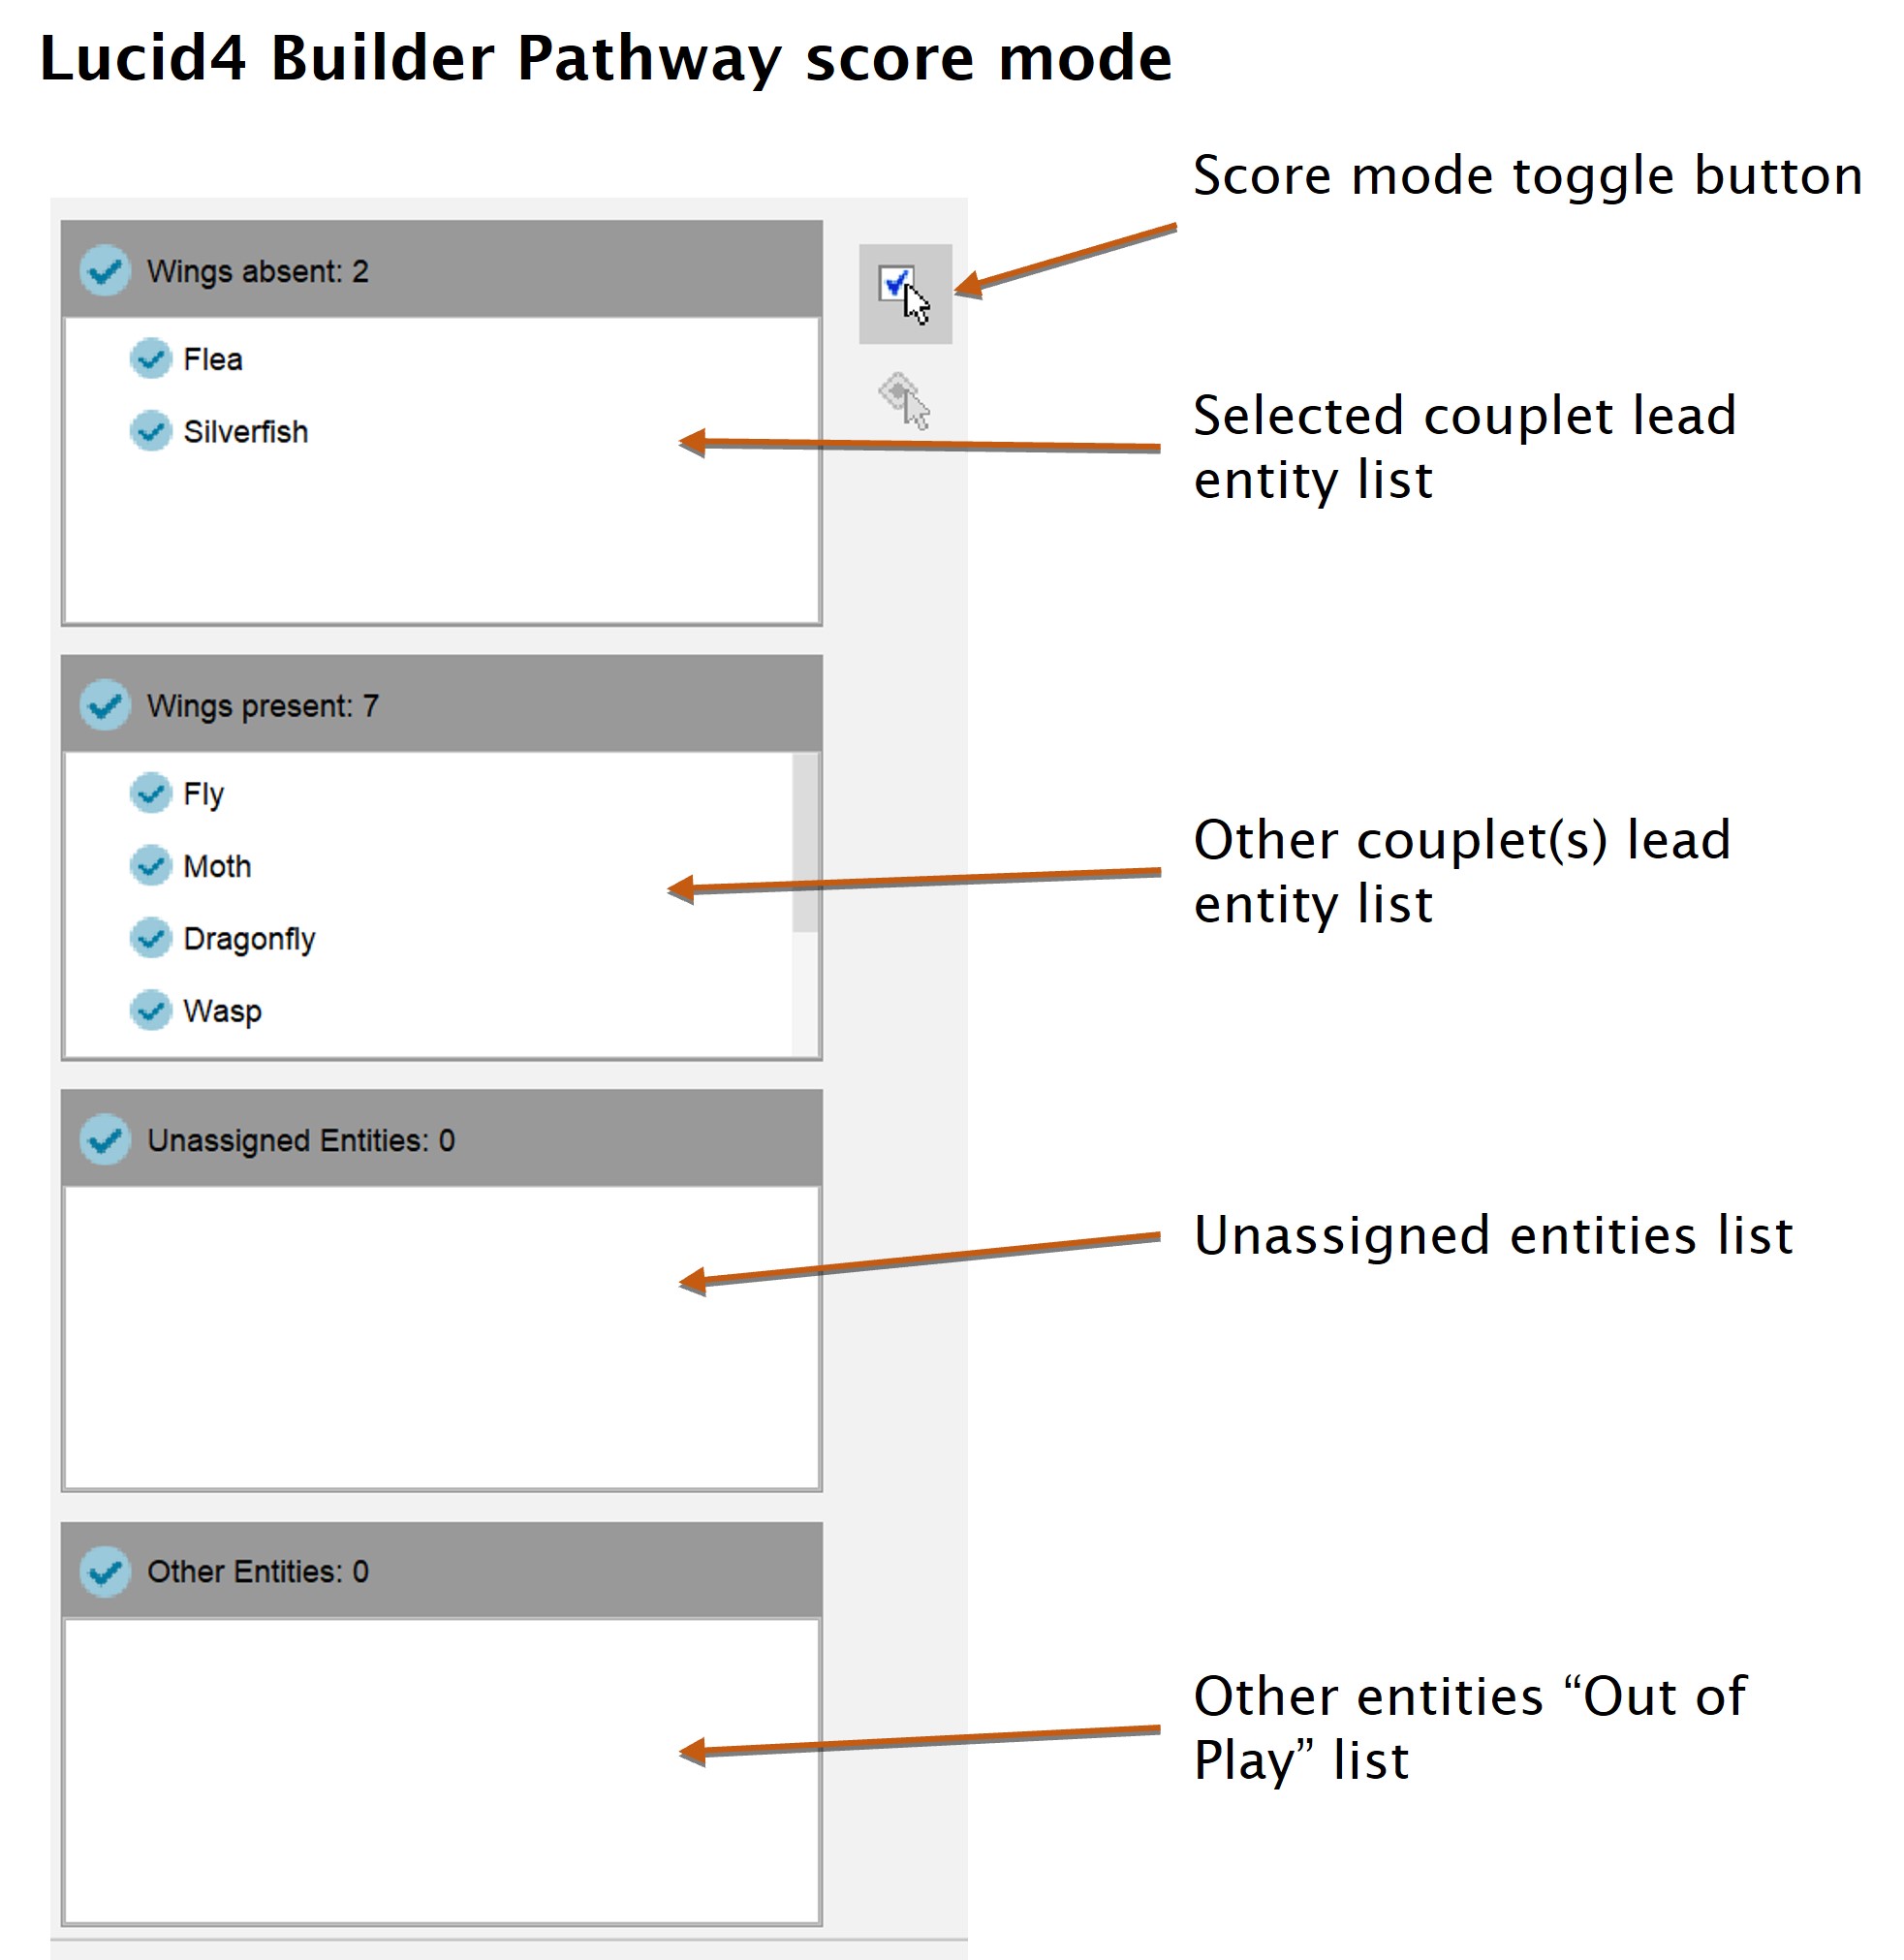
To begin associating entities with leads place the Builder into score mode by clicking on the score toggle button.
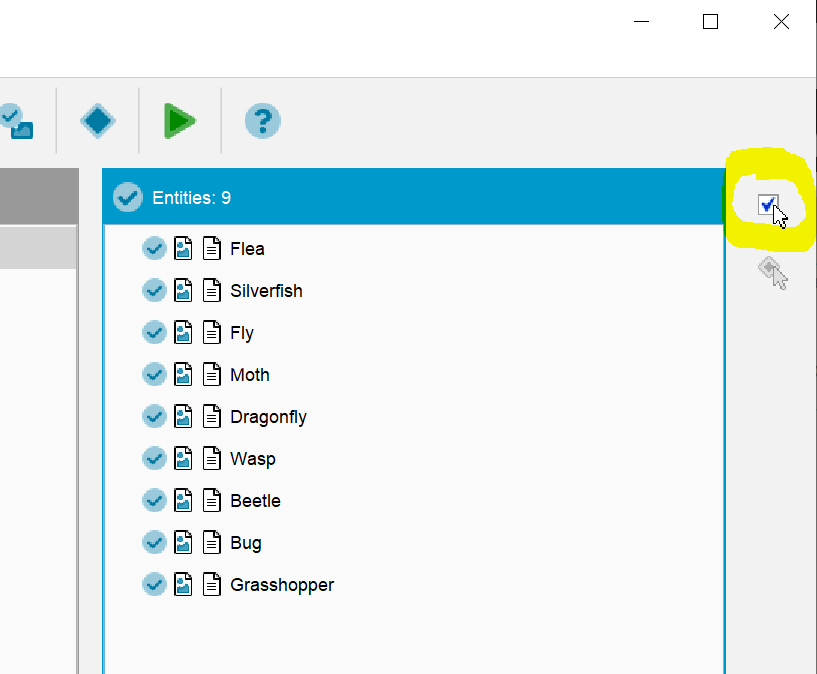
When score mode is enabled, four entity window options will appear.
Assigning entities to leads can be done at any stage of the keys development. That is you don’t need to wait until you have completed the entire pathway.
Entities that haven’t yet been assigned to a lead will appear in the ‘Unassigned Entities’ list. To assign an entity, simply click it, then drag and drop it to the selected couplet lead entity list (top score list). More than one entity can be selected and moved at once. Use the Ctrl (individual selection) or the Shift key (contiguous selection) to make your entity selections, then drag and drop to the selected couplet lead entity list.
Assigned entities for either the selected lead or other lead(s) can be unassigned by selecting them, then drag and dropping them back to the Unassigned Entities list. It is also possible to move entities from the selected lead to the other lead(s) list and vice versa.
There is no need to score entities to every lead in the pathway, you can simply assign the entities to end leads, if preferred. Or to a preferred lead in the pathway as the key develops.
The key does not need to be completely scored before you can try it out in the player. In the event where the key has unassigned entities, these will be excluded from the key when played. When playing the key, and couplet leads that do not have any assigned entities will be shown in the Entity lists (Entities Remaining or Entities Discarded) as “INCOMPLETE KEY – ‘<lead text>‘ “. Entities should be assigned to these leads for your key to be considered complete.